Sometimes Apple stuff is just “magic.” But when the magic fails, it can send you endlessly searching for a solution online. I am placing this post here so search engines can be find it in case someone else is having this same issue.
Normally, I can take a photo on my iPhone and see it show up moments later on my Mac or iPad. Lately, however, photos taken from my iPhone seem to get stuck uploading to my iCloud Photos library. I had a few photos that didn’t sync after several days (hooked to power overnight and on WiFi). Sometimes, switching to cellular causes these photos to upload immediately.
I read some tips that suggested turning off iCloud Photos and turning it back on (with a phone reboot in between). I did that, end then had 5818 photos waiting to upload. Not great.
After none of the tips I read (from dozens and dozens of forums, blog posts and “fix it” site articles) worked, I decided to try the “erase everything and restore from a backup” approach.
I did that, and after an hour of restoring and getting Apple Pay and Touch ID and such set back up, I find that I now have 14,803 photos waiting to upload.
Does anyone have any clue what causes this, and how to fix it? My phone has been plugged up an on WiFi for half an hour and not a single change in the upload count.
2018-02-01 – Updated link for the iOS version. Added link to my page showing other CoCo games that have been modernized.
Since the early 1990s, one of my side gigs has been doing audio productions for broadcast radio. I have also done a number of local TV commercials over the years. I can now add video game music to this, as I recently contributed some music for an iOS and AppleTV update of a Color Computer game called Bouncy Ball. Here’s the trailer…
Find out more about Bouncy Ball NG for Apple devices at www.axorion.com, and the original Bouncy Ball for the Color Computer at www.8bitcoder.com.
Update: It appeared in the app store the same day it was submitted. Here is the link:
I just used some points I earned on Swagbucks to order a discontinued iCade Mobile controller for less than $5 (with Amazon Prime shipping). Currently, the price has gone up to $9, but either way, it’s a deal if you want an iCade circuit to mess with:
I chose the pink one because it was a buck less than the other color. Of course, now it’s going to seem mean to dissect something that “cute.”
The iCade devices, which I have written about before, started out as an April Fool’s joke at Think Geek in 2010. They act like a Bluetooth (or USB) keyboard and some games were written to interpret certain key presses as joystick buttons. Ever since iOS 7, Apple has added official support for game pads so the iCade format is pretty much dead. Still, there are a ton of old apps (over 100) that still support iCade (including Atari’s Greatest Hits and a few other retro emulators).
I plan to dissect mine and use it inside a cheap arcade-style joystick I have, thus allowing me to have something like a Tankstick for iOS (for games that support it), without having to spend any money. I am especially interested in using it for Pinball Arcade and plan to add some buttons on the sides to act as flipper buttons.
I just thought I’d share this, since it’s cheaper to buy this and gut it than to get a cheap Arduino Leonardo type device to hook up via USB adapter cables like my Atari joystick project.
If you get one and hack it in to something, let me know. I’d love to see what you come up with.
P.S. Since 4/15/2014, I have earned over $1419 in Amazon gift cards (and PayPal cash)! Sign up using my link and I get credit: http://swagbucks.com/refer/allenhuffman (Ask me for the tip/howto doc.)
One of the features of Android is that you can install anything you want, from any source — such as a developer’s website. Until app stores made all of this obsolete, this was the way all software was distributed. Sure, there were always index sites, such as VersionTracker.com or Download.com, where you could find links to all the installers, but ultimately everything came direct from the developer.
By contrast, Apple’s iOS apps only install through Apple’s App Store. Except that’s never really been true. Even without jailbreaking an iPhone, you have always been able to install an app direct from a developer for testing purposes. The developer had to be registered with Apple, but beyond that there were no barriers. Downloader beware.
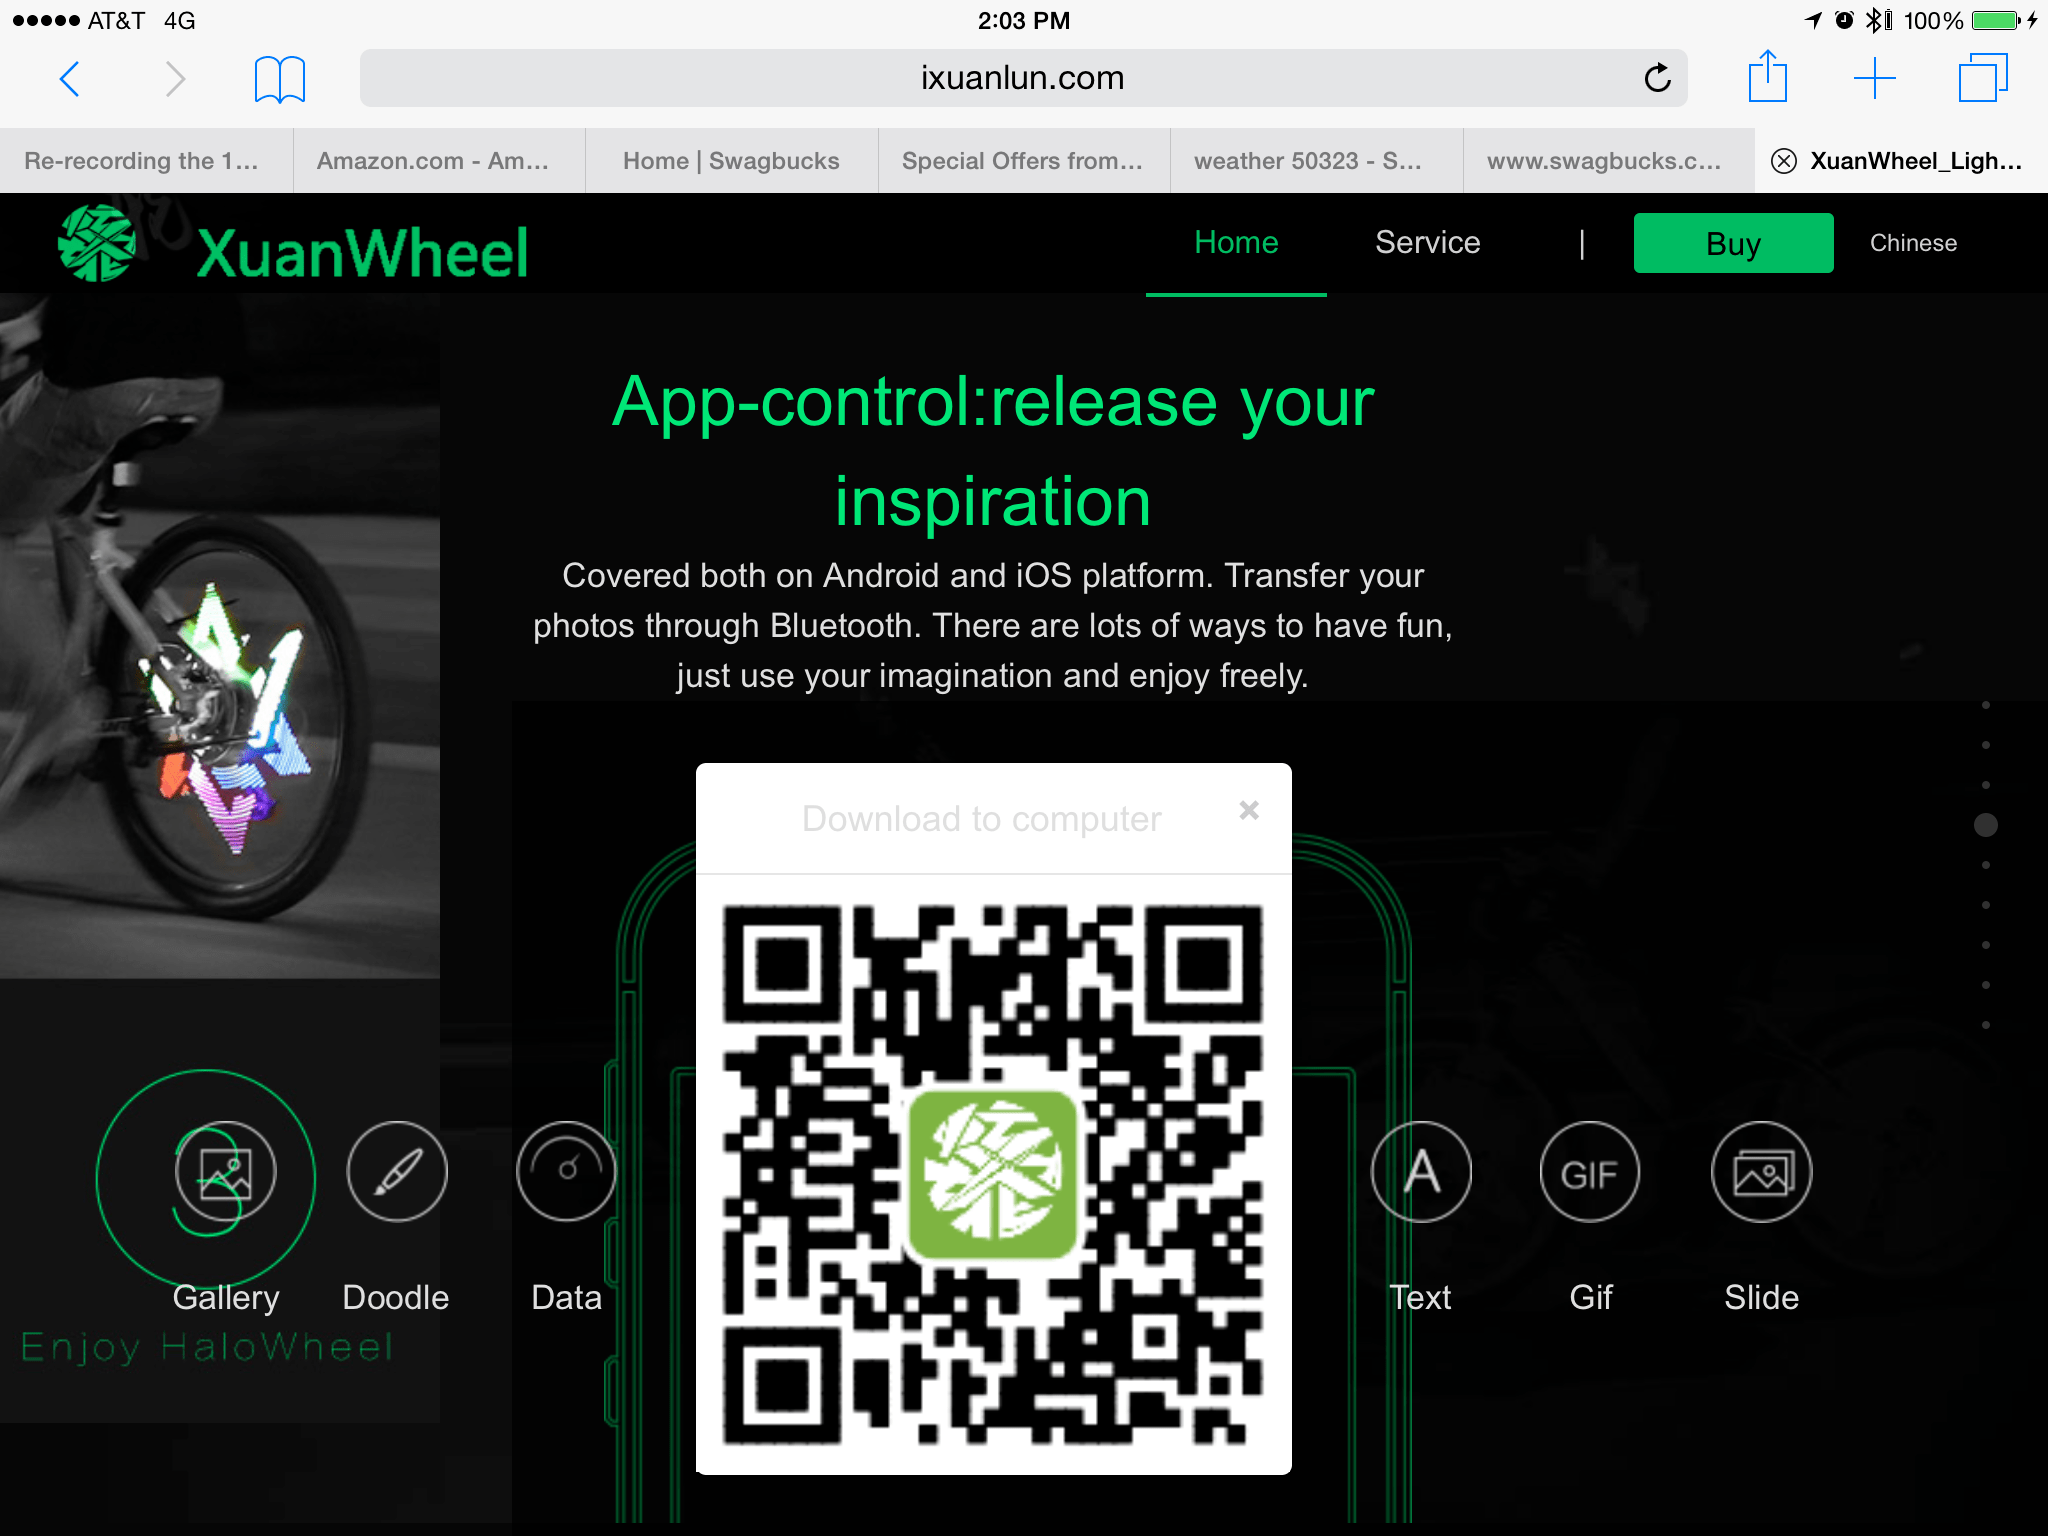
I recently came across what I believe is a misuse of this beta test capability… There is a computerized bicycle light I have been researching and it is programmed via an Android or iPhone app. Their app does not appear in Apple’s App Store. Instead, you get a QR code from their website which will take you to a special download website:
I don’t know why they don’t just post the link directly — I have a QR reader app, but most folks I know don’t. For those without a QR reader app, that location goes to:
If you go there, you can download the iPhone app direct to your device, and your device will warn you:
Do you trust this app? XuanWheel iOS app.
You can see the green app icon in the lower right of that screen shot.
So yes, a developer can do this… But isn’t supposed to. I assume they plan to get their app in the App Store at some point… Until then, I wonder how many are brave enouhg to directly install it?
Starting with iOS 7, Apple added official support for game controllers on an iPhone, iPad or iPod touch. Previously, the iCade standard was used, acting as a keyboard device sending key presses for button up and button down.
I have yet to find any place the discusses how these new controllers work. Has anyone reverse engineered it? Does it have digital rights management so you can’t pair using regular devices? Does anyone know?
Just because you can do something, doesn’t mean you should. The JavaScript version of the MESS emulator can run on an iPad… but it’s too slow to be useful. (As in, seconds between each cursor color change).
(Edited on 02/12/2013 to fix the source code formatting, and to add a photo.)
NOTE: There is a native method of compiling code for the Teensy, using a C compiler, but this source code was built using the Teensyduino add-on. It enables the standard Arduino IDE GUI to build code for the Teensy. You have to install the Arduino IDE first, then you install the Teensyduino add-on on top of it.
Teensy 2.0 as an Atari 2600 joystick interface for iOS
This is my source code for the Teensy 2.0 iCade/Atari joystick interface. It could easily be made to work on an Arduino that has USB HID support (Arduino Leonardo, Esplora) and enough digital I/O pins. It is a bit bulky because I emit various status messages for testing, but I will at some point provide a stripped down version. I also have a version that uses the Debounce library which appears even smaller, but I like completely self-contained code where possible.
I have not got back to clean this up, so it includes some items commented out and such, but I wanted to provide this for those asking about it.
Or, this code could be modified to run on the new Arduino Esplora, which already has joystick buttons on it and USB HID output to act like a keyboard/mouse to whatever it’s hooked up to:
Keep in mind, the Teensy 2.0 is a low power device and it seems the 20mah of the iPad is enouhg to power it (running in low power mode, no LEDs, etc.). This may not be the case with an Arduino, and they may require hooking up via a powered hub before connecting to the iPad.
//*-----------------------------------------------------------------------------

Teensy iCade Input
by Allen C. Huffman (alsplace@pobox.com)

Monitor digital inputs, then emit a USB keyboard character mapped to an iCade
button depending on the pin status. The character will be the "hold" character
for pin connected (N.O. button push) and "release" character for pin
disconnected (N.O. button released).

Pin 11 is reserved for blinking the onboard LED as a heartbeat "we are alive"
indicator.

This software was written to allow a Teensy 2.0 to interface between arcade
buttons and an iPad via USB and Camera Connector Kit.

2012-12-04 0.0 allenh - Initial version, based on my ArduinoAIDI code.

-----------------------------------------------------------------------------*/
#define VERSION "0.0"
#define LED_OFF

//#include <eeprom .h>
//#include <avr/wdt.h>

/*
iCade keyboard mappings.
See developer doc at: http://www.ionaudio.com/products/details/icade

WE     YT UF IM OG
AQ< -->DC
XZ     HR JN KP LV

Atari joystick port, looking at the male DB9 on the Atari.
See: http://old.pinouts.ru/Inputs/JoystickAtari2600_pinout.shtml

1 2 3 4 5/  Up Dn Lt Rt PA
6 7 8 9/    Bt +5  Gd PB
*/

/*
The following I/O pins will be used as digital inputs
for each specific iCade function.
*/
#define UP_PIN 0
#define DOWN_PIN 1
#define LEFT_PIN 2
#define RIGHT_PIN 3
#define BTN1_PIN 4
#define BTN2_PIN 5
#define BTN3_PIN 6
#define BTN4_PIN 7
#define BTN5_PIN 8
#define BTN6_PIN 9
#define BTN7_PIN 10
#define BTN8_PIN 12

/*
The following keys are the iCade sequence (hold, release)
for each function. Send "W" to indicate UP, and "E" when
UP is released.
*/
#define UP_KEYS "we"
#define DOWN_KEYS "xz"
#define LEFT_KEYS "aq"
#define RIGHT_KEYS "dc"
#define BTN1_KEYS "yt"
#define BTN2_KEYS "uf"
#define BTN3_KEYS "im"
#define BTN4_KEYS "og"
#define BTN5_KEYS "hr"
#define BTN6_KEYS "jn"
#define BTN7_KEYS "kp"
#define BTN8_KEYS "lv"

#define DI_PIN_COUNT 12 // 12 pins used.
#define DI_PIN_START 1  // First I/O pin.
#define DI_PIN_END 20   // Last I/O pin.

byte myPins[DI_PIN_COUNT] =
{UP_PIN, DOWN_PIN, LEFT_PIN, RIGHT_PIN,
BTN1_PIN, BTN2_PIN, BTN3_PIN, BTN4_PIN,
BTN5_PIN, BTN6_PIN, BTN7_PIN, BTN8_PIN};

char iCadeKeymap[][DI_PIN_COUNT] =
    {UP_KEYS, DOWN_KEYS, LEFT_KEYS, RIGHT_KEYS,
     BTN1_KEYS, BTN2_KEYS, BTN3_KEYS, BTN4_KEYS,
     BTN5_KEYS, BTN6_KEYS, BTN7_KEYS, BTN8_KEYS};

char iCadeDesc[][DI_PIN_COUNT] =
    {"Up", "Down", "Left", "Right",
     "Btn1", "Btn2", "Btn3", "Btn4",
     "Btn5", "Btn6", "Btn7", "Btn8"};

/* We want a very short debounce delay for an arcade controller. */
#define DI_DEBOUNCE_MS 10 // 100ms (1/10th second)

#define LED_PIN 11
#define LEDBLINK_MS 1000

/*---------------------------------------------------------------------------*/

/* For I/O pin status and debounce. */
unsigned int digitalStatus[DI_PIN_COUNT];        // Last set PIN mode.
unsigned long digitalDebounceTime[DI_PIN_COUNT]; // Debounce time.
// unsigned long digitalCounter[DI_PIN_COUNT];         // Times button pressed.
unsigned int digitalDebounceRate = DI_DEBOUNCE_MS; // Debounce rate.

/* For the blinking LED (heartbeat). */
unsigned int ledStatus = LOW;            // Last set LED mode.
unsigned long ledBlinkTime = 0;          // LED blink time.
unsigned int ledBlinkRate = LEDBLINK_MS; // LED blink rate.

unsigned int pinsOn = 0;

/*---------------------------------------------------------------------------*/

void setup()
{
    // Just in case it was left on...
    // wdt_disable();

    // Initialize the serial port.
    Serial.begin(9600);

    // Docs say this isn't necessary for Uno.
    // while(!Serial) { }

    showHeader();

    // Initialize watchdog timer for 2 seconds.
    // wdt_enable(WDTO_4S);

    // LOW POWER MODE!
    // Pins default to INPUT mode. To save power, turn them all to OUTPUT
    // initially, so only those being used will be turn on. See:
    // http://www.pjrc.com/teensy/low_power.html
    for (int thisPin = 0; thisPin < DI_PIN_COUNT; thisPin++)
    {
        pinMode(thisPin, OUTPUT);
    }

    // Disable Unused Peripherals
    ADCSRA = 0;

    // Initialize the pins and digitalPin array.
    for (int thisPin = 0; thisPin < DI_PIN_COUNT; thisPin++)
    {
        // Set pin to be digital input using pullup resistor.
        pinMode(myPins[thisPin], INPUT_PULLUP);
        // Set the current initial pin status.
        digitalStatus[thisPin] = HIGH; // digitalRead(thisPin+DI_PIN_START);
        // Clear debounce time.
        digitalDebounceTime[thisPin] = 0;
        // digitalCounter[thisPin] = 0;
    }

    // Set LED pin to output, since it has an LED we can use.
    pinMode(LED_PIN, OUTPUT);

    Serial.println("Ready.");
}

/*---------------------------------------------------------------------------*/

void loop()
{
    // Tell the watchdog timer we are still alive.
    // wdt_reset();

#ifndef LED_OFF
    // LED blinking heartbeat. Yes, we are alive.
    if ((long)(millis() - ledBlinkTime) >= 0)
    {
        // Toggle LED.
        if (ledStatus == LOW) // If LED is LOW...
        {
            ledStatus = HIGH; // ...make it HIGH.
        }
        else
        {
            ledStatus = LOW; // ...else, make it LOW.
        }
        // Set LED pin status.
        if (pinsOn == 0)
            digitalWrite(LED_PIN, ledStatus);
        // Reset "next time to toggle" time.
        ledBlinkTime = millis() + ledBlinkRate;
    }
#endif

    // Check for serial data.
    if (Serial.available() > 0)
    {
        // If data ready, read a byte.
        int incomingByte = Serial.read();
        // Parse the byte we read.
        switch (incomingByte)
        {
        case '?':
            showStatus();
            break;
        default:
            break;
        }
    }

    /*-------------------------------------------------------------------------*/

    // Loop through each Digital Input pin.
    for (int thisPin = 0; thisPin < DI_PIN_COUNT; thisPin++)
    {
        // Read the pin's current status.
        unsigned int status = digitalRead(myPins[thisPin]);

        // In pin status has changed from our last toggle...
        if (status != digitalStatus[thisPin])
        {
            // Remember when it changed, starting debounce mode.
            // If not currently in debounce mode,
            if (digitalDebounceTime[thisPin] == 0)
            {
                // Set when we can accept this as valid (debounce is considered
                // done if the time gets to this point with the status still the same).
                digitalDebounceTime[thisPin] = millis() + digitalDebounceRate;
            }

            // Check to see if we are in debounce detect mode.
            if (digitalDebounceTime[thisPin] > 0)
            {
                // Yes we are. Have we delayed long enough yet?
                if ((long)(millis() - digitalDebounceTime[thisPin]) >= 0)
                {
                    // Yes, so consider it switched.
                    // If pin is Active LOW,
                    if (status == LOW)
                    {
                        // Emit BUTTON PRESSED string.
                        Serial.print(iCadeDesc[thisPin]);
                        Serial.print(" pressed  (sending ");
                        Serial.print(iCadeKeymap[thisPin][0]);
                        Serial.println(" to iCade).");
                        Keyboard.print(iCadeKeymap[thisPin][0]);
                        // digitalCounter[thisPin]++;
                        pinsOn++;
#ifndef LED_OFF
                        digitalWrite(LED_PIN, HIGH);
#endif
                    }
                    else
                    {
                        // Emit BUTTON RELEASED string.
                        Serial.print(iCadeDesc[thisPin]);
                        Serial.print(" released (sending ");
                        Serial.print(iCadeKeymap[thisPin][1]);
                        Serial.println(" to iCade).");
                        Keyboard.print(iCadeKeymap[thisPin][1]);
                        if (pinsOn > 0)
                            pinsOn--;
                        if (pinsOn == 0)
                            digitalWrite(LED_PIN, LOW);
                    }
                    // Remember current (last set) status for this pin.
                    digitalStatus[thisPin] = status;
                    // Reset debounce time (disable, not looking any more).
                    digitalDebounceTime[thisPin] = 0;
                } // End of if ( (long)(millis()-digitalDebounceTime[thisPin]) >= 0 )

            } // End of if (digitalDebounceTime[thisPin]>0)
        }
        else // No change? Flag no change.
        {
            // If we were debouncing, we are no longer debouncing.
            digitalDebounceTime[thisPin] = 0;
        }
    } // End of (int thisPin=0; thisPin < DI_PIN_COUNT; thisPin++ )
}

/*---------------------------------------------------------------------------*/

void showHeader()
{
    int i;
    // Emit some startup stuff to the serial port.
    Serial.print("iCadeTeensy ");
    Serial.print(VERSION);
    Serial.println(" by Allen C. Huffman (alsplace@pobox.com)");
    Serial.print(DI_PIN_COUNT);
    Serial.print(" DI Pins (");
    for (i = 0; i < DI_PIN_COUNT; i++)
    {
        Serial.print(myPins[i]);
        Serial.print("=");
        Serial.print(iCadeDesc[i]);
        Serial.print(" ");
    }
    Serial.print("), ");
    Serial.print(digitalDebounceRate);
    Serial.println("ms Debounce.");
}

/*---------------------------------------------------------------------------*/

void showStatus()
{
    showDigitalInputStatus();
}

/*---------------------------------------------------------------------------*/

void showDigitalInputStatus()
{
    Serial.print("DI: ");

    for (int thisPin = 0; thisPin < DI_PIN_COUNT; thisPin++)
    {
        // Read the pin's current status.
        Serial.print(iCadeDesc[thisPin]);
        Serial.print("=");
        Serial.print(digitalRead(myPins[thisPin]));
        Serial.print(" ");
        // Serial.print(" (");
        // Serial.print(digitalCounter[thisPin]);
        // Serial.print(") ");
    }
    Serial.println("");
}

/*---------------------------------------------------------------------------*/

// End of file.
I just read a reference to Apple’s “struggling” map software. Like many things that get “reported” in the blogosphere, they are often repeating the echo chamber of things observed or researched by others, or they are sharing one tiny sliver of experience as fact as if everyone experiences it the same way.
When it comes to Apple Maps on iOS 6, I must say, I am quite impressed. You see, there is a small connecting road on the East side of Des Moines that my 2005 Toyota Prius navigation system never knew about. It would always route many blocks out of the way to go around it.
My 2007 navigation system, likewise, also did not know about. And neither did an additional map update I purchased for it at great cost.
My 2010 3rd generation Prius navigation system also does not seem to think it exists, nor did a map update for it.
Two TomTom models, years apart, do not know it exists, even after being reported with the community “suggest corrections” feature TomTom brags about.
I believe I even tested a Magellan navigation unit to find it also did not know about this road.
Surprisingly, to me, the one map that did have it was OpenStreetMaps – the open source wikipedia of maps. Amazing that they knew about this road, while Google, Navtec, TomTom, etc. did not seem to believe that it existed — even though it had been there for ages.
Google, today, does show this section of the road, but I believe that was not the case a few years ago.
And Apple Maps also shows it. Not only that, but Apple Maps can correctly navigate me from my housing area to the Main Street without jumping me through the forest nearby like everything else does. None of the systems I have used had the connecting driveway that links my area with the road, so they often jump to the closest pavement they can find, which is over the river and through the woods.
Apple Maps is the first map software I have used that correctly pinpoints where I live, and knows how to get there without just getting close.
So from my perspective, it’s a huge improvement over many other maps I have used and reviewed over the years.
I recently gained some experience using Arduinos to control inputs in a local haunted house attraction, and that has opened up quite a world of projects. During my research, I learned about the Teensy 2.0, a cheap (starting at $16, http://www.pjrc.com/teensy/index.html) controller that is similar to Arduino, but had more I/O pins than the Arduino Uno, plus had the ability to act like a USB keyboard or mouse. This enables it to send keystrokes or mouse movements/clicks to a computer, as if it were receiving them from an input device.
So, using the $19 version of Teensy 2.0 (that has header pins) and some wires, I was able to connect my Atari Flashback 2 joystick to an iPad via the USB adapter. I wrote a small program that reads the I/O pins of the Teensy 2.0, then sends out USB keyboard commands that emulate the iCade arcade controller.
My project was noted on the Teensy 2.0 project page: