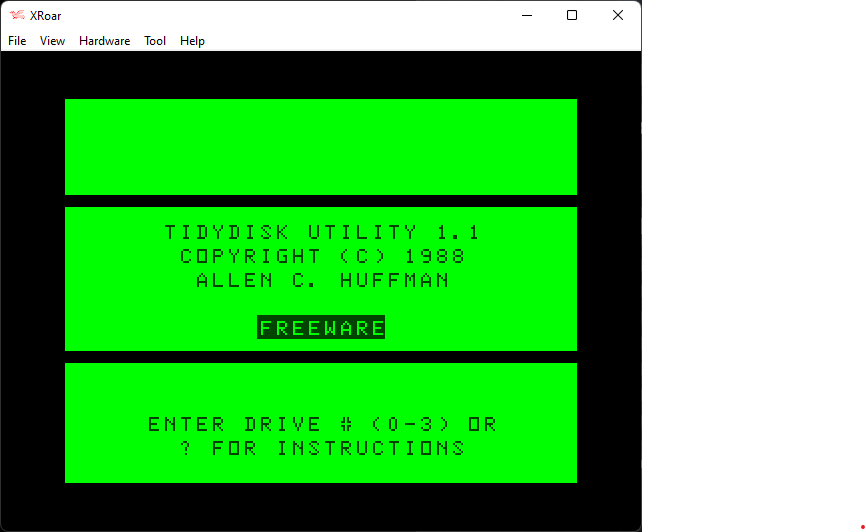
One I found interesting to revisit was my TIDY DISK program. I created it in 1988, and it appears I revised it two more times since there is a version 1.2 from 1990. (Unfortunately, I did not update the title screen so it still reads 1.1):
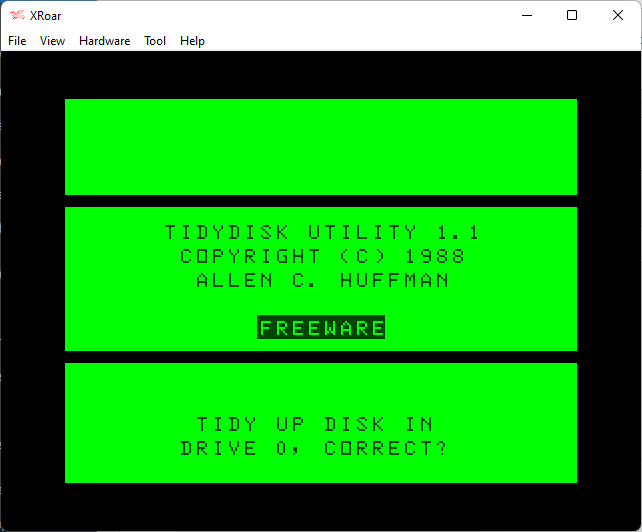
Tidy Disk title screen
This program, written in BASIC, was designed to scan a floppy disk and erase any unallocated space. Much like how one can “undelete” files on a modern PC and see what was there, the same thing was possible with the old Disk BASIC disk format in the 1980s. However, privacy was not even something I was considering when I created the program.
At the time, I had a modem and was using it all the time to call in to Bulletin Board Systems (BBS). There were many places where you could download CoCo software, including pirated software. There were also disk transfer programs that could be used to send an entire disk from one user to another.
I do not recall the name of the program I used, but it was smart enough to not send “empty” data. If a granule (the CoCo disk was divided in to 68 sections called granules) was empty, the program would skip sending it. Unfortunately, if you had a disk that previously had data on that granule (from a file that was since deleted), it would send all that old “deleted” data as well. This made the transfer much longer than it needed to be.
(And believe me, sending a full disk of 156K over a 300 or 1200 baud modem seemed to take “days” back then… At least it felt like it.)
I created TIDY DISK to solve this problem.
TIDY DISK
The program was written for a CoCo 3, and it errors out on a CoCo 1 or 2. This is because I do a PEEK on startup to check for screen width. If the CoCo 3 is not in 32-column mode, I do a “WIDTH 32” command to switch back. That PEEK does not work on a CoCo 1 or 2, and thus it tries to run the non-existent “WIDTH” command and errors out. Removing that check (or doing a manual POKE 231,0 before running) allows it to run on a CoCo 1 or 2.
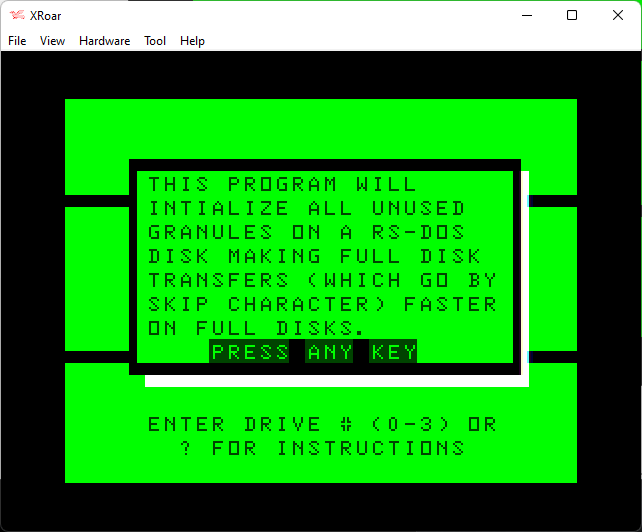
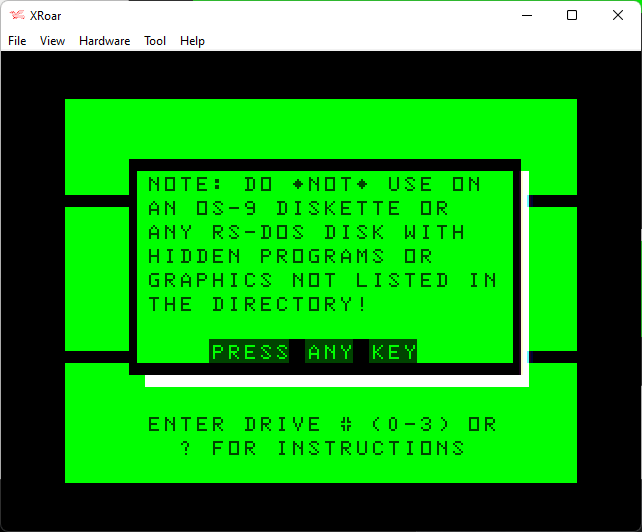
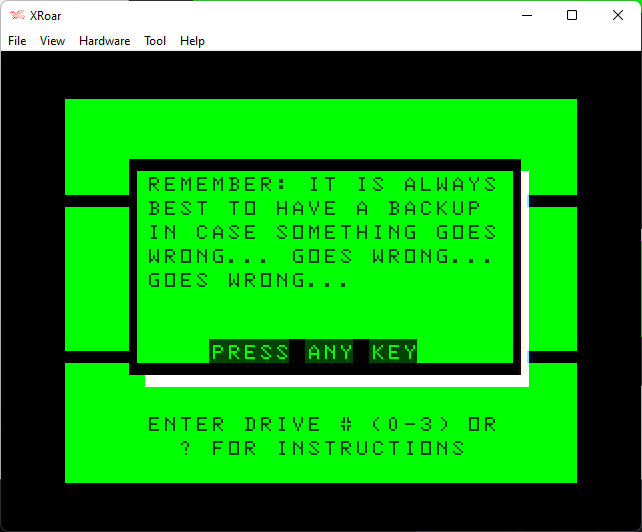
To understand what it does, I built in HELP screens.
Tidy Disk – help screen 1Tidy Disk – help screen 2Tidy Disk – help screen 3
Ah, humor.
The “pop up” windows I used was a BASIC routine I wrote, and I also posted that routine to the Color Computer Archive site.
When the user selected a drive, they were asked to make sure they really meant to do that:
Tidy Disk – select drive confirmation
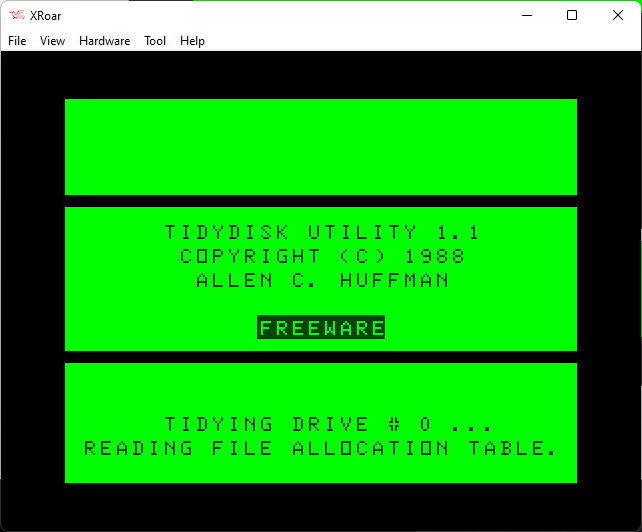
If they answered Yes, it would begin by first reading in the allocation table information:
Tidy Disk – starting
This was basically a table that showed which of the 68 granules were in use. This would be a real good time to explain how the Disk BASIC disk format worked, but I think I’ll save that for a standalone article. (Mostly because I do not remember. I’m not even sure how I figured this out back then!)
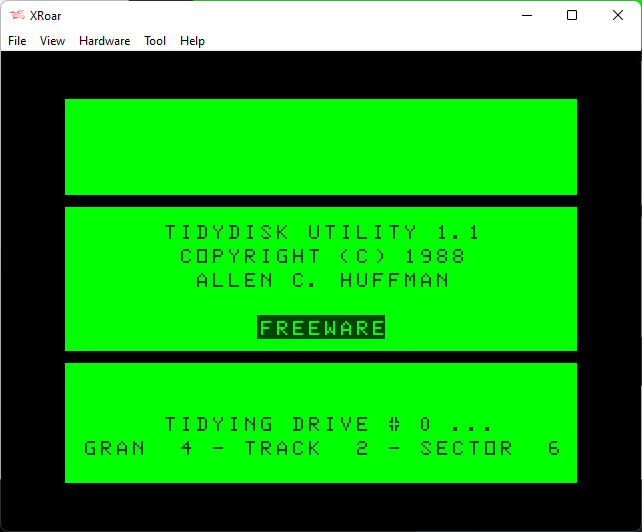
The process would then scan all 68 granules of the disk and write blank data to any that was not marked as allocated. This would take some time…
Tidy Disk – in progress
When complete, the program would stop. It would literally STOP, saying “BREAK IN 55”. I ended the program with the STOP command. I can’t imagine I used that command very often, and was surprised I even used it there versus “END” which would just end cleanly.
One modern use for this program would be for disk images. If you have a disk image you want to ZIP and share, ZIP will compress all the data. If there are many sectors with deleted information, that will get ZIPped right along with the actual data you want to share. Not only does it make the file larger, but someone could use a disk editor and look at all the formerly “deleted” data.
Running this on a disk image before zipping it up might still have some use.
TIDY TIDK 1.3?
If I were to update this program, here are some things I would change:
I would certainly fix the version number in the title screen.
I’d also fix it to correctly work on a CoCo 1/2.
I’d make it accept drives from 0-255, so it would work on RGB-DOS/HDB-DOS.
And I’d remove that STOP, and just have a real Quit option so the user could keep doing disks without needing to re-RUN the program each time.
As our spiraling trip down the rabbit hole continues, we finally return to drawing stuff instead of converting stuff.
We now have DATA statements that contain 2-byte hex numbers. Each hex number represents a byte (0-255) and each of those bytes represents 8 maze blocks on the screen.
For use in a Color BASIC program, we might want to take this HEX data and convert it in to string data (containing the final CHR$ values) for fast printing on the screen. If we were doing this in 6809 assembly, we might have the binary data contained in the executable, and convert it to a buffer that can then be copied to the screen as needed.
We’ll start with a simple (verbose) Color BASIC version. Since I am using the XRoar emulator to CLOAD this text file, I had to shorten the DATA lines a bit since they are now on higher lines, thus instead of loading “1DATA” it is loading “360DATA” taking up more bytes. I just moved some hex values to the next line.
I also adjusted my parser a bit. In my binary example, I wanted to handle binary numbers of any length. i.e, “111” would be 7, and “11111111” would be 255. To do this, I started with 0, and each time I saw a 1 I added one. For each new digit, I shifted the bits left by multiplying by 2. That way if it parsed “111” it would be “1 *2 +1 *2 +1” and so on for longer values.
For the maze, everything has to be a byte, so I took the opposite approach by starting with a bit value of 128 (representing the high bit in an 8-bit byte). Each time I found a new digit, I divided the bit value by 2 and either added it (if the new digit was a “1”, or “X” in the case of the maze) or not. That would make a maze of “XXXXXXXX” be “128 + 16 + 32 + 16 + 8 + 4 + 1” giving 255. If the maze data ran short, so the last few bytes were just “XXXX” it would be “128 + 64 + 32 + 16” which is &HF0 in hex (11110000), exactly what we want. If I had done it the other way, it would end up with 1111 (&H0F) and maze data would look like this:
I hope that makes sense. Anyway, here is the program I came up with… It will scan the hex values and build an array of strings (LN$) for each line. That way, the converted maze can be quickly printed after it has been generated once.
0 REM HEXMAZE.BAS
10 ' STRING SPACE IS MW*(MH+1)
20 CLEAR 28*32
30 ' SIZE OF MAZE IN DATA
40 MW=28:MH=31
50 ' ROOM FOR CONVERTED MAZE
60 DIM MZ$(MH):LN=0
70 CLS
80 ' READ A LINE OF HEX DATA
90 READ A$:IF A$="" THEN 340
100 ' EVERY 2 CHARS IS A HEX
110 FOR A=1 TO LEN(A$) STEP 2
120 ' COVERT HEX TO A VALUE
130 V=VAL("&H"+MID$(A$,A,2))
140 ' CONVERT BITS TO BLOCKS
150 BT=128
160 IF (V AND BT)=0 THEN B$=CHR$(128) ELSE B$=CHR$(175)
170 ' ADD BLOCK/SPACE TO STRING
180 MZ$(LN)=MZ$(LN)+B$
190 ' IF LEN >= MAZE W, NEXT
200 IF LEN(MZ$(LN))>=MW THEN 280
210 ' SHIFT BIT RIGHT
220 BT=INT(BT/2)
230 ' IF MORE BITS, REPEAT
240 IF BT>0 THEN 160
250 ' GET NEXT CHARACTER
260 GOTO 310
270 ' ELSE NEW MAZE LINE
280 PRINT MZ$(LN)
290 LN=LN+1
300 ' NEXT CHARACTER
310 NEXT
320 ' MORE LINES TO DO?
330 IF LN<MH THEN 90
340 END
350 REM MAZE AS HEX DATA
360 DATAFFFFFFF080060010BDF6FBD0BDF6FBD0BDF6FBD080000010BDBFDBD0BDBFDBD081861810FDF6FBF005F6FA0005801A0005BFDA00FDA05BF000204000FDA05BF005BFDA0005801A0005BFDA00FDBFDBF080060010BDF6FBD0BDF6FBD08C000310EDBFDB70EDBFDB7081861810BFF6FFD0BFF6FFD080000010
370 DATAFFFFFFF0,""
This program works, but it’s very slow, taking about 45 seconds to run. But, it’s verbose enough to (hopefully) explain what is going on.
By removing spaces, swapping out a integer values for faster HEX values, changing a CHR$() to a variable and adding a bit more string space, removing INT (and making one adjustment needed due to that), and combining lines, it can be sped up to just over 32 seconds.
0 REM HEXMAZE2.BAS
10 ' STRING SPACE IS MW*(MH+1)
20 CLEAR 28*32+200
30 ' SIZE OF MAZE IN DATA
40 MW=28:MH=31
50 ' ROOM FOR CONVERTED MAZE
60 DIM MZ$(MH):LN=0:BL$=CHR$(175)
70 CLS
90 READA$:IFA$=""THEN340
110 FORA=1TOLEN(A$)STEP2:V=VAL("&H"+MID$(A$,A,&H2)):BT=&H80
160 IF(V ANDBT)=0THENB$=BK$ELSEB$=BL$
180 MZ$(LN)=MZ$(LN)+B$:IFLEN(MZ$(LN))>=MW THEN280
220 BT=BT/2:IFBT>=1THEN160
260 GOTO310
280 PRINTMZ$(LN):LN=LN+1
310 NEXT:IFLN<MH THEN90
340 END
350 REM MAZE AS HEX DATA
360 DATAFFFFFFF080060010BDF6FBD0BDF6FBD0BDF6FBD080000010BDBFDBD0BDBFDBD081861810FDF6FBF005F6FA0005801A0005BFDA00FDA05BF000204000FDA05BF005BFDA0005801A0005BFDA00FDBFDBF080060010BDF6FBD0BDF6FBD08C000310EDBFDB70EDBFDB7081861810BFF6FFD0BFF6FFD080000010
370 DATAFFFFFFF0,""
And this is before translating that blocky maze into the “rounded corners” and such we want. This may be far too slow to do in BASIC since most folks don’t want to “Please wait 3.5 minutes while loading…” like a program my Commodore 64 friend once showed me. Assembly language helper routines might be needed for the impatient players out there…
Blocky to less blocky
After this code converts HEX values to maze data in a string array, we can process those strings and change the characters to have the “rounded” corners and such. Here is what I came up with, based on the original version that PEEKed and POKEed displayed bytes on the screen. This time, it’s scanning strings using MID$() and altering CHR$() values.
Side Note: Does everyone here know that, while you can’t use LEFT$ or RIGHT$ to change the left or right portion of a string, you can use MID$ to change characters? If you have A$=”1234567890″ and you want to change two characters starting at the third one, you can do MID$(A$,3,2)=”XX” and you get “12XX567890”. I’ll be using that…
Here is what I came up with… Instead of PEEKing memory, I used MID$(). It’s quite the mess, and very slow since I went back to the first version of the hex-to-maze print routine, just for clarity.
0 REM HEXMAZE3.BAS
10 ' STRING SPACE IS MW*(MH+1)
20 CLEAR 28*32
30 ' SIZE OF MAZE IN DATA
40 MW=28:MH=31
50 ' ROOM FOR CONVERTED MAZE
60 DIM MZ$(MH):LN=0
70 CLS
80 ' READ A LINE OF HEX DATA
90 READ A$:IF A$="" THEN 340
100 ' EVERY 2 CHARS IS A HEX
110 FOR A=1 TO LEN(A$) STEP 2
120 ' COVERT HEX TO A VALUE
130 V=VAL("&H"+MID$(A$,A,2))
140 ' CONVERT BITS TO BLOCKS
150 BT=128
160 IF (V AND BT)=0 THEN B$=CHR$(128) ELSE B$=CHR$(175)
170 ' ADD BLOCK/SPACE TO STRING
180 MZ$(LN)=MZ$(LN)+B$
190 ' IF LEN >= MAZE W, NEXT
200 IF LEN(MZ$(LN))>=MW THEN 280
210 ' SHIFT BIT RIGHT
220 BT=INT(BT/2)
230 ' IF MORE BITS, REPEAT
240 IF BT>0 THEN 160
250 ' GET NEXT CHARACTER
260 GOTO 310
270 ' ELSE NEW MAZE LINE
280 PRINT MZ$(LN)
290 LN=LN+1
300 ' NEXT CHARACTER
310 NEXT
320 ' MORE LINES TO DO?
330 IF LN<MH THEN 90

340 ' CONVERT LINES
350 BL$=CHR$(128):PRINT
360 FOR LN=0 TO MH-1
370 FOR C=1 TO LEN(MZ$(LN))
380 IF MID$(MZ$(LN),C,1)=BL$ THEN 510
390 V$=CHR$(175)
400 IF LN>0 THEN U$=MID$(MZ$(LN-1),C,1):UR$=MID$(MZ$(LN-1),C+1,1) ELSE U$=BL$:UR$=BL$
410 IF LN>0 THEN IF C>1 THEN UL$=MID$(MZ$(LN-1),C-1,1) ELSE ELSE UL$=BL$
420 IF C>1 THEN L$=MID$(MZ$(LN),C-1,1) ELSE L$=BL$
430 IF C<LEN(MZ$(LN)) THEN R$=MID$(MZ$(LN),C+1,1) ELSE R$=BL$
440 IF LN<MH-1 THEN D$=MID$(MZ$(LN+1),C,1) ELSE D$=BL$
450 IF LN<MH-1 THEN IF C>1 THEN DL$=MID$(MZ$(LN+1),C-1,1) ELSE ELSE DL$=BL$
460 IF LN<MH-1 THEN IF C<MW THEN DR$=MID$(MZ$(LN+1),C+1,1) ELSE ELSE DR$=BL$
470 IF U$<>BL$ THEN IF L$<>BL$ THEN GOSUB 600
480 IF U$<>BL$ THEN IF R$<>BL$ THEN GOSUB 700
490 IF D$<>BL$ THEN IF L$<>BL$ THEN GOSUB 800
500 IF D$<>BL$ THEN IF R$<>BL$ THEN GOSUB 900
510 NEXT:PRINT MZ$(LN):NEXT
520 END

600 ' UP and LEFT set
610 IF UL$<>BL$ THEN V$=CHR$(ASC(V$) AND NOT 8)
620 IF R$=BL$ THEN IF DR$=BL$ THEN IF D$=BL$ THEN V$=CHR$(ASC(V$) AND NOT 1)
630 MID$(MZ$(LN),C,1)=V$:RETURN

700 ' UP and RIGHT set
710 IF UR$<>BL$ THEN V$=CHR$(ASC(V$) AND NOT 4)
720 IF L$=BL$ THEN IF DL$=BL$ THEN IF D$=BL$ THEN V$=CHR$(ASC(V$) AND NOT 2)
730 MID$(MZ$(LN),C,1)=V$:RETURN

800 ' DOWN and LEFT set
810 IF DL$<>BL$ THEN V$=CHR$(ASC(V$) AND NOT 2)
820 IF U$=BL$ THEN IF UR$=BL$ THEN IF R$=BL$ THEN V$=CHR$(ASC(V$) AND NOT 4)
830 MID$(MZ$(LN),C,1)=V$:RETURN

900 ' DOWN and RIGHT set
910 IF DR$<>BL$ THEN V$=CHR$(ASC(V$) AND NOT 1)
920 IF L$=BL$ THEN IF UL$=BL$ THEN IF U$=BL$ THEN V$=CHR$(ASC(V$) AND NOT 8)
930 MID$(MZ$(LN),C,1)=V$:RETURN

1000 REM MAZE AS HEX DATA
1010 DATAFFFFFFF080060010BDF6FBD0BDF6FBD0BDF6FBD080000010BDBFDBD0BDBFDBD081861810FDF6FBF005F6FA0005801A0005BFDA00FDA05BF000204000FDA05BF005BFDA0005801A0005BFDA00FDBFDBF080060010BDF6FBD0BDF6FBD08C000310EDBFDB70EDBFDB7081861810BFF6FFD0BFF6FFD080000010
1020 DATAFFFFFFF0,""
Testing on the XRoar emulator shows this whole process takes about 161 seconds.
That’s so slow. Perhaps removing some of the CHR$() stuff and changing strings to values (like the originally PEEK version), skipping some of the extra IFs (like, if you are on line 0, there is no up, up left, or up right; if you are on the last line, there is no bottom, bottom left, or bottom right) and some other minor things might help…
340 ' CONVERT LINES
350 BL=128:PRINT
360 FOR LN=0 TO MH-1
365 LL=LEN(MZ$(LN))
370 FOR C=1 TO LL
380 IF ASC(MID$(MZ$(LN),C,1))=BL THEN 510
390 V=175

395 IF LN=0 THEN U=BL:UR=BL:UL=BL:GOTO 420
400 U=ASC(MID$(MZ$(LN-1),C,1)) ELSE U=BL
405 IF C<LL THEN UR=ASC(MID$(MZ$(LN-1),C+1,1)) ELSE UR=BL
410 IF C>1 THEN UL=ASC(MID$(MZ$(LN-1),C-1,1)) ELSE UL=BL

420 IF C>1 THEN L=ASC(MID$(MZ$(LN),C-1,1)) ELSE L=BL
430 IF C<LL THEN R=ASC(MID$(MZ$(LN),C+1,1)) ELSE R=BL

435 IF LN=MH-1 THEN D=BL:DL=BL:DR=BL:GOTO 470
440 D=ASC(MID$(MZ$(LN+1),C,1)) ELSE D=BL
450 IF C>1 THEN DL=ASC(MID$(MZ$(LN+1),C-1,1)) ELSE DL=BL
460 IF C<LL THEN DR=ASC(MID$(MZ$(LN+1),C+1,1)) ELSE DR=BL

470 IF U<>BL THEN IF L<>BL THEN GOSUB 600
480 IF U<>BL THEN IF R<>BL THEN GOSUB 700
490 IF D<>BL THEN IF L<>BL THEN GOSUB 800
500 IF D<>BL THEN IF R<>BL THEN GOSUB 900
510 NEXT:PRINT MZ$(LN):NEXT
515 PRINT TIMER,TIMER/60
520 END

600 ' UP and LEFT set
610 IF UL<>BL THEN V=(V AND NOT 8)
620 IF R=BL THEN IF DR=BL THEN IF D=BL THEN V=(V AND NOT 1)
630 MID$(MZ$(LN),C,1)=CHR$(V):RETURN

700 ' UP and RIGHT set
710 IF UR<>BL THEN V=(V AND NOT 4)
720 IF L=BL THEN IF DL=BL THEN IF D=BL THEN V=(V AND NOT 2)
730 MID$(MZ$(LN),C,1)=CHR$(V):RETURN

800 ' DOWN and LEFT set
810 IF DL<>BL THEN V=(V AND NOT 2)
820 IF U=BL THEN IF UR=BL THEN IF R=BL THEN V=(V AND NOT 4)
830 MID$(MZ$(LN),C,1)=CHR$(V):RETURN

900 ' DOWN and RIGHT set
910 IF DR<>BL THEN V=(V AND NOT 1)
920 IF L=BL THEN IF UL=BL THEN IF U=BL THEN V=(V AND NOT 8)
930 MID$(MZ$(LN),C,1)=CHR$(V):RETURN
Well, that brings it down to 155 seconds and that simply won’t do. There are many other optimizations to this BASIC program that could be done, and I bet we could even double the speed. But even then, that’s far too long to wait for a maze level to be drawn.
It looks like an assembly language routine might be our only option. We’ll take a break for now, but revisit this later after some discussion on assembly language. At some point. Eventually.
Let’s jump right in and write the program that writes the DATA statements for this maze.
It should generate a string that will start with a line number, the keyword “DATA”, and then add 2-digit hex values to it until it reaches that magic 250 character limit. When that happens, we write it out to cassette or disk, and start a new line. (Of course, this could also be adjusted to make each line 31 characters or less, to fit nicely on the CoCo’s screen. That’s the magic of computer generated code — you can easily make it change the output rather than having to do it by hand.)
I also want to make it get as many bytes as possible on the line, so I’ll start with single digit line numbers, and increment by 1. “1DATA” in ASCII gives me four extra bytes than “1000 DATA” and, when they get tokenized (either by loading from tape/disk in ASCII, or typing them in) they will take up the same amount of room since line numbers are all stored as two byte values in the program code. The result can then be RENUMbered to start at whatever line is needed for the final program.
Here is my very slow, very large version:
10 CLEAR 500
20 ' MAX OUTPUT LINE LENGTH
30 INPUT "MAX LINE LENGTH";MX
40 IF MX=0 OR MX>250 THEN MX=250
50 ' GET/SET DEVICE NUMBER
60 DV=0
70 PRINT "OUTPUT TO D)ISK, P)RINTER"
80 INPUT "S)CREEN OR T)APE";A$
90 IF A$="D" THEN DV=1 ELSE IF A$="P" THEN DV=-2 ELSE IF A$="S" THEN DV=0 ELSE IF A$="T" THEN DV=-1 ELSE 70
100 ' CREATE OUTPUT FILE
110 OPEN "O",#DV,"MAZEDATA.BAS"
120 ' LINE NUMBER/RESET STRING
130 LN=1:LN$=""
140 ' READ LINE OF MAZE DATA
150 READ A$:IF A$="" THEN 470
160 PRINT A$
170 ' START AT FIRST CHARACTER
180 CH=1
190 ' INIT BIT VALUE
200 BT=128
210 ' RESET OUTPUT VALUE
220 V=0
230 ' IF X, ADD 1 (SET BIT)
240 IF MID$(A$,CH,1)="X" THEN V=V+BT
250 PRINT MID$(A$,CH,1);
260 ' SHIFT BIT LEFT
270 BT=INT(BT/2)
280 ' IF MORE BITS, DO NEXT CH
290 IF BT>0 THEN CH=CH+1:GOTO 240
300 ' CREATE 2-DIGIT HEX VALUE
310 HX$=HEX$(V):IF V<16 THEN HX$="0"+HX$
320 PRINT ,HX$;CH
330 ' START LINE IF NEEDED
340 ' TRIM FIRST CHAR
350 IF LN$="" THEN LN$=STR$(LN)+"DATA":LN$=MID$(LN$,2)
360 ' ADD HEX VALUE
370 LN$=LN$+HX$
380 'IF LINE FULL, WRITE IT OUT
390 IF LEN(LN$)>=MX-2 THEN PRINT #DV,LN$:LN$="":LN=LN+1
400 ' GO TO NEXT CH
410 CH=CH+1
420 ' IF PAST END, NEW LINE
430 IF CH>LEN(A$) THEN 150
440 ' OTHERWISE, NEXT BYTE
450 GOTO 200
460 ' WRITE ANY REMAINING DATA
470 PRINT #DV,LN$
480 CLOSE #DV
490 END
1000 DATA "XXXXXXXXXXXXXXXXXXXXXXXXXXXX"
1010 DATA "X            XX            X"
1020 DATA "X XXXX XXXXX XX XXXXX XXXX X"
1030 DATA "X XXXX XXXXX XX XXXXX XXXX X"
1040 DATA "X XXXX XXXXX XX XXXXX XXXX X"
1050 DATA "X                          X"
1060 DATA "X XXXX XX XXXXXXXX XX XXXX X"
1070 DATA "X XXXX XX XXXXXXXX XX XXXX X"
1080 DATA "X      XX    XX    XX      X"
1090 DATA "XXXXXX XXXXX XX XXXXX XXXXXX"
1100 DATA "     X XXXXX XX XXXXX X     "
1110 DATA "     X XX          XX X     "
1120 DATA "     X XX XXXXXXXX XX X     "
1130 DATA "XXXXXX XX X      X XX XXXXXX"
1140 DATA "          X      X          "
1150 DATA "XXXXXX XX X      X XX XXXXXX"
1160 DATA "     X XX XXXXXXXX XX X     "
1170 DATA "     X XX          XX X     "
1180 DATA "     X XX XXXXXXXX XX X     "
1190 DATA "XXXXXX XX XXXXXXXX XX XXXXXX"
1200 DATA "X            XX            X"
1210 DATA "X XXXX XXXXX XX XXXXX XXXX X"
1220 DATA "X XXXX XXXXX XX XXXXX XXXX X"
1230 DATA "X   XX                XX   X"
1240 DATA "XXX XX XX XXXXXXXX XX XX XXX"
1250 DATA "XXX XX XX XXXXXXXX XX XX XXX"
1260 DATA "X      XX    XX    XX      X"
1270 DATA "X XXXXXXXXXX XX XXXXXXXXXX X"
1280 DATA "X XXXXXXXXXX XX XXXXXXXXXX X"
1290 DATA "X                          X"
1300 DATA "XXXXXXXXXXXXXXXXXXXXXXXXXXXX"
1310 DATA ""
Let’s walk through the code…
Line 10 – We need more than the default 200 bytes of string space.
Lines 20-40 – Just for fun, I decided to let the user choose how long the output lines will be. 32 would give DATA statements that fit on the screen, or maybe 80 for a printer. 250 is the largest allowed.
Lines 50-90 – Just to be fancy, the user can choose Disk, Printer, Screen or Tape output. When writing this, I learned you can still use OPEN “O”,#-2,”FILE” even on the printer or screen! The filename is ignored and no error is generated. Very cool.
Lines 100-110 – Create the output file.
Lines 120-130 – LN is the initial line number for the DATA statements, and LN$ will be the buffer for the line we are creating.
Lines 140-160 – Read a line of MAZE DATA and display it. (This program is slow, so I thought some output would be fun to look at.)
Lines 170-180 – CH will be the current character of the line we are checking to be an “X” or not.
Lines 190-200 – BT is the bit value. For 8-bits, we start with the high bit, which is a value of 128. Unlike my previous example, I think this might be a simpler approach for making the value as we scan 8 characters.
Lines 210-220 – V will be the output value (8 characters turned in to a number).
Lines 230-250 – If the current character is “X”, add the BT value to V. We then print the character that is being processed.
Lines 260-270 – To get to the next bit value, we divide by 2. 128 becomes 64, 64 becomes 32, etc.
Lines 280-290 – As long as BT>0, we have more bits to do so we can move to the next CH character of the line. GOTO 240 resumes checking the character.
Lines 300-320 – If out of bits, we make a HEX$ out of V. If it is a value less than 16 (0-15 would be 0-F in hex), we add a leading zero to make it always two characters. We then print that to the screen.
Lines 330-350 – If LN$ is empty, we need to start it with a line number and “DATA”. When using STR$(x) to turn a number into a string, a leading space will be added. This means 1 becomes ” 1″. If this was negative, that would be used for the minus sign — i.e., -1 would be “-1”. Since we know our number will be positive, we can just get rid of the first character. Using a trick I recently learned about, MID$() will give the right side of a string starting with a position if you leave out the third parameter (length). Thus, instead of RIGHT$(LN$,LEN(LN$)-1), I can do MID$(LN$,2) to give me everything from character 2 on. Wish I knew that in the 80s! (Hat tip to Robin at 8-Bit Show and Tell since I think that is where I learned this.)
Lines 360-370 – We add the HX$ to the end of our LN$ (which is either the one we just started, or one that is slowly growing as we keep adding values).
Lines 380-390 – If the LN$ reaches our max (minus 2, since we just added a 2 character hex value), we print it out to the selected device, then reset LN$ and increment our line number.
Lines 400-410 – Move to the next CH character position.
Lines 420-430 – If CH is past the end of the length of our A$ data, go to line 150 to read the next maze DATA.
Lines 440-450 – If there’s still more characters in the line, go back to 150 and get the next one.
Lines 460-480 – If done, we need to output whatever is left. The earlier output only did that when the line reached max size. This takes care of the final line that is less than that. We then close the file. (Or, if this is printer or screen, this doesn’t do anything.)
Done! Whew…
Running this using a max of 250 produces this in the file:
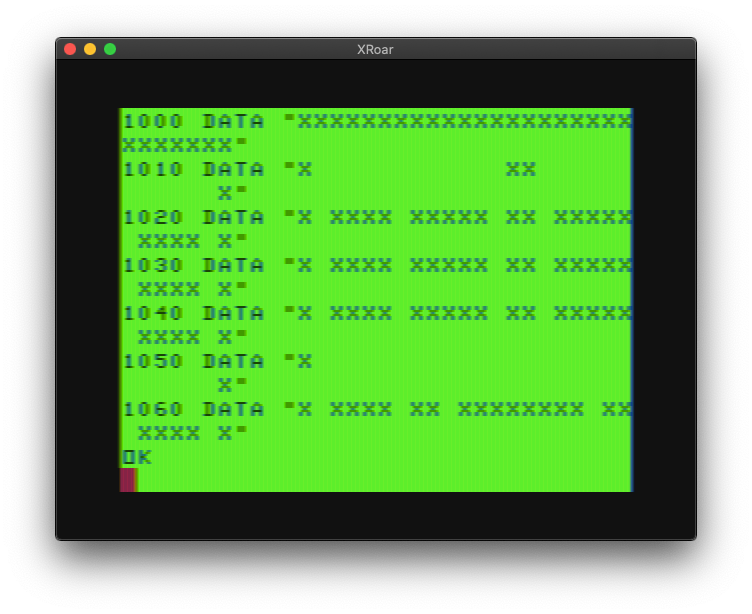
Our maze data converts to just two hex values more than what would fit on one line of BASIC. So close! To make it look prettier (but take up more program space) we could have done it with shorter lines:
So far, we’ve talked about how to represent a simple maze level, and how to make the maze level have more detail than the data used to represent it. We still need to code a way to represent the maze as bits rather than ASCII characters. Let’s try to get that one figured out.
First, we’ll use the DATA statements shown in part 2 and make a program that scans them and outputs the hex bytes we’ll want for DATA statements.
1000 DATA "XXXXXXXXXXXXXXXXXXXXXXXXXXXX"
1010 DATA "X            XX            X"
1020 DATA "X XXXX XXXXX XX XXXXX XXXX X"
1030 DATA "X XXXX XXXXX XX XXXXX XXXX X"
1040 DATA "X XXXX XXXXX XX XXXXX XXXX X"
1050 DATA "X                          X"
1060 DATA "X XXXX XX XXXXXXXX XX XXXX X"
1070 DATA "X XXXX XX XXXXXXXX XX XXXX X"
1080 DATA "X      XX    XX    XX      X"
1090 DATA "XXXXXX XXXXX XX XXXXX XXXXXX"
1100 DATA "     X XXXXX XX XXXXX X     "
1110 DATA "     X XX          XX X     "
1120 DATA "     X XX XXXXXXXX XX X     "
1130 DATA "XXXXXX XX X      X XX XXXXXX"
1140 DATA "          X      X          "
1150 DATA "XXXXXX XX X      X XX XXXXXX"
1160 DATA "     X XX XXXXXXXX XX X     "
1170 DATA "     X XX          XX X     "
1180 DATA "     X XX XXXXXXXX XX X     "
1190 DATA "XXXXXX XX XXXXXXXX XX XXXXXX"
1200 DATA "X            XX            X"
1210 DATA "X XXXX XXXXX XX XXXXX XXXX X"
1220 DATA "X XXXX XXXXX XX XXXXX XXXX X"
1230 DATA "X   XX                XX   X"
1240 DATA "XXX XX XX XXXXXXXX XX XX XXX"
1250 DATA "XXX XX XX XXXXXXXX XX XX XXX"
1260 DATA "X      XX    XX    XX      X"
1270 DATA "X XXXXXXXXXX XX XXXXXXXXXX X"
1280 DATA "X XXXXXXXXXX XX XXXXXXXXXX X"
1290 DATA "X                          X"
1300 DATA "XXXXXXXXXXXXXXXXXXXXXXXXXXXX"
1310 DATA ""
The idea would be to build bytes by scanning 8 characters and setting a 1 bit if there is an “X”, or a 0 bit if there is a ” ” space. In C I’d do this using bit shifting. BASIC doesn’t have that. Except it kinda does.
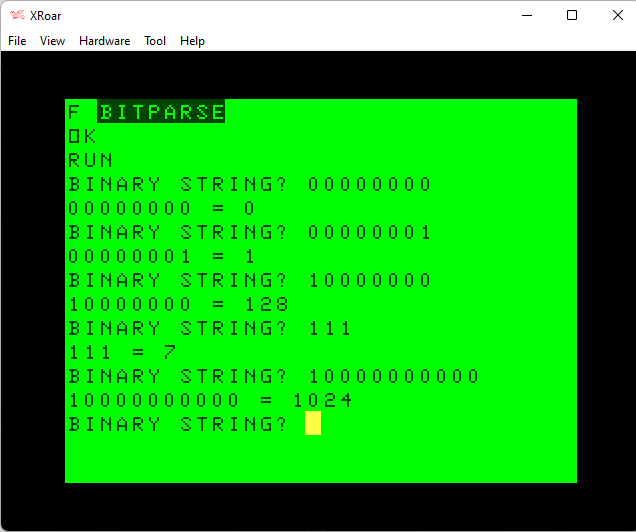
I have previously done some YouTube videos about bit manipulation in BASIC, but basically you just divide by 2 to shift right, or multiply by 2 to shift left. Here is a sample that will take an ASCII binary string and turn it in to a numeric variable:
0 REM BITPARSE.BAS
10 INPUT "BINARY STRING";A$
20 BT=0
30 ' SCAN LEFT TO RIGHT
40 FOR A=1 TO LEN(A$)
50 ' SHIFT LEFT
60 BT=BT*2
70 ' IF 1, ADD 1 BIT
80 IF MID$(A$,A,1)="1" THEN BT=BT+1
90 NEXT
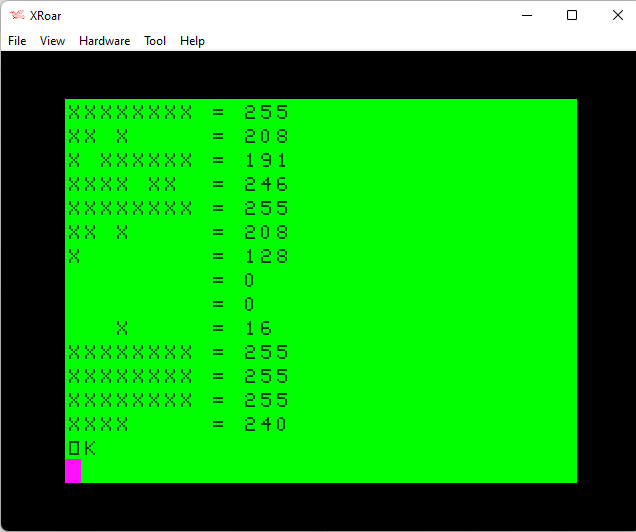
100 PRINT A$;" =";BT
110 GOTO 10
This lets me type a binary string like “111” and see that it represents 7. “11111111” will show 255. You can even go beyond 8 bits, though I did not test to see what the upper limit of BASIC’s floating point variables are before they start showing bogus values.
BASIC Bit Parsing
If it’s easy to build a value out of ASCII ones and zeros, it should be just as easy to do it looking for ASCII Xs and spaces. The only new part will be stopping every 8 characters to output the number, then starting over with the next 8 characters. Here is the BITPARSE program updated to do just that. Changes are bolded.
0 REM MAZE2NUM.BAS
10 READ A$:IF A$="" THEN END15 FOR B=1 TO LEN(A$) STEP 8
20 BT=0
30 ' SCAN LEFT TO RIGHT
40 FOR A=B TO B+7
50 ' SHIFT LEFT
60 BT=BT*2
70 ' IF 1, ADD 1 BIT
80 IF MID$(A$,A,1)="X" THEN BT=BT+1
90 NEXT
100 PRINT MID$(A$,B,8);TAB(8);" =";BT
105 NEXT
110 GOTO 10
1000 DATA "XXXXXXXXXXXXXXXXXXXXXXXXXXXX"
1010 DATA "X XX X"
1020 DATA "X XXXX XXXXX XX XXXXX XXXX X"
1030 DATA "X XXXX XXXXX XX XXXXX XXXX X"
1040 DATA "X XXXX XXXXX XX XXXXX XXXX X"
1050 DATA "X X"
1060 DATA "X XXXX XX XXXXXXXX XX XXXX X"
1070 DATA "X XXXX XX XXXXXXXX XX XXXX X"
1080 DATA "X XX XX XX X"
1090 DATA "XXXXXX XXXXX XX XXXXX XXXXXX"
1100 DATA " X XXXXX XX XXXXX X "
1110 DATA " X XX XX X "
1120 DATA " X XX XXXXXXXX XX X "
1130 DATA "XXXXXX XX X X XX XXXXXX"
1140 DATA " X X "
1150 DATA "XXXXXX XX X X XX XXXXXX"
1160 DATA " X XX XXXXXXXX XX X "
1170 DATA " X XX XX X "
1180 DATA " X XX XXXXXXXX XX X "
1190 DATA "XXXXXX XX XXXXXXXX XX XXXXXX"
1200 DATA "X XX X"
1210 DATA "X XXXX XXXXX XX XXXXX XXXX X"
1220 DATA "X XXXX XXXXX XX XXXXX XXXX X"
1230 DATA "X XX XX X"
1240 DATA "XXX XX XX XXXXXXXX XX XX XXX"
1250 DATA "XXX XX XX XXXXXXXX XX XX XXX"
1260 DATA "X XX XX XX X"
1270 DATA "X XXXXXXXXXX XX XXXXXXXXXX X"
1280 DATA "X XXXXXXXXXX XX XXXXXXXXXX X"
1290 DATA "X X"
1300 DATA "XXXXXXXXXXXXXXXXXXXXXXXXXXXX"
1310 DATA ""
This was substantially easier to do than I expected.
Text to bits to numbers…
And I got lucky, thanks to something BASIC does I was not aware of. The strings being parsed at not multiples of 8 characters. Each line is 28 characters long. Since I parse each one 8 characters at a time, I should be getting:
MID$(A$,1,8) – first 8 characters.
MID$(A$,9,8) – second 8 characters.
MID$(A$,17,8) – third 8 characters
MID$(A$,25,8) – fourth 8 characters … but there are only 2 left in the line!
MID$() does something that saved me a ton of work. Say you have a ten character string, and you want to print 4 characters starting at position 2:
A$="1234567890"

PRINT MID$(A$,2,4)
2345
But what if you wanted to print four characters starting at position 9? There are only two characters left in the string:
A$="1234567890"

PRINT MID$(A$,9,4)
90
We asked for four… we got two … no error was given. What is BASIC returning? I think this is kind of a bug, because you can do this:
A$="1234567890"

PRINT MID$(A$,25,4)
Tada! Even though you asked for a character beyond the end of the string, it does not error. It just returns … nothing. Literally nothing — the empty string.
A$="1234567890"

IF MID$(A$,200,4)="" THEN PRINT "NOTHING"
NOTHING
And since our parser is looking for an “X” to set a bit, and anything else for 0, nothing counts as anything else and it just works.
Nice. (And I’m too embarrassed to show the overcomplex version I came up with the first time I tried to do this…)
Hexing
It is to make the program print out HEX values by using HEX$, but there is a problem… HEX$ only prints the characters it needs to. If you print HEX$(255) you will get FF. If you print HEX$(15) you will get F. We want our hex values to always be two digits, so we have to add some extra code to make sure any single digit values (0-15) have a 0 added to the start of them.
The simplest way is probably this — assuming we are just dealing with 2-digit hex values (0-255):
V=15
HX$=HEX$(V):IF LEN(HX$)<2 THEN HX$="0"+HX$
Or, since we know only values 0-15 will be one hex digit, this may be both smaller and faster:
V=15
HX$=HEX$(V):IF V<16 THEN HX$="0"+HX$
Or we could go all complicated and build a string like “00” and use MID$ to insert the new string, either one or two characters long.
That one is cool because you can make HX$=”00″ for two digits, or “0000” for four digits. While the first two are smaller (and probably faster), they are hard-coded for 2 digit hex values.
Which is all we are using here, so I’ll just go with one of those.
Make the computer do the work…
We could now just output all the hex values and put them in DATA statements. Perhaps we copy them down from the screen, or maybe we have the program create a tape or disk text file and write them to it. We could even make them write out as if they were an ASCII program that could be loaded back in to BASIC.
That sounds fun, so we’ll do that.
Here is a simple program that will create a text file on tape (or disk) and write out a few lines of BASIC. You can then load this file in using LOAD or CLOAD and it will load as if it were a program saved in ASCII format.
10 OPEN "O",#-1,"DATA.BAS"
20 PRINT #-1,"1000 DATA 1,2,3"
30 CLOSE #-1
You can change the device from #-1 (cassette) to #1 for disk.
LINE LENGTH WARNING: Lines loaded in this was have a limit of no more than 250 characters. That’s all the room the BASIC input buffer has. If you have a line longer than that, the end of it will be cropped off. Here is the longest line you could load this way (100 1’s, 100 2’s, then 32 dashes, and some numbers so I could count how far it went easily on the screen).
A space after the line number can always be left out of ASCII BASIC program files, and BASIC shows a space there when you LIST it anyway. But if you want a cleaner look with a space between “DATA” and your data, just remember 250 is the limit.
With this in mind, we should be able to generate a string that starts with “1DATA” then packs as many 2 character HEX values as will fit up to 250.
Tangent about line lengths…
Something interesting… If you try typing in BASIC, you will see it stops you after 249 characters (7 full lines plus 25 more characters). I don’t know why they are different.
Also, if you type a long line like this, and press ENTER, the line gets tokenized and takes up less space (assuming it has any BASIC keywords in it like “DATA”). You may then be able to EDIT the line, ‘X’ to the end and type more characters. This is referred to as “packing” the line. However, if you do this EDIT trick, and type until it stops you again, the final character gets dropped. I’m betting that has something to do with the 250 versus 249 difference somewhere in the ROM. I’ll have to look in to that some day.
Also also, you can start the lines out as one digit line numbers, like 1, 2, 3, etc. That gives you more room than if you used line “1000”. Then, you can rename it later, and the tokenized line will still have your full data. Line numbers are represented by 2-bytes once the program is tokenized so it doesn’t matter if it’s line 1 or line 60000 it takes up the same amount of space.
But I digress…
In the next installment, I’ll come up with some kind of program that makes the program so we don’t have to.
If the maze were stored as bits representing blocks that were either set or unset (32×16 blocks will fit on the CoCo 32 column screen), we could make the program handle changing those blocks in to ones with “rounded” corners, or open areas in the middle or large blocks.
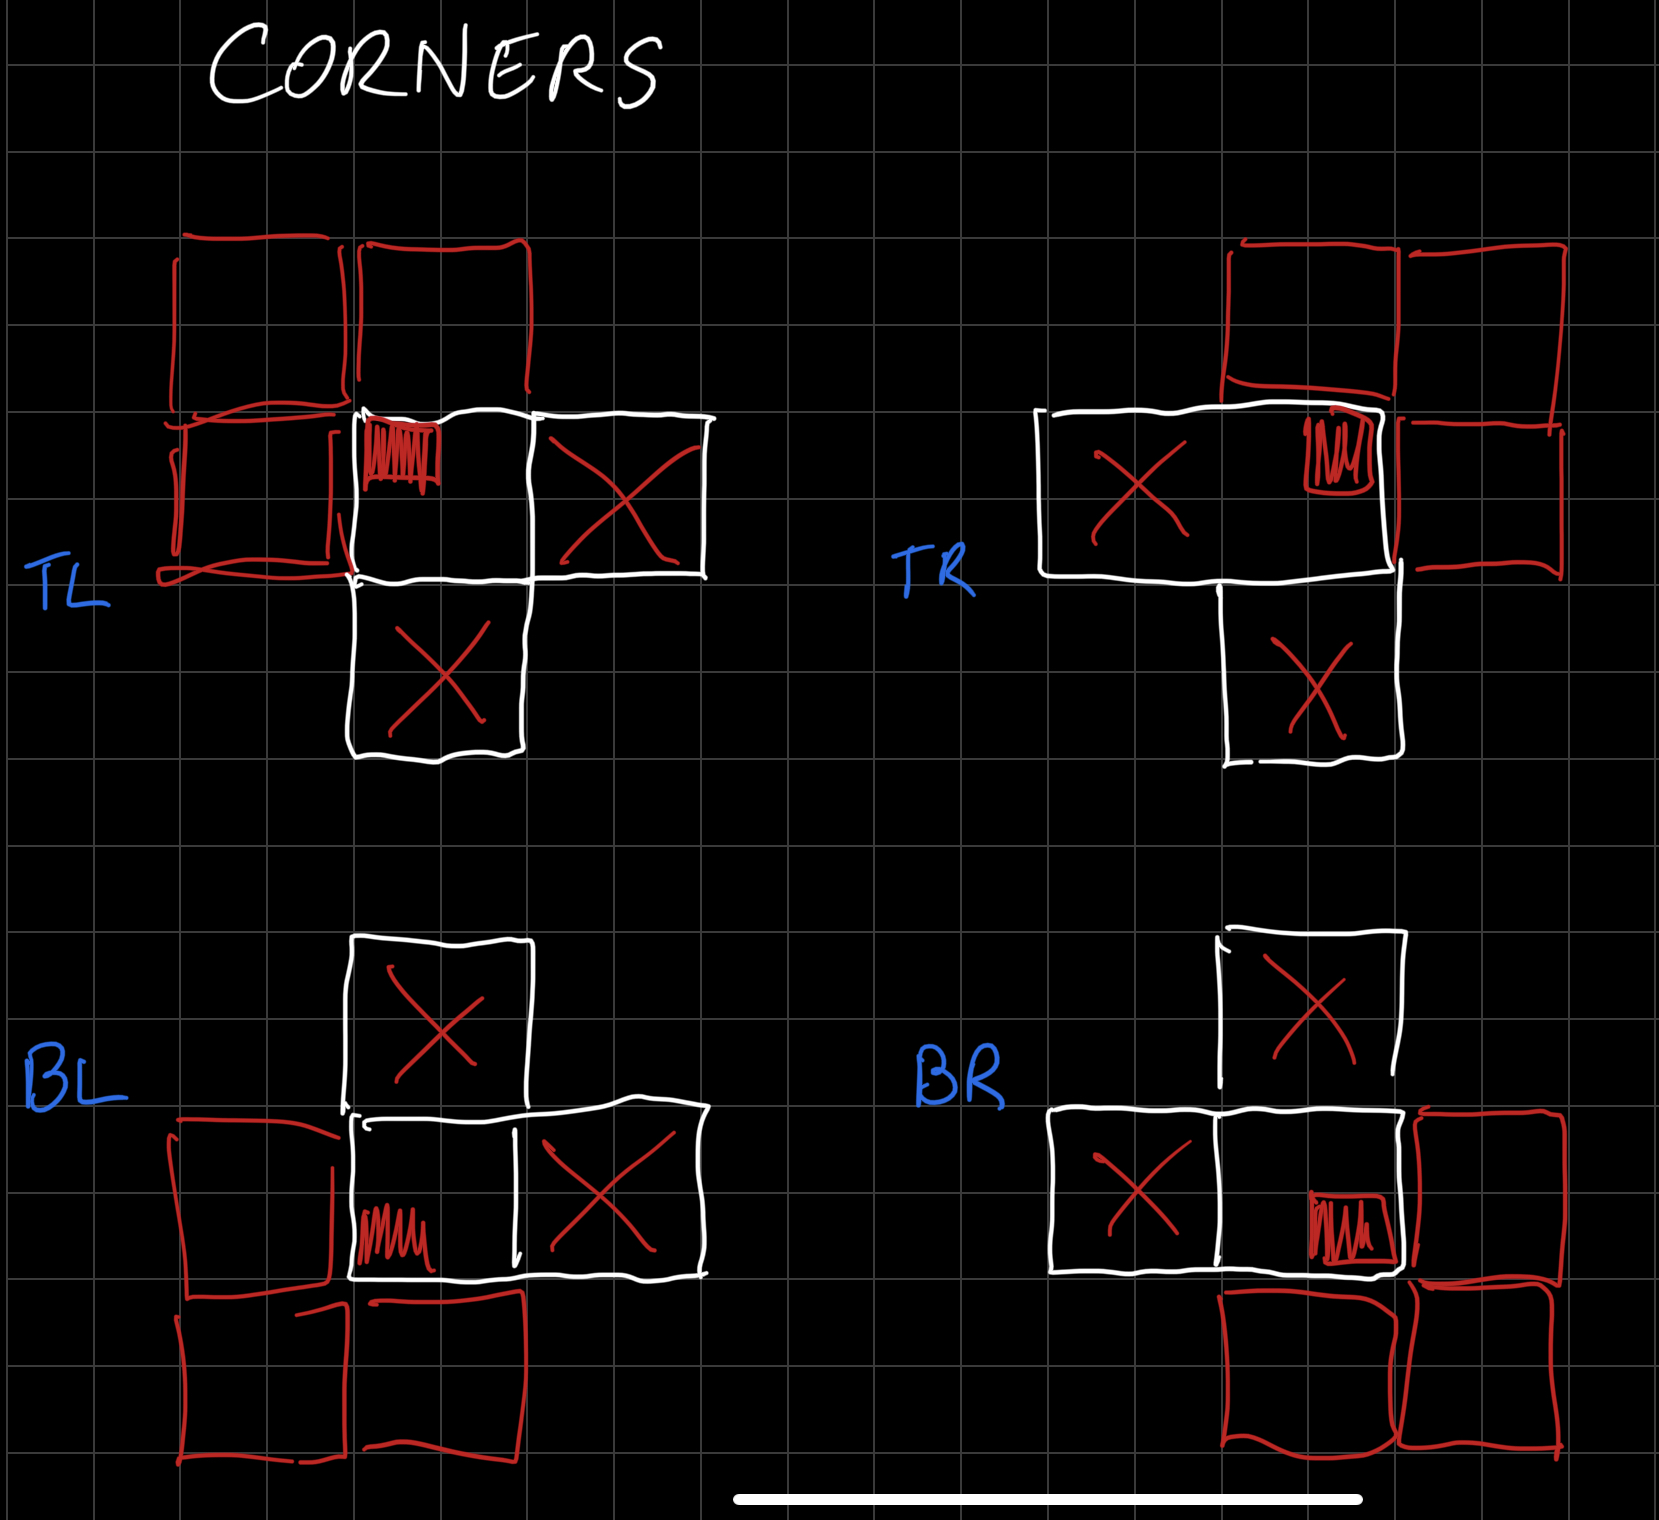
First, I needed to decide what the rules are for this, so I did some drawings.
For each corner (top left, top right, bottom left, bottom right) it seemed safe to round if the block above, beside, and diagonally from the corner were empty (empty red square). BUT, only round if the opposite sides were NOT vacant (red X). If that second part isn’t there, a single block with a path all around it would have all of its corners rounded. That’s fine on high resolution graphics (it would be a circle?), but when each block is made up of 2×2 mini squares, you can’t remove each corner or you’ll have nothin’ left!
As I found out.
Next, there are large areas made up of double blocks. On the Pac-Man maze these are larger “open” areas with thin walls around them, like the four along the top of the arcade Pac-Man game:
Arcade Pac-Mac (image from Wikipedia)
Don’t fill me in…
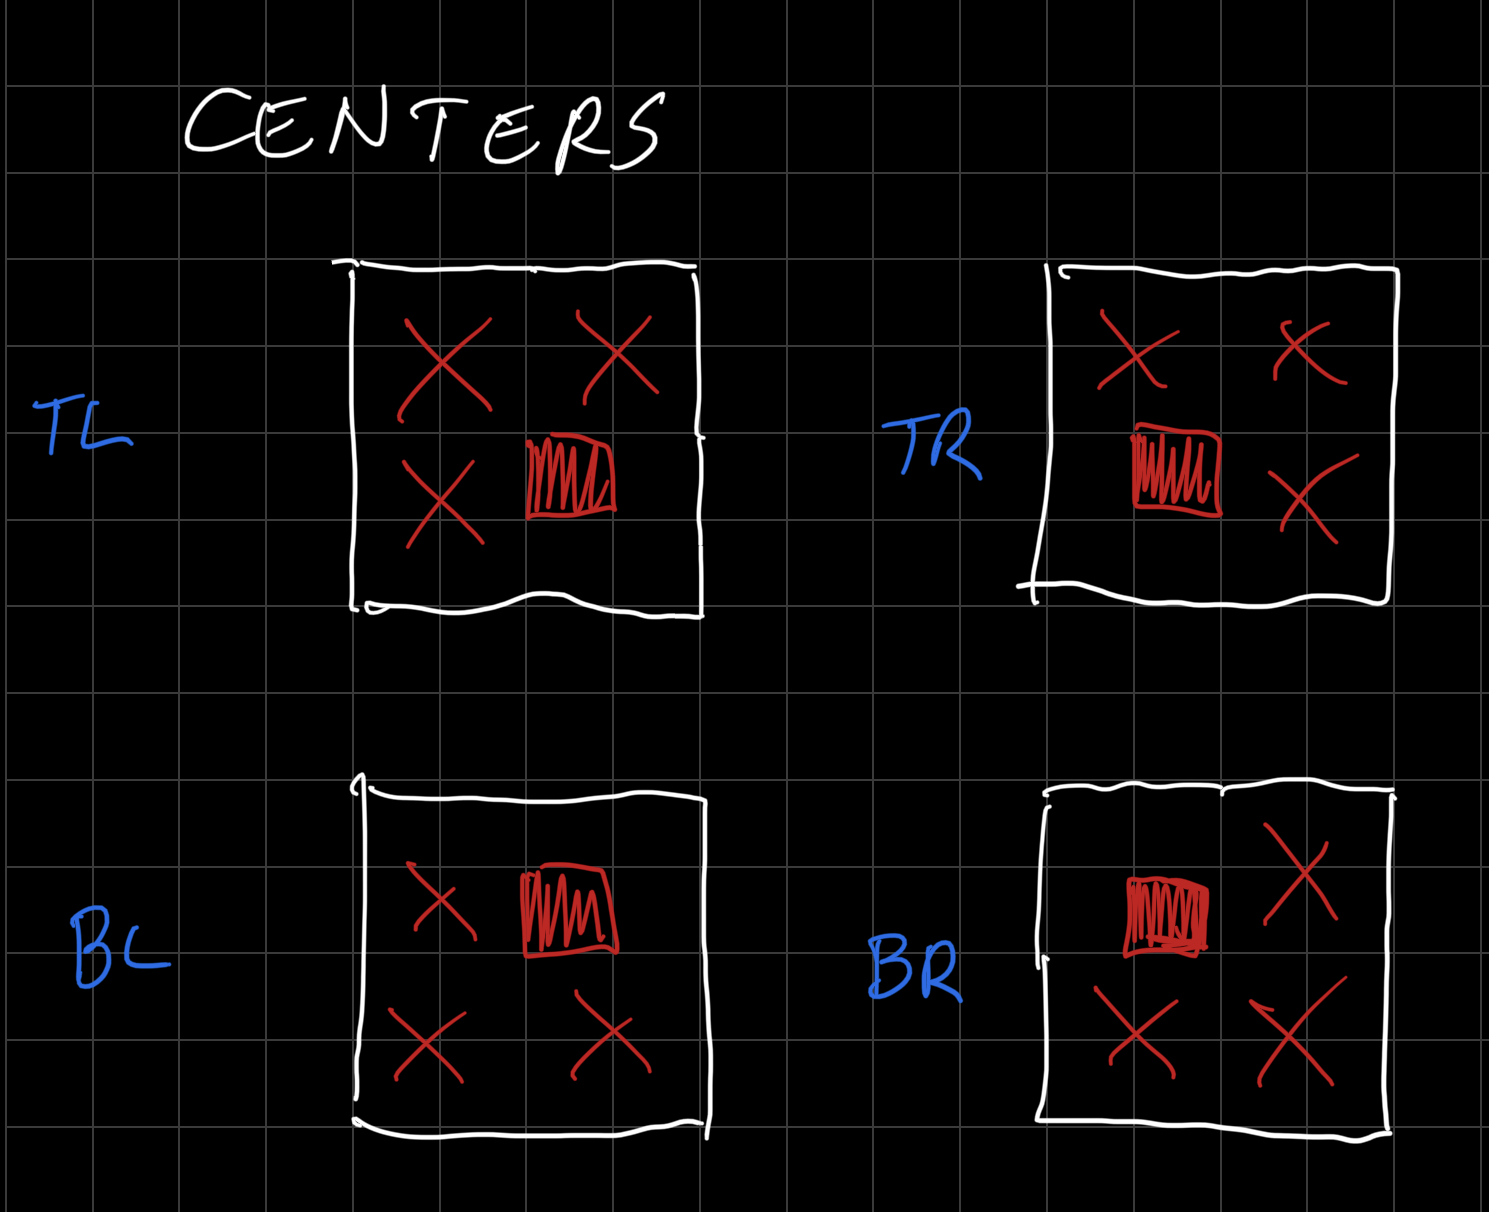
To figure out what the rules were for this, I did more drawings…
This one took me a bit longer to figure out. Above, each mini square of block is represented by the graph. Each white box is 2 blocks by 2 blocks.
After way too much trial and error, I worked it out that any corner that has an occupied square above, beside, and diagonally qualifies to be removed.
At first I tried to brute-force this in BASIC. It was way too long, and way too slow.
Then I decided as I was scanning each block location, I’d use variables to PEEK the contents of what was up, down, left or right from the blocks, as well as up-left, up-right, down-left and down-right from it. Using variables greatly sped things up (though they are still way too slow).
Once I had those variables, I could apply some simply logic.
I noticed that in both CORNERS and CENTERS, there is a need to check for an OCCUPIED block beside and either above or below. I started there, since I could do that check once, then dispatch to a second routine to determine if it was doing a corner, a center, or both.
I ran in to many bugs during all of things, and learned I had to pass each block through all the checks… Originally, I’d find a corner, remove it, and move to the next block. That would leave other corners that should have been removed, or center bits…
Finally, I came up with this (slow) proof-of-concept:
0 REM MAZEVERT.BAS

10 CLS:FOR I=0 TO 15:READ A$:PRINT@2+32*I,A$;:NEXT
20 BL=96
30 FOR M=1024 TO 1535
40 IF PEEK(M)=BL THEN 140
50 POKE M,175:V=175
60 IF M>1055 THEN U=PEEK(M-32):UR=PEEK(M-31) ELSE U=BL:UR=BL
70 IF M>1056 THEN UL=PEEK(M-33) ELSE UL=BL
80 L=PEEK(M-1):R=PEEK(M+1)
90 DL=PEEK(M+31):D=PEEK(M+32):DR=PEEK(M+33)

100 IF U<>BL THEN IF L<>BL THEN GOSUB 200
110 IF U<>BL THEN IF R<>BL THEN GOSUB 300
120 IF D<>BL THEN IF L<>BL THEN GOSUB 400
130 IF D<>BL THEN IF R<>BL THEN GOSUB 500
140 NEXT
150 FOR M=1024 TO 1535:IF PEEK(M)=96 THEN POKE M,128
160 NEXT
170 GOTO 170

200 ' UP and LEFT set
210 IF UL<>BL THEN V=V AND NOT 8
220 IF R=BL THEN IF DR=BL THEN IF D=BL THEN V=V AND NOT 1
230 POKE M,V:RETURN

300 ' UP and RIGHT set
310 IF UR<>BL THEN V=V AND NOT 4
320 IF L=BL THEN IF DL=BL THEN IF D=BL THEN V=V AND NOT 2
330 POKE M,V:RETURN

400 ' DOWN and LEFT set
410 IF DL<>BL THEN V=V AND NOT 2
420 IF U=BL THEN IF UR=BL THEN IF R=BL THEN V=V AND NOT 4
430 POKE M,V:RETURN

500 ' DOWN and RIGHT set
510 IF DR<>BL THEN V=V AND NOT 1
520 IF L=BL THEN IF UL=BL THEN IF U=BL THEN V=V AND NOT 8
530 POKE M,V:RETURN

999 GOTO 999

1000 DATA "XXXXXXXXXXXXXXXXXXXXXXXXXXXX"
1010 DATA "X            XX            X"
1020 DATA "X XXXX XXXXX XX XXXXX XXXX X"
1030 DATA "X XXXX XXXXX XX XXXXX XXXX X"
1040 DATA "X XXXX XXXXX XX XXXXX XXXX X"
1050 DATA "X                          X"
1060 DATA "X XXXX XX XXXXXXXX XX XXXX X"
1070 DATA "X XXXX XX XXXXXXXX XX XXXX X"
1080 DATA "X      XX    XX    XX      X"
1090 DATA "XXXXXX XXXXX XX XXXXX XXXXXX"
1100 DATA "     X XXXXX XX XXXXX X     "
1110 DATA "     X XX          XX X     "
1120 DATA "     X XX XXXXXXXX XX X     "
1130 DATA "XXXXXX XX X      X XX XXXXXX"
1140 DATA "          X      X          "
1150 DATA "XXXXXX XX X      X XX XXXXXX"
1160 DATA "     X XX XXXXXXXX XX X     "
1170 DATA "     X XX          XX X     "
1180 DATA "     X XX XXXXXXXX XX X     "
1190 DATA "XXXXXX XX XXXXXXXX XX XXXXXX"
1200 DATA "X            XX            X"
1210 DATA "X XXXX XXXXX XX XXXXX XXXX X"
1220 DATA "X XXXX XXXXX XX XXXXX XXXX X"
1230 DATA "X   XX                XX   X"
1240 DATA "XXX XX XX XXXXXXXX XX XX XXX"
1250 DATA "XXX XX XX XXXXXXXX XX XX XXX"
1260 DATA "X      XX    XX    XX      X"
1270 DATA "X XXXXXXXXXX XX XXXXXXXXXX X"
1280 DATA "X XXXXXXXXXX XX XXXXXXXXXX X"
1290 DATA "X                          X"
1300 DATA "XXXXXXXXXXXXXXXXXXXXXXXXXXXX"
The program has three phases:
Draw the ASCII maze (or at least what will fit on the screen for this test).
Scan the screen and convert non-blanks to semigraphics blocks, then check to see if a corner needs to be removed (because it is a corner or in the center of a larger group of blocks).
Scan the screen one more time, changing any blank space blocks to black.
The end result is this:
The whole process takes just over 40 seconds. It could be made faster by going in to double speed mode with POKE 65495,0 (or 65497,0 on a CoCo 3), but even then it would still be way too long for the user to wait for a game screen to draw.
Plus, this doesn’t even have the code to convert the less-memory hex string representation of the maze into the actual maze.
Ready to fall down a rabbit hole, exploring ways to represent a maze screen efficiently?
Neither was I.
Somewhere on this site is an article series I wrote about programming a simple maze type game on the CoCo. In it, I presented an ASCII version of the Pac-Man maze. The arcade maze looks like this:
Actual size (224×228) Pac-Man screen.
And you can learn a ton about how the game works on the Pac-Man Dosier website. But basically, the game screen is a grid of 28 x 36 tiles. In the arcade original, each tile is 8×8 pixels. With the CoCo 1/2s text screen being 32×16, this means we could fit 28 tiles horizontally with room to space, but we’d be 20 tiles short vertically. (Pac-Man used a monitor mounted sideways to get this aspect ratio.) My solution was to scroll the maze up and down. I also removed the top and bottom rows that showed score and such, so this will be using only 31 of the games original 36 rows.
A portion displayed in ASCII text would look like this:
Pac-Man maze in ASCII
Though it wouldn’t look like the arcade, this is an accurate representation of the 28×36 tiles of the original game (well, 28×16 seen any any time). There are elements of Pac-Man that couldn’t really be recreated with this low resolution (such as the way Pac can hug to corners to go around them faster), but at least the maze layout could be accurate.
But ASCII is ugly, so we’d probably want to use the semigraphics characters (128-255). Using CHR$(175) for a blue block looks like this:
Pac-Man maze in 32×16.
That’s better, but still a bit ugly. The background could at least be made black:
Pac-Man maze in 32×16 with black background.
That’s more better, but it looks more reminiscent of blocky Atari VCS games like Adventure.
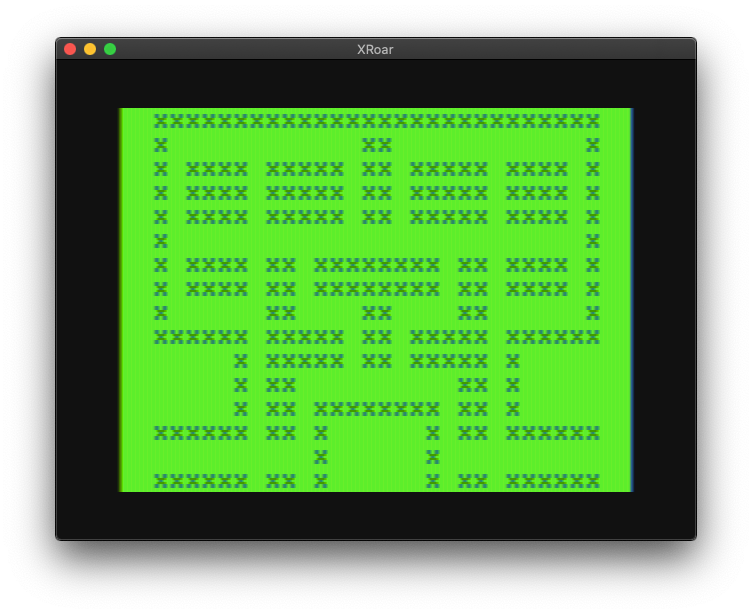
By taking advantage of the 64×32 resolution semigraphics, the corners could be at least “rounded” a bit (if round meant “still square”), and the centers of the areas could be opened up like the arcade original:
Pac-Man maze in 64×32 semigraphics.
At this resolution, I’m not sure if we can really do any better than that ;-)
The maze data could be represented as ASCII strings, either directly PRINTed on the screen, or read from DATA statements to be PRINTed or POKEd:
Pac-Maze DATA statements.
This would make creating new mazes and levels as easy as typing. But storing 28 x 26 characters is 1008 bytes of memory. Imagine trying to do that on a 4K Color Computer or a 5K Commodore VIC-20. (The highest resolution graphics screen on a CoCo 1/2 takes up 6144 bytes, compared to the 512 bytes of the text screen.)
Here’s the ASCII DATA:
1000 DATA "XXXXXXXXXXXXXXXXXXXXXXXXXXXX"
1010 DATA "X            XX            X"
1020 DATA "X XXXX XXXXX XX XXXXX XXXX X"
1030 DATA "X XXXX XXXXX XX XXXXX XXXX X"
1040 DATA "X XXXX XXXXX XX XXXXX XXXX X"
1050 DATA "X                          X"
1060 DATA "X XXXX XX XXXXXXXX XX XXXX X"
1070 DATA "X XXXX XX XXXXXXXX XX XXXX X"
1080 DATA "X      XX    XX    XX      X"
1090 DATA "XXXXXX XXXXX XX XXXXX XXXXXX"
1100 DATA "     X XXXXX XX XXXXX X     "
1110 DATA "     X XX          XX X     "
1120 DATA "     X XX XXXXXXXX XX X     "
1130 DATA "XXXXXX XX X      X XX XXXXXX"
1140 DATA "          X      X          "
1150 DATA "XXXXXX XX X      X XX XXXXXX"
1160 DATA "     X XX XXXXXXXX XX X     "
1170 DATA "     X XX          XX X     "
1180 DATA "     X XX XXXXXXXX XX X     "
1190 DATA "XXXXXX XX XXXXXXXX XX XXXXXX"
1200 DATA "X            XX            X"
1210 DATA "X XXXX XXXXX XX XXXXX XXXX X"
1220 DATA "X XXXX XXXXX XX XXXXX XXXX X"
1230 DATA "X   XX                XX   X"
1240 DATA "XXX XX XX XXXXXXXX XX XX XXX"
1250 DATA "XXX XX XX XXXXXXXX XX XX XXX"
1260 DATA "X      XX    XX    XX      X"
1270 DATA "X XXXXXXXXXX XX XXXXXXXXXX X"
1280 DATA "X XXXXXXXXXX XX XXXXXXXXXX X"
1290 DATA "X                          X"
1300 DATA "XXXXXXXXXXXXXXXXXXXXXXXXXXXX"
If we tried to use numeric DATA statements to represent the screen blocks, it would be 4 times longer since every entry would be a three digit number with a comma:
DATA 175,175,175,175,175,175,175,175,175,175,175,175,175,175,175,175,175,175,175,175,175,175,175
But, if we were just using blocks and spaces, we could have a number represent eight of them. Each number could represent a byte (0-255) and each byte contains 8 bits, therefore each number could represent 8 character blocks.
In a DATA statement with numbers, the top row would look like:
1000 DATA 255,255,255,240
The storage space for “255,255,255,240” is 15 bytes which is less than the 28 string characters (plus quotes, if needed — like if the line started with spaces or had special characters in it like a comma or ‘ REM abbreviation, which this won’t).
I suppose we could use numbers representing 16-bit values (0-65535) and have only two numbers to represent that line:
1000 DATA 65535,65520
That brings us down to 11 bytes to represent the 28 block row.
The 4K CoCo BASIC did not have hexadecimal numbers, but on Extended BASIC machines we could convert to HEX:
1000 DATA &HFF,&HFF,&HFF,&HF0
…but that is 19 bytes. While that would be better than ASCII, it would be worse than two decimal values. Doubling up to 16 bit values results in:
1000 DATA &HFFFF,&HFFF0
That gets us down to 12 bytes so it looks like needing that &H at the start loses out — 65535 versus &HFFFF. Even worse when 1 has to be three times larger as &H1. Though 15 is only one by larger as &HF. But always larger.
Hex values could be written as a string without the &H, and that could be added by the READ routine:
1000 DATA FF,FF,FF,F0
…which gives us 11 bytes, matching the two decimal values. But reading those would require some extra code which might negate the savings:
READ A$:V=VAL("&H"+A$)
…versus just reading a decimal value…
READ V
Using hex without the “&H” requires an extra 15 bytes of code space (actually, maybe a little less, since the “VAL” keyword probably tokenizes in to one or two bytes).
But, we could also pack the hex values together:
1000 DATA FFFFFFF0
That would only take 8 bytes to represent a row. But even more code would be needed to parse that:
READ A$:FOR A=1 TO LEN(A$) STEP 2:V=VAL("&H"+MID$(A$,A,2)):NEXT
The code gets even longer. However, if we had enough data (and 36 rows of data probably is enough), the code space savings should be smaller overall. And clever programming could be done to have one massive hex string and decode it knowing how many bytes go to each line.
But this only gets us to displaying the maze in ASCII or as colored blocks. If we wanted to get that “rounded” corner look of a 64×32 display, we’d need twice as many bytes.
2024-01-07 – Fixed a value in one of the examples.
During #SepTandy2020, I posted a CoCo-related video each day of the month. A few of them dealt with bit operations in Color BASIC. This was when I fist learned that Color BASIC could not deal with more than 15-bit values. You can do AND/OR/NOT operations
These work:
PRINT 32767 AND 1
PRINT 32767 OR 1
PRINT NOT 32767
…but these will return ?FC ERROR:
PRINT 32768 AND 1
PRINT 32768 OR 1
PRINT NOT 32678
8-bits before 16-bits
8-bits is handled just fine. Here is an example program that will display an 8-bit value (0-255) as binary. It is very slow:
0 ' slow8bit.bas
10 FOR Z=0 TO 255
20 GOSUB 1000:PRINT
30 NEXT
40 END
1000 REM SLOW: 8-BIT Z AS BINARY
1010 FOR BT=7 TO 0 STEP-1
1020 IF Z AND 2^BT THEN PRINT "1"; ELSE PRINT "0";
1030 NEXT:RETURN
If you looked at TIMER, that one would count to 7339 (about 122.2 seconds). And here is a version that is substantially faster because it pre-calculates the AND bit values in an array:
0 ' fast8bit.bas
5 DIM BT(7):FOR BT=0 TO 7:BT(BT)=INT(2^BT):NEXT
10 FOR Z=0 TO 255
20 GOSUB 1000:PRINT
30 NEXT
40 END
1000 REM FAST: 8-BIT Z AS BINARY
1010 FOR BT=7 TO 0 STEP-1
1020 IF Z AND BT(BT) THEN PRINT "1"; ELSE PRINT "0";
1030 NEXT:RETURN
TIMER for that one would count to 1372 (about 22.8 seconds).
When I was recording those videos, I decided to make versions that handled 16-bit values. That is when I discovered you could not to that in Color BASIC.
16-bit workaround
Color BASIC seems to treat bit values as signed, so instead of 0 to 65535, it is really -32768 to 32767. That led me to a workaround where, if the high bit was set, I would subtract 65536 from the value and do the AND/OR/NOT on a negative value. And it worked!
0 ' fast16bit.bas
5 DIM BT(15):FOR BT=0 TO 14:BT(BT)=INT(2^BT):NEXT:BT(15)=-32768
10 FOR Z=0 TO 65535
20 GOSUB 1000:PRINT
30 NEXT
40 END
1000 REM SLOW: 16-BIT Z AS BINARY
1005 IF Z>32767 THEN Z=Z-65536
1010 FOR BT=15 TO 0 STEP-1
1020 IF Z AND BT(BT) THEN PRINT "1"; ELSE PRINT "0";
1030 NEXT:RETURN
The above version uses powers-of-two for the first 15 bits (1, 2, 4, 8, 16, etc.) then for bit 16 it uses -32768, which will work. When the value is passed in, if it is larger than 32767, it is turned in to a negative value which would be a 16-bit number with the high bit set, indicating negative.
I have no idea if this is “supposed” to work, or even be allowed (AND/OR/NOT on a negative), but it does.
And what about AND? (And OR, and NOT?)
For something I am working on, I wanted to use AND to get the most significant and least significant bytes of a 16-bit value. I could not, so I came up with various workarounds:
To get the MSB of a 16-bit value, shift the 16-bit value right 8 bits (divide by 256).
To get the LSB of a 16- bit value, subtract the MSB*256 from the original 16-bit value.
This worked fine, but required swapping variables around to preserve the original values.
In my project, I then wanted to clear the top 5-bits of the word, so I would clear them in the MSB value:
M=M AND &H07
…and then I could re-build the word variable using “W=M*256+B”.
Then I wondered: Could I somehow use the same trick I used for 16-bit binary numbers to make AND, OR and NOT just work on the value?
It turns out, yes. Yes I could.
I started with a subroutine that would take a 16-bit value in in Z and convert it, as needed, to a negative value that represented the desired bits. I did this this by manually looping through the bits and adding the appropriate bit value from the same array I used in the fast 16-bit routine shown earlier:
5 DIM BT(15):FOR BT=0 TO 14:BT(BT)=INT(2^BT):NEXT:BT(15)=-32768
...
1000 ' CONVERT 16-BIT Z TO ZC
1010 ZC=0:IF Z>32767 THEN Z=Z-65536 ELSE ZC=Z:RETURN
1020 FOR BT=15 TO 0 STEP-1
1030 IF Z AND BT(BT) THEN ZC=ZC+BT(BT)
1040 NEXT:RETURN
I could then set a value to Z and call this subroutine and then use ZC with AND/OR/NOT:
10 V=65535:A=&HFF00
20 PRINT V;"AND";A;"=";
30 Z=V:GOSUB 1000:VC=ZC
40 Z=A:GOSUB 1000:AC=ZC
50 Z=VC AND AC
Yuck. But it worked. Except, after I AND the two converted values, the value I get would be a negative if it was using more than 15-bits. If I wanted to display that as HEX, I’d get another ?FC ERROR because you cannot HEX$ a negative.
Thus, I needed a routine to convert such a 16-bit negative value back to a normal positive number:
1100 ' CONVERT ZC BACK TO Z
1110 IF Z<0 THEN ZC=Z+65536 ELSE ZC=Z
1120 RETURN
The end result was a multistep routine I could use to AND, OR or NOT and 16-bit value:
0 ' AND16.BAS
5 DIM BT(15):FOR BT=0 TO 14:BT(BT)=INT(2^BT):NEXT:BT(15)=-32768

10 V=65535:A=&HFF00
20 PRINT V;"AND";A;"=";
30 Z=V:GOSUB 1000:VC=ZC
40 Z=A:GOSUB 1000:AC=ZC
50 Z=VC AND AC:GOSUB 1100:PRINT ZC

999 END
1000 ' CONVERT 16-BIT Z TO ZC
1010 ZC=0:IF Z>32767 THEN Z=Z-65536 ELSE ZC=Z:RETURN
1020 FOR BT=15 TO 0 STEP-1
1030 IF Z AND BT(BT) THEN ZC=ZC+BT(BT)
1040 NEXT:RETURN

1100 ' CONVERT ZC BACK TO Z
1110 IF Z<0 THEN ZC=Z+65536 ELSE ZC=Z
1120 RETURN
And it works!
But is there a better way?
A better way
To avoid all the swapping with temporary variables, it might be easier to just make subroutines for AND, OR and NOT that handled two passed-in variables and returned the results in another.
I created a generic subroutine that would take V1 and V2, and convert V1 (if negative) and create a new value based on the bits of V2:
4000 ' CONVERT V1 AND V2
4010 IF V1>32767 THEN V1=V1-65536
4020 IF V2>32767 THEN V2=V2-65536
4030 ZZ=0:FOR BT=15 TO 0 STEP-1
4040 IF V2 AND BT(BT) THEN ZZ=ZZ+BT(BT)
4050 NEXT:V2=ZZ:RETURN
The program could set V1 to a value and V2 to a value for the bit operation, then GOSUB 4000. Then the program could do “V=V1 AND V2” or “V=V1 OR V2” or “V=NOT V2” to perform the operation.
Then, a GOSUB to 5000 would convert V back to the positive value (if needed):
5000 ' CONVERT V BACK, IF NEEDED
5010 IF V<0 THEN V=V+65536
5020 RETURN
This allowed a slightly less ugly way to do AND, OR and NOT on 16-bit values:
0 ' ANDORNOT16.BAS
5 DIM BT(15):FOR BT=0 TO 14:BT(BT)=INT(2^BT):NEXT:BT(15)=-32768

10 V1=&HFFFF:V2=&HFF00
20 PRINT HEX$(V1);" AND ";HEX$(V2),"=";
30 GOSUB 4000:V=V1 AND V2:GOSUB 5000:PRINT HEX$(V)

40 V1=&H8000:V2=&H0001
50 PRINT HEX$(V1);" OR  ";HEX$(V2),"=";
60 GOSUB 4000::V=V1 OR V2:GOSUB 5000:PRINT HEX$(V)

70 V2=&HF00F
80 PRINT "     NOT ";HEX$(V2),"=";
90 GOSUB 4000:V=NOT V2:GOSUB 5000:PRINT HEX$(V)

999 END

1000 ' AND 16-BIT V1 WITH V2
1010 GOSUB 4000:V=V1 AND V2:GOSUB 5000:RETURN

2000 ' OR 16-BIT V1 WITH V2
2010 GOSUB 4000:V=V1 OR V2:GOSUB 5000:RETURN

3000 ' NOT 16-BIT V1
2010 GOSUB 4000:V=NOT V2:GOSUB 5000:RETURN

4000 ' CONVERT V1 AND V2
4010 IF V1>32767 THEN V1=V1-65536
4020 IF V2>32767 THEN V2=V2-65536
4030 ZZ=0:FOR BT=15 TO 0 STEP-1
4040 IF V2 AND BT(BT) THEN ZZ=ZZ+BT(BT)
4050 NEXT:V2=ZZ:RETURN

5000 ' CONVERT V BACK, IF NEEDED
5010 IF V<0 THEN V=V+65536
5020 RETURN
It still ain’t pretty, but it still works. (Though has not been extensively tested, so your milage may vary.)
Still learning something new about the CoCo even after all the years, excellent article!
Would there ever be one about DEFFN? :-)
– Rogelio Perea II, 7/19/2022
Challenge accepted.
DEF FN: Definitely Fun?
There are many features of Microsoft Color BASIC that went right over my head when I was learning to program as a junior high school kid. DEF FN was certainly one of them.
My first CoCo came with Extended Color BASIC, and that was required to use DEF FN. But what is is? According to Getting Started with Extended Color BASIC:
Extended Color BASIC has one numeric function, DEF FN, that is unlike any others we’ve talked about so far. DEF FN lets you create your own mathematical function. You can use your new function the same as any of the available functions (SIN, COS, TAN, and so on). Once you’ve used DEF FN to define a function, you may put it to work in your program by attaching the prefix FN to the name you assign to the new function. Here is the syntax for DEF FN:
DEF FN name (variable list) – formula
name is the name you assign to the function you create. variable list contains one “dummy variable” for each variable to be used by the function. formula defines the operation in terms of the variables given in the variable list
Note: Variable names that appear in formula serve only to define the formula; they do not affect program variables that have the same name. You may have only one argument in a formula call; therefore, DEF FN must contain only one variable.
You may use DEF FN only in a program, not in the immediate mode.
– Getting Started with Color BASIC, page 177.
I think my work here is done.
Until next time…
Okay, maybe not.
DEF FN: Define Function
There are commands in BASIC, such as PRINT and GOTO, and then there are functions that return values, such as SIN, ABS and INT.
DEF FN allows you to create your own function that returns a value.
A simple example
We start with a simple example. What if you wanted a function that added 42 to any value you passed in? I will call this function “UA” (for “Ultimate Answer”) and define it as follows:
10 DEF FNUA(N)=N+42
20 PRINT FNUA(10)
If I run that, it will print 52. The new “function” FNUA(x) returns whatever you pass in with 42 added to it. Tada!
Function names seem to follow the same rules as variable names so you can have one or two letters (A to Z, AA to ZZ) or a letter and a number (A0 to Z9).
In the parens is a parameter that also follows the same rules of a variable. The parameter is just a placeholder so you have something to use in your new formula on the right of the equal sign. If you did DEF FNA(X) then after the equal you’d have whatever you want to happen to X. When the user calls it with FNA(123) then 123 goes to where the X was in the formula after the equals… Neat.
It’s kind of like a C function with only one parameter, now that I think about it/
// fnua(n) - return n plus 42
int fnua(float n)
{
    return n+42;
}

int main()
{
    float x = fnua(10);

    printf ("x = %f\n", x);

    return EXIT_SUCCESS;
}
You can have DEF FNA(X) or DEF FNZZ(AB) or any combination.
What can you use it for?
The manual gives an example of doing math with a long floating point value so you don’t have to have that value in your code everywhere you want to use it.
At least I’m not the only one with code snippets that don’t really do anything.
Of course, for something like this you could have placed that number in a variable which would be faster than parsing a long number (in most cases). Still, if the formula itself is big, it could save typing, I guess.
Benchmarks, anyone?
I was curious if it would be any faster for other types of maths…
Suppose I want to use PRINT@ to put a character on the text screen, but want to use PEEK to see if it “hits” another character on the text screen. I would use the PRINT@ positions of 0-511, but I’d want to PEEK the screen memory locations of 1024-1535.
10 CLS:P=0
20 FOR I=1 TO 20:PRINT@RND(511)-1,"X";:NEXT
30 PRINT @P,"*";
40 A$=INKEY$:IF A$="" THEN 40
50 IF A$="W" THEN NP=P-32:GOTO 90
60 IF A$="A" THEN NP=P-1:GOTO 90
70 IF A$="S" THEN NP=P+32:GOTO 90
80 IF A$="D" THEN NP=P+1
90 IF NP<0 THEN 40
100 IF NP>510 THEN 40
110 IF PEEK(NP+1024)<>96 THEN 40
120 PRINT @P," ";
130 P=NP
140 GOTO 30
Above is a program that will clear the screen and put X characters in random positions. The player is an asterisk in the top left of the screen. Using the keys W (up), A (left), S (down) and D (right) will move the asterisk around the screen. Checks ensure you cannot go off the top or bottom of the screen, or run in to an X.
Line 110 does the conversion from PRINT@ position to PEEK position. Maybe we can do this:
0 ' defusr2.bas
10 CLS:P=0
15 DEF FNP(X)=X+1024
20 FOR I=1 TO 20:PRINT@RND(511)-1,"X";:NEXT
30 PRINT @P,"*";
40 A$=INKEY$:IF A$="" THEN 40
50 IF A$="W" THEN NP=P-32:GOTO 90
60 IF A$="A" THEN NP=P-1:GOTO 90
70 IF A$="S" THEN NP=P+32:GOTO 90
80 IF A$="D" THEN NP=P+1
90 IF NP<0 THEN 40
100 IF NP>510 THEN 40
110 IF PEEK(FNP(NP))<>96 THEN 40
120 PRINT @P," ";
130 P=NP
140 GOTO 30
The behavior is the same, and now I get the benefit of it not having to parse “NP+1024” each time. Parsing decimal values is slow. On Extended BASIC I could have replaced 1024 with hex &H400 and that would have been faster. For more speed, I could have used a variable and had “NP+S” or whatever.
But is it faster?
0 ' defbench1.bas
5 P=0
10 TIMER=0
20 FOR A=1 TO 1000
30 Z=P+1024
40 NEXT
50 PRINT TIMER
Doing “P+1024” 1000 times prints 481.
0 ' defbench2.bas
5 P=0
6 DEF FNP(X)=X+1024
10 TIMER=0
20 FOR A=1 TO 1000
30 Z=FNA(P)
40 NEXT
50 PRINT TIMER
That version prints 603. Not faster. The overhead of FN seems to be more than just doing it directly. In a way, this makes sense because in-lining code in assembly or C is faster than calling it as a subroutine/function.
But let’s try more… We could also include other things in the function, like the PEEK itself.
0 ' defbench3.bas
5 P=0
6 DEF FNP(X)=PEEK(X+1024)
10 TIMER=0
20 FOR A=1 TO 1000
30 Z=FNP(P)
40 NEXT
50 PRINT TIMER
That one prints 690, and if you had just done “30 Z=PEEK(P+1024)” it would have been 572.
Cool, but definitely slower. I believe this is because it’s still storing that formula in a buffer somewhere and executing it as if you’d just typed it in. Indeed, if you change the formula to use hex:
0 ' defbench3.bas
5 P=0
6 DEF FNP(X)=PEEK(X+&H400)
10 TIMER=0
20 FOR A=1 TO 1000
30 Z=FNP(P)
40 NEXT
50 PRINT TIMER
…it prints 480, which means it’s parsing that formula each time instead of converting it to a number when you define it.
Pity. It would have been really cool if this had been a way to bypass the detokenizer stuff in BASIC and speed up routines like that.
FN Conclusion
DEF FN is slower. I don’t see any example where it speeds anything up. With that said, I expect I’d use DEF FN if…
I had a custom function I used in multiple places, and wanted to maintain it in just one spot. This would be more efficient, perhaps, than making it a GOSUB subroutine.
I needed to save some bytes of BASIC memory.
I wanted to write an example that fix things on small lines on the screen, just for appearances.
For anything else, I think I’d just put it in and make the program a bit faster.
Where else might one use this?
More examples
Sebastian Tepper commented to another post with a more useful example for DEF FN. There are many times when we use two PEEKs to get a 16-bit value from two bytes in memory:
V=PEEK(25)*256+PEEK(27)
Sebastian mentioned using DEF FN for this:
DEF FNP(AD)=PEEK(AD)*256+PEEK(AD+1)

V=FNP(25)
That’s very cool, and something I could see myself using. I wish I had thought of that when I was doing all my “Color BASIC memory location” articles, since I typed the double PEEK lines over and over and over…
But that’s not all…
The defined function can also use other variables. You can only pass one in, but any variable that is declared at the time the FN is used may be used. You could do this:
10 DEF FNA(X)=X*Y
20 Y=10
30 PRINT FNA(Y)
RUN
50
Above, you pass in a value for “X” and it returns the value multiplied by whatever Y is at that moment. You could create more complex formulas that way, but it kind of defeats the purpose.
Speaking of defeating the purpose, here are more silly examples. Using it to replicate PEEK:
10 DEF FNP(X)=PEEK(X)
20 PRINT FNP(1024)
How about returning if something is true or not? Like, is a memory location outside screen memory?
…but that sure looks like it would be really slow. Still neat, though. You could do:
IF FNL(L) THEN PRINT"NOT IN SCREEN MEMORY"
It does make the code look neater — especially if something is being checked multiple times (such as checking four ghost in Pac-Man or whatever).
What other examples can you think of? Leave a comment.
On a 64K Color Computer, the BASIC ROMs configure it so the first 32K is RAM and the second 32K is ROM. It is easy to change a memory location and cause the upper 32K to be RAM, too, but if you did that from BASIC you would suddenly find yourself without the ROM and would have a nice crash.
Machine language programs that did not rely on any ROM calls could enable the 64K RAM mode and use the full 64K memory as they wished.
At some point, someone was the first to figure out they could copy the ROMs in to RAM, and then switch to RAM mode. This would allow them to be running BASIC from RAM, and thus it would be possible to use POKEs to modify the BASIC code and do patches.
In an effort to see who first figured this out and published details, I did some searching…
March 1982 – Frank Hogg
I found something on page 18 of the March 1982 issue of Color Computer News. The article was called “MORE ON 64K by Frank Hogg of Frank Hogg Labs.
Last month we showed you how to access the other 32K in your Color Computer bringing it up to the full 64K, This month we’re going to discuss some additional uses for that memory, plus a program to copy the ROM Basic into RAM and run it there;
– Frank Hogg, Color Computer News, March 1982
Included was a BASIC program that loaded the machine code, with example POKEs used to modify BASIC (such as changing the PRINT command to be WRITE).
The assembly code was listed in comments:
1820 ' THE MACHINE LANGUAGE
1830 ' PROGRAM TO MOVE BASIC TO
1840 ' RAM IS AS FOLLOWS:
1850 '
1860 '
1870 ' EP   ORCC #$50 DIS. INTS.
1880 '      LDX #$8000 1ST ADDR.
1890 ' LOOP LDA ,X
1900 '      STA $FFDF MAP TYPE 1
1910 '      STA ,X+ IN RAM!
1920 '      STA $FFDE MAP TYPE 0
1930 '      CMPX #$FFOO LAST +1
1940 '      BNE LOOP
1950 '      STA $FFDF MAP TYPE 1
1960 '      ANDCC #$AF ENBL INTS
1970 '      RTS
Was this the first such program published?
April 1983 – Frank Hogg revisted
Frank had a follow-up in the April 1983 issue, as well, on page 19. It looks like an article, but it was labeled as a paid ad called “64K KORNER“:
The code listed was the same, but with updated comments. He also added a copyright notice as well as a small standalone BASIC loader:
1 ' Copyright 1983 by Frank Hogg Permission to use is
2 ' given for all but commercial use.
10 CLEAR 999
20 DATA 26,80,190,128,0,183,255,222,166,128
30 DATA 183,255,223,167,31,140,224,0,37,241,57
40 FOR I=1 TO 21:READ A:A$=A$+CHR$(A):NEXT I
50 P=VARPTR(A$)+1
60 POKE P,126
70 EXEC P
80 PRINT "NOW IN RAM!"
Frank chose to store the machine language bytes as characters of a string. He then gets the pointer to the 5-byte string descriptor and adds one to it. That makes P point to the unused byte which is directly in front of the two byte address of the string in string space. The string descriptor looks like this:
        Addr of String in Mem
                 |
              +-----+
              |     |
[Siz] [N/A] [MSB] [LSB] [N/A]
        |
        P points here
He then POKEs a 126 at that P location, which I believe is a machine language JMP instructions. Then he EXECutes P, which makes for a very clever way to execute this code!
[Siz] [JMP] [MSB] [LSB] [N/A]
I would have done it the long way like this:
P=VARPTR(A$)
EXEC PEEK(P+2)*256+PEEK(P+3)
Frank did much better.
July 1987 – Rainbow article
Another ROM to RAM program showed up in the July 1987 Rainbow on page 97. Joseph Forgione submitted a small utility to change BASIC’s “OK” prompt to say “READY.” In included a short DRIVER.BAS program which was a ROM to RAM routine:
1 DATA 26,80,142,128,0,127,255,222,166,132,127,255,223,167,132,48,1,140,255,0,38,239,28,159,57
2 FORA=&HE00 TO &HE18:READX:POKEA,X:NEXTA:EXEC3584:POKE65503,0:PRINT"OS IS NOW IN RAM!"
I fed those bytes in to the 6809 Simulator at www.6809.uk to see what it looked like:
This is very similar to Hogg’s original, except instead of incrementing X when the byte is stored (STA ,X+) the author chose to not do that, and have a different instruction add one to X (LEAX $01,X). That makes it a few bytes larger and a few clock cycles slower, not that anyone would really notice.
Where did it come from?
I have yet to locate the one I used back on my CoCo 1, but it was probably from my pre-disk drive days and is on some old cassette tape somewhere. I had never seen Color Computer News, so my version probably came from Rainbow Magazine, or perhaps one of the few issues of Color Computer Magazine or Hot CoCo I picked up from the newstand. I was unable to locate anything obvious in the Rainbow indexes except that 1987 article.
Variations of this code seem to pop up, even to this day. In 2016, Juan Castro provided me a routine which I used in an earlier article about 64K. It was a faster one, that copied 6 bytes at a time instead of just one.
If anyone know who did this first (or at least was the first time it was in print somewhere), please leave a comment.
Until then, we’ll say it was Frank Hogg in March 1982.
Due to reasons I discussed at length in an earlier article, the Microsoft BASIC in the Color Computer recognizes no more than 32K of RAM, minus the memory used for BASIC and screen memory.
When folks figured out how to upgrade the original Color Computer to 64K (by piggybacking 32K of RAM on top of the existing chips and running some wires), BASIC could not see or use that extra memory.
Enter the Dragon
Dragon Data, which sold the CoCo “clone” Dragon computers in the U.K., improved on this limitation with their Dragon 64 computer. It would boot up in a compatibility mode with the same memory limitation as the earlier Dragon 32 machines, but allowed entering a new mode that moved things around to allow more memory for BASIC.
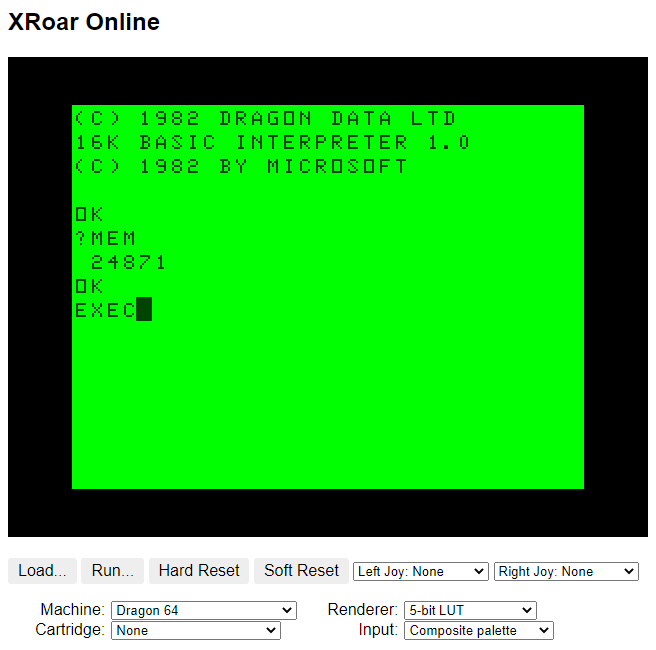
If you start up a cassette-based Dragon 64 in the XRoar Online emulator, you get 24871 bytes available to BASIC:
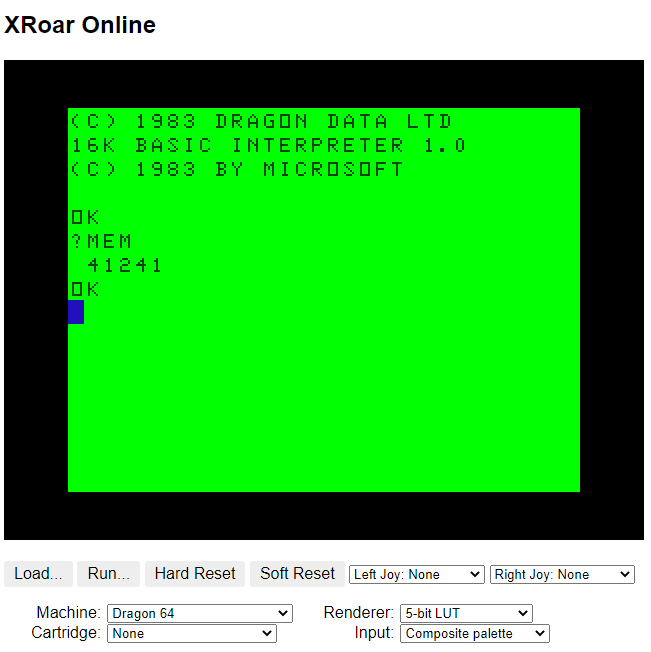
If you then typed EXEC (to execute a machine language routine), the default routine it executed would do some magic to relocate BASIC and restart it with 41241 bytes available. (Both of these values will be less if using a disk system.)
Oh how I wish we had gotten that feature added to the CoCo’s BASIC when 64K machines first came out. (There were rumors that the Deluxe Color Computer 2 would have had something like this as part of it’s new features, but that machine never came to exist beyond some mentions in the BASIC manuals.)
CoCo RAM: Don’t ask, don’t tell.
On the CoCo, once you got to 32K, the machine would show the maximum amount of memory available to BASIC — the same 24871 seen by a Dragon 32 machine.
On startup, a cassette-based CoCo has 24871 bytes available for BASIC.
If you had a 64K machine, it would still show the same value since that is all BASIC knew about. The rest of the 64K was hidden.
“Assembly Language or OS-9”
In those early years, it seemed the official line from Radio Shack was that 64K was usable only from assembly language or the OS-9 disk operating system.
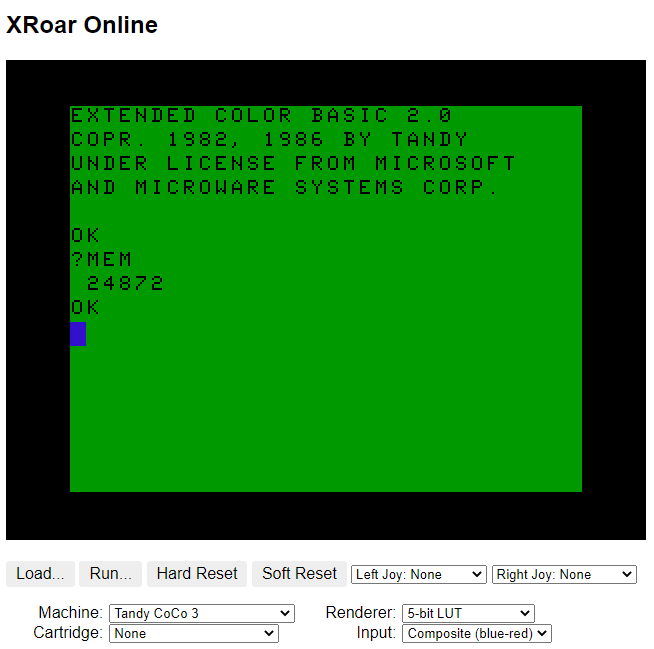
The same was true when the CoCo 3 came out in 1986. It came with 128K but could be expanded to 512K. Even though BASIC was enhanced to support the new graphics modes of the machine, it still only saw 32K available for BASIC programs. On a 512K CoCo 3, free memory for BASIC was reported as 24872:
…and now I am very curious to see where that extra byte came from.
Show me the mem’ry!
And here we are in 2022, over four decades after the first CoCo was sold in 1980, and folks are still wondering how to tell how much memory is in their machine.
One of the most suggested ways of determining if a CoCo 1 or 2 has 64K is to try to run the game Saylor Man from Tom Mix Software. It is notable for being the first CoCo game to require 64K, so if it runs … you have 64K and not just 32K.
But loading up a large program just to do a memory test isn’t the efficient way to do a memory check (even if it is the most fun way).
The second method is to run a short BASIC program that attempts to copy the BASIC ROMs in to RAM. If it works, and you can POKE to the BASIC ROM locations and change things, it proves you have 64K.
This test is convenient because it can be done by typing in a very short program in BASIC, rather than needing a way to download and transfer a tape or disk image of Sailor Man over to a CoCo.
In part 2, I’ll discuss several implementations of this “ROM to RAM” program, and then present a super simple 64K test program.