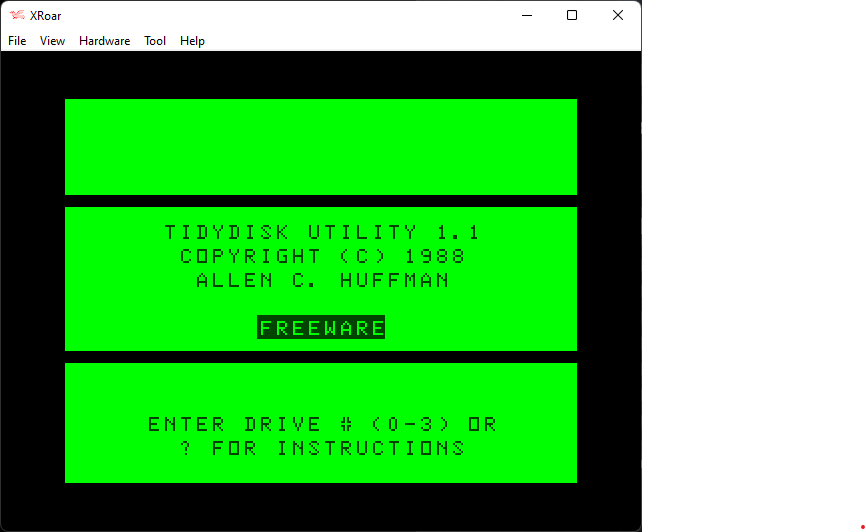
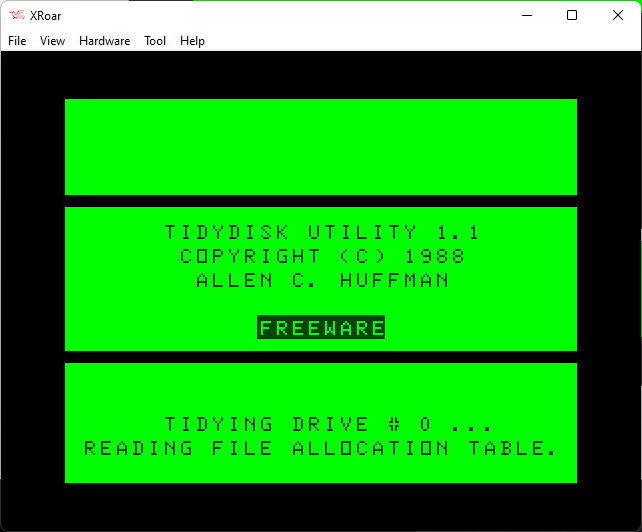
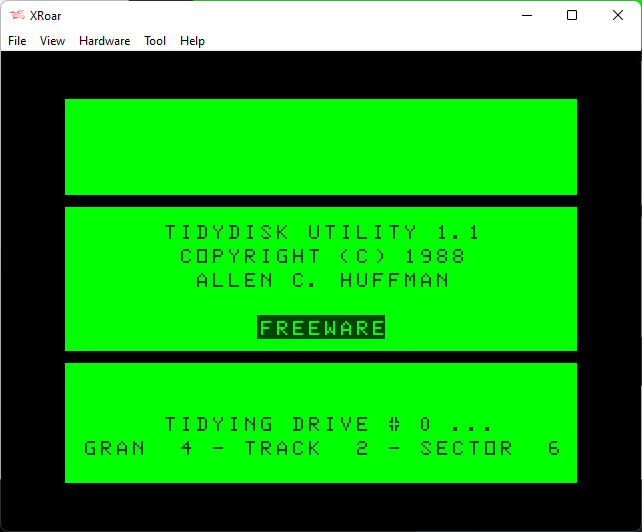
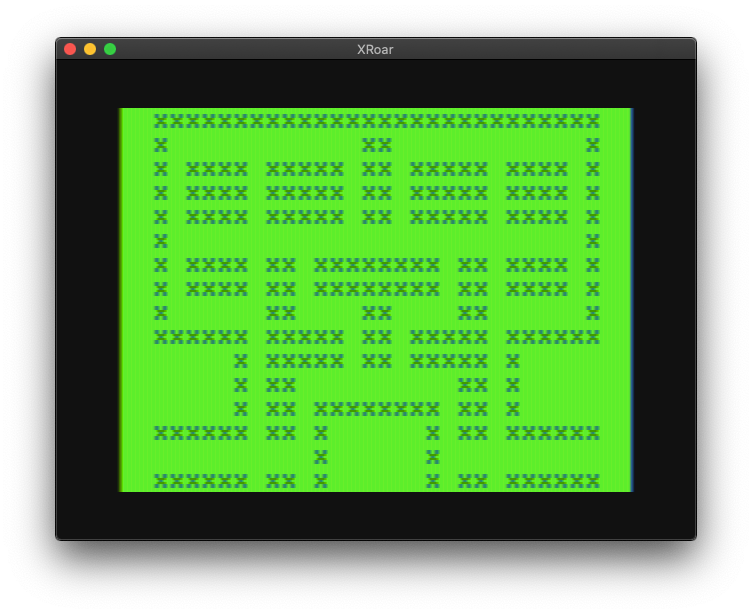
In 1987, I wrote a simple routine to display a pop-up window on the 32-column text screen of the CoCo. I am not sure what I wrote this for, but it appears I did use this routine (or a version of it) in my TIDY DISK program a year later:
It is sometimes interesting to look back on something I did 35 years ago and see how (or if) I would do it differently today. So let’s do that.
On the Color Computer Archive site is a disk image containing two versions of this routine. The first was done on 8/8/1987, and it looks like a 1.1 was created the next day. I am pleased to see I was retaining versions back then.
Using the wonderful toolshed utility decb, I was able to get a text version of the tokenized BASic program easily:
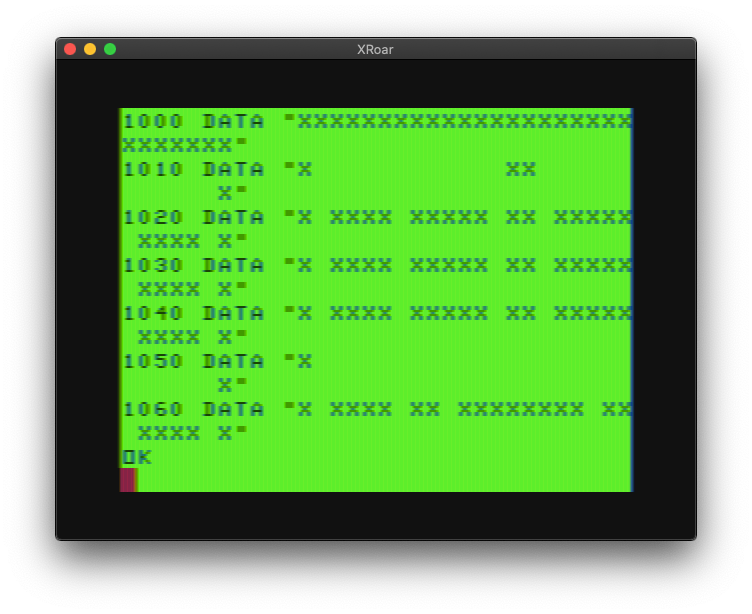
$decb dir WNDO.DSK
Directory of: WNDO.DSK,

WNDO     BAS  0  B  1
WNDO11   BAS  0  B  1

$decb list -t WNDO.DSK,WNDO.BAS
999 END
1000 REM WINDOW SUBROUTINE
1001 REM S-START W-IDTH
1002 REM A$-TEXT L-ENGTH
1005 PRINT@S,STRING$(W+1,140)CHR$(141);:FORA=1TOL:PRINT@A*32+S,CHR$(133)STRING$(W,32)CHR$(128);:NEXTA:PRINT@32*L+S,CHR$(131)STRING$(W+1,128);:B=1
1010 FORA=W TOW-8STEP-1:IFMID$(A$,A,1)=" "THENPRINT@S+1+32*B,LEFT$(A$,A);:A$=RIGHT$(A$,LEN(A$)-A)ELSENEXTA:PRINT@S+1+32*B,A$;:GOTO1020
1015 B=B+1:GOTO1010
1020 PRINT@S+32*(L-1)+(W/2-5),"press any key";
1025 IFINKEY$=""THEN1025ELSERETURN

$ decb list -t WNDO.DSK,WNDO11.BAS
999 END
1000 REM WINDOW SUBROUTINE 1.1
1001 REM  BY ALLEN C. HUFFMAN
1002 REM      8/8, 8/9/87
1003 C=4
1005 PRINT@S,CHR$(140)STRING$(W,140)CHR$(141);:FORA=1TOL:PRINT@A*32+S,CHR$(133)STRING$(W,32)CHR$(133+16*C);:NEXTA:PRINT@32*L+S,CHR$(131)STRING$(W,131+16*C)CHR$(135+16*C);:B=1
1010 FORA=W TOW-8STEP-1:IFMID$(A$,A,1)=" "THENPRINT@S+1+32*B,LEFT$(A$,A);:A$=RIGHT$(A$,LEN(A$)-A)ELSENEXTA:PRINT@S+1+32*B,A$;:GOTO1020
1015 B=B+1:GOTO1010
1020 PRINT@S+32*(L-1)+W/2-6,"press"CHR$(128)"any"CHR$(128)"key";
1025 IFINKEY$=""THEN1025ELSERETURN
It appears the first version had help in the comments, and the second replaced that with my name and version dates. Looking at a WinMerge diff of the two versions, I see this:

It looks like I basically added color support rather than just a black drop shadow, and must have fixed a bug where width needed 1 added to it. The only other change was printing “PRESS ANY KEY” with black blocks between each word in stead of spaces. I can therefore tell I used at least this 1.1 version in my TIDY DISK program.
The subroutine requires the user to set a few variables before calling it:
- S – PRINT @ position for the top left of the pop-up.
- W – width of the pop-up (in characters).
- L – length (height) of the pop-up (in lines).
- A$ – message to display inside the pop-up. The message will be word-wrapped by the routine.
It appears I also allowed the user to set the color. In line 1003, the routine sets it to 3 (white), but the user could also set C ahead of time and then GOSUB to 1005 to bypass that line and use their own color. So I’ll add:
- C – color of the drop shadow (use GOSUB 1005) if setting C.
GOSUB 1000 uses a default color, or set it yourself and GOSUB 1005. Nice.
10 C=6:S=39:W=16:L=10
20 A$="HELLO, 1987. THIS IS A COCO WINDOW POP-UP."
30 GOSUB 1005
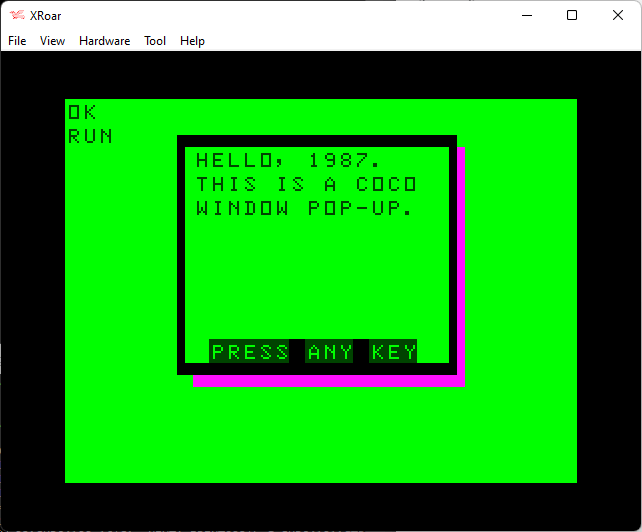
The routine itself is not very smart. It doesn’t calculate anything. The user has to specify top left, width and height and do all that work. If you want a nicely centered box, you have to figure that out. But, if you wanted to make windows at different positions, I guess it allowed that flexibility. (I expect that’s why I wrote it this way.)
We can do better.
How many lines is it, anyway?
For most uses, a centered pop-up seems good enough. The issue is knowing how many lines the message is going to take to display after being word-wrapped. The current routine scans the string starting at “width” and moving backwards until it finds a space character. It then uses LEFT$ to print just that portion, and then trims that part off using RIGHT$.
To know how many lines it will take, we have to scan the string first to count them. Then we do it again to print them. This will slow things down, but make things easier on the user.
Anatomy of a Word Wrap
There are some good old articles here about word wrap routines, with some very fast and clever ones contributed by others (way better than mine). Check out those articles for better methods that what I am about to present.
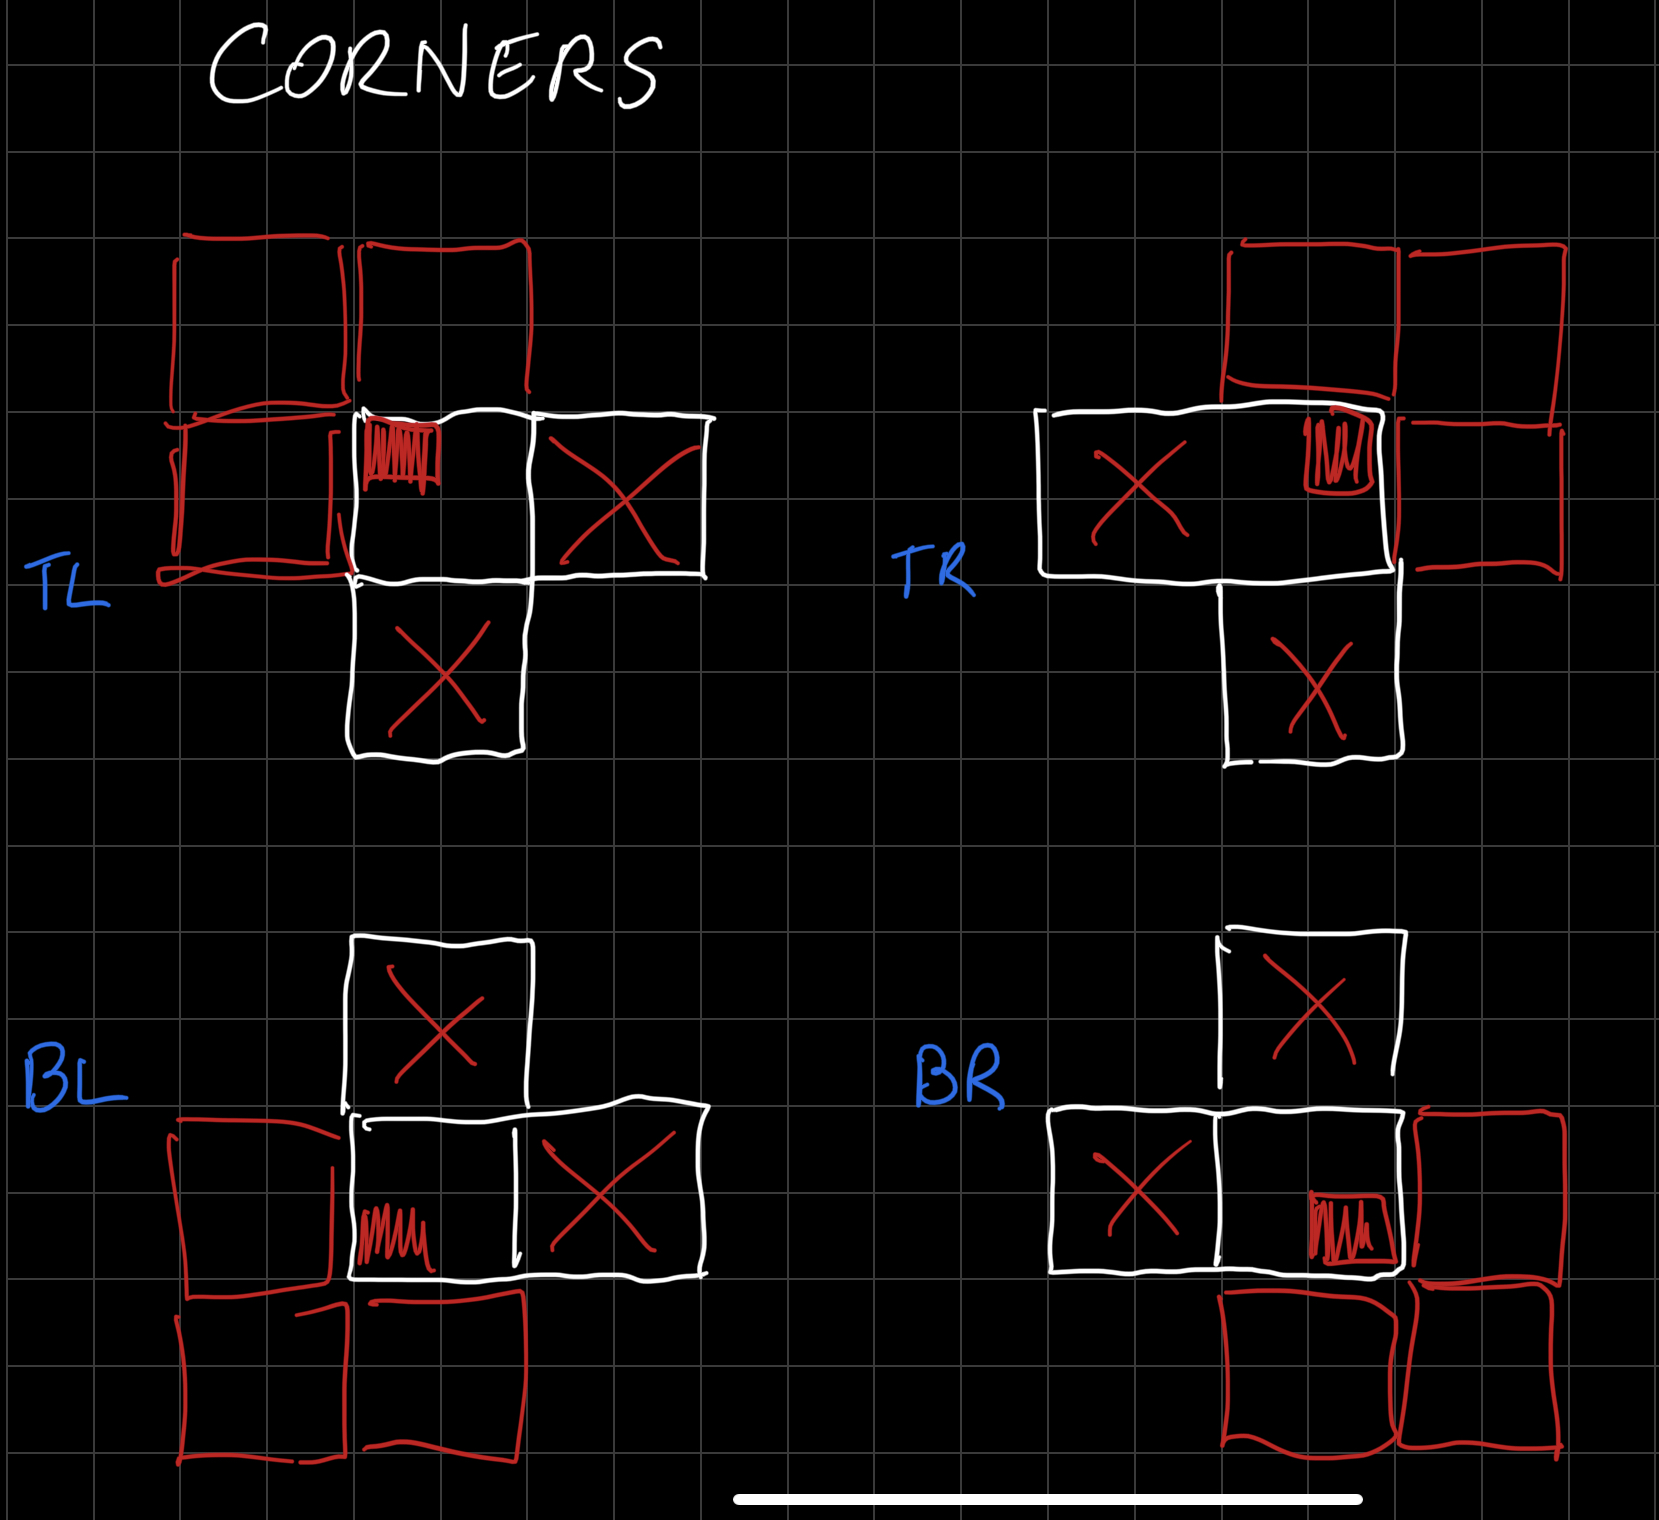
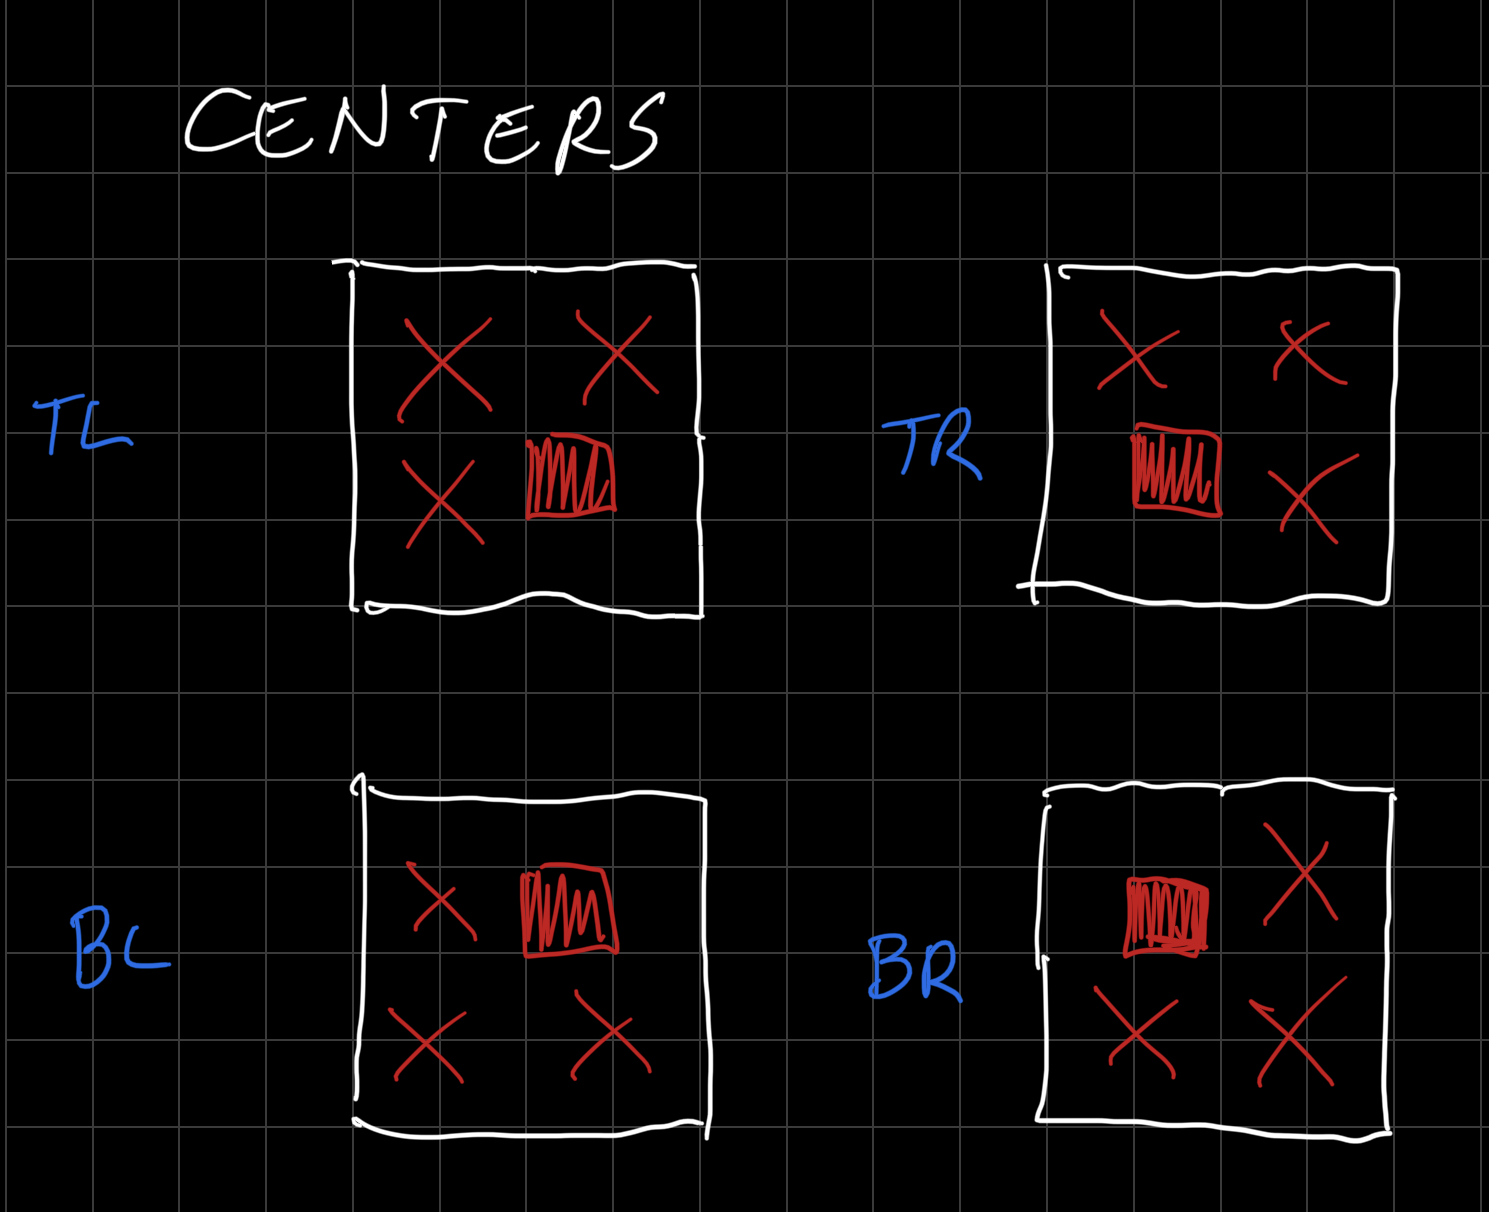
Because I need to scan the line twice — one time to count the lines, and the second for the actual word wrap — I cannot mess with the user’s string. Instead, I’ll just use variables that sell me the Start Position (SP) within the string and End Position (EP) of the width-sized chunk I am going to scan. I’ll use a Position (P) variable and start at the end and scan backwards looking for a space. If I find one, I can count that as a line (increase the line count) and then move to the next character (to skip the space) and reset the Start Position to that. The process will repeat.
Since I do not want to duplicate code, I’ll embed the “print this section of the string” code in this routine, but use another variable to determine if I actually print it or now. I’m calling it Show (SH), and if SH=0 then it just counts, otherwise it prints as it counts each line.
It’s messy, but it works.
Here is a diagram showing the process:
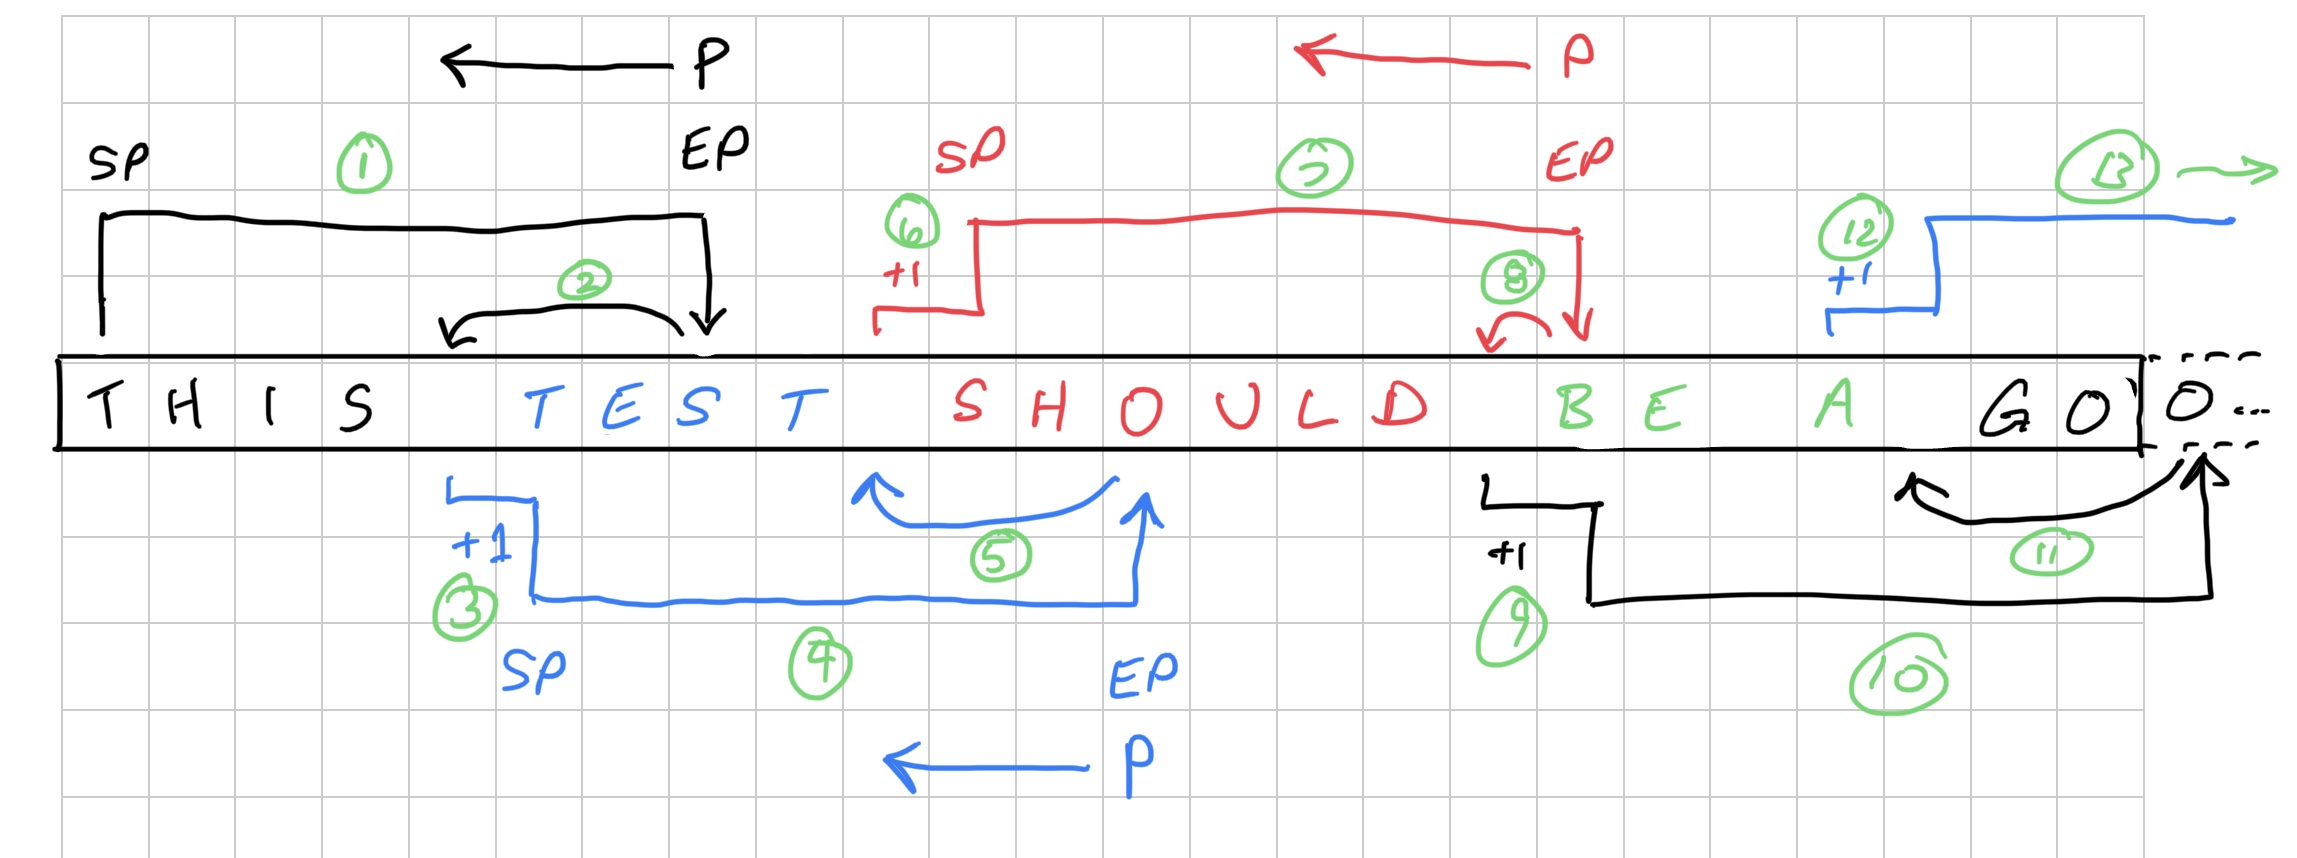
When the space is located, it knows that from SP to that space position is something to print (a line).
Easy peasy.
Except it took me way too much brane power to figure this out, and I am sure it could be massively improved.
The routine will use the user’s width (W) variable to know how wide to make the box, and adjust the text space inside accordingly (W-2, leaving room for the borders).
The user can specify C for color, or if it’s not set (0) it will be assigned a color.
The starting location (S) must also be set. This is the top left of the pop-up box, in PRINT@ format (i.e. 0 is the top left of the screen, 32 is the start of the second line, etc.)
Here is what I came up with, along with a few lines at the start to test it out. It will keep displaying random sized pop-ups with the same text over and over and over. I used this to make sure it would work with the various size and color valuies.
NOTE: If you send in a width that is too narrow, it won’t work properly. Ideally I should check for that and have a minimum size. (I’ll try to add that in the final version, since I know it needs to be at least wide enough to fit “PRESS ANY KEY”.)
10 A$="THIS IS A LONG STRING THAT I WANT TO USE TO TEST WORD WRAPPING IN MY WINDOW ROUTINE."
20 W=RND(10)+20:S=48-W/2:C=RND(8)-1
30 CLS:GOSUB 1000
40 GOTO 20

999 END
1000 REM WINDOW SUBROUTINE 2.0
1001 REM  BY ALLEN C. HUFFMAN
1002 REM 8/8, 8/9/87 & 7/27/22
1993 REM    S-START W-IDTH
1004 REM    A$-TEXT C-COLOR
1005 REM
1010 IF C=0 THEN C=4
1020 SH=0:GOSUB 1120
1030 PRINT@S,CHR$(140)STRING$(W-2,140)CHR$(141);
1040 FOR A=1 TO LC+1
1050 PRINT@S+32*A,CHR$(133)STRING$(W-2,32)CHR$(133+16*C);
1060 NEXTA
1070 PRINT@S+32*(LC+1),CHR$(131)STRING$(W-2,131+16*C)CHR$(135+16*C);
1080 SH=1:GOSUB 1120
1090 PRINT@S+32*LC+W/2-7,"press"CHR$(128)"any"CHR$(128)"key";
1100 IF INKEY$="" THEN 1100 ELSE RETURN
1110 ' CALC LINE COUNT/PRINT
1120 LC=1:SP=1:LN=LEN(A$)
1130 EP=SP+W-2:P=EP
1140 IF EP>LN THEN 1190
1150 IF MID$(A$,P,1)<>" " THEN P=P-1 ELSE 1170
1160 IF P>SP THEN 1150 ELSE 1190
1170 IF SH<>0 THEN PRINT@S+32*LC+1,MID$(A$,SP,P-SP);
1180 LC=LC+1:SP=P+1:GOTO 1130
1190 IF SH<>0 THEN PRINT@S+32*LC+1,MID$(A$,SP);
1200 LC=LC+1:RETURN
1210 RETURN

One bad thing about this is all the variables I am using. And it could also be made faster by combining lines and such.
Here are some things I would like to do next:
- Check for a minimum width (if W<x then W=x).
- Combine lines to make it smaller and faster.
- Rename variables to all start with Z.
Z? Since my subroutine uses many variables, the calling program would have to make sure to not use any of them since the subroutine would change them. Today I like the approach of starting all my subroutine variables with Z, and just noting that “Zx variables are reserved for subroutines.” That way I can use any variables I want in my main program — other than the ones that are specifically used to pass values in to the subroutine — without worrying about a conflict.
I guess that means there will be a part 2. Until then, please comment with any ideas you have on improving this.
Until next time…