While writing up my article on Color BASIC memory, I ran across something I was unaware of. Special thanks to William “Lost Wizard” Astle for his responses on the CoCo mailing list that got me pointed in the right direction…
BASIC memory looks like this:
+-------------+ 0
| SYSTEM USE  |
+-------------+ 1024
| TEXT SCREEN |
+-------------+ 1536
| DISK USE    |
+-------------+
| HI-RES GFX  |
+-------------+
| BASIC PROG  |
+-------------+
| VARIABLES   |
+-------------+
| ARRAYS      |
+-------------+
| FREE MEMORY |
+-------------+
| STRINGS     |
+-------------+ 32767
Without Disk BASIC, “DISK USE” is not there, and without Extended BASIC, neither is “HI-RES GFX”.
To determine free memory available to BASIC (for program, variables or arrays), you would subtract the end of “ARRAYS” from the start of “STRINGS.” The locations that store this are at &H1F-&H20 (31-32) and &H21-&H22 (33-34).

Each of those two byte locations holds a 16-bit address to some area of RAM. You can get the values by taking the first byte, multiplying it by 256, and adding the second byte.
PRINT "MEMSIZE:";PEEK(&H27)*256+PEEK(&H28)
Here is a program that prints out some pertinent information:
0 ' BASINFO2.BAS

10 ' START OF BASIC PROGRAM
20 BS=PEEK(25)*256+PEEK(26)

30 ' START OF VARIABLES
40 VS=PEEK(27)*256+PEEK(28)

50 ' START OF ARRAYS
60 SA=PEEK(29)*256+PEEK(30)

70 ' END OF ARRAYS (+1)
80 EA=PEEK(31)*256+PEEK(32)

90 ' START OF STRING STORAGE
100 SS=PEEK(33)*256+PEEK(34)

110 ' START OF STRING VARIABLES
120 SV=PEEK(35)*256+PEEK(36)

130 ' TOP OF STRING SPACE/MEMSIZ
140 ST=PEEK(39)*256+PEEK(40)

150 PRINT "PROG  SIZE";(VS-BS),"STR SPACE";(ST-SS)
170 PRINT "ARRAY SIZE";(EA-SA)," STR USED";(ST-SV)
180 PRINT " VARS SIZE";(SA-VS)," FREE MEM";(SS-EA)

999 END
And here is that PRINT code, without using any variables. It could be made a subroutine that you could GOSUB to and see status of your memory usage:
10 PRINT "PROG  SIZE";(PEEK(27)*256+PEEK(28))-(PEEK(25)*256+PEEK(26)),;
20 PRINT "STR SPACE";(PEEK(39)*256+PEEK(40))-(PEEK(33)*256+PEEK(34))
30 PRINT "ARRAY SIZE";(PEEK(31)*256+PEEK(32))-(PEEK(29)*256+PEEK(30)),;
40 PRINT " STR USED";(PEEK(39)*256+PEEK(40))-(PEEK(35)*256+PEEK(36))
50 PRINT " VARS SIZE";(PEEK(29)*256+PEEK(30))-(PEEK(27)*256+PEEK(28)),;
60 PRINT " FREE MEM";(PEEK(33)*256+PEEK(34))-(PEEK(31)*256+PEEK(32))
There are a few mysteries here. First, if I wanted to get the size of my program, I would take MEMSIZE and subtract ARYEND. That would be this:
PRINT (PEEK(33)*256+PEEK(34))-(PEEK(31)*256+PEEK(32))
But that disagrees with that PRINT MEM shows:

There are some bytes missing somewhere. This made me wonder which was correct, so I consulted the PRINT MEM code in Color BASIC Unravelled. It had comments that shed some light on what is going on:

“This is not a true indicator of free memory because BASIC requires a STKBUF size buffer for the stack for which MEM does not allow.”
– Color BASIC Unraveled, page B34.
On page A1, I see the definition for STKBUF:
STKBUF EQU 58 STACK BUFFER ROOM
I see code in the ROM that takes this in to consideration, adding the value of ARYEND plus the value of STKBUF.

That routine is used to test if enough memory is available for something, and if there isn’t, it returns the ?OM ERROR.
But the difference I get is 12 bytes, not 58. What it BOTSTK? It looks like it is just before the pointer variables I have been working with. I just did not know what it was.
0017 BOTSTK RMB 2 BOTTOM OF STACK AT LAST CHECK
&H17 would be memory location 23. Let’s see where it is by doing…
PRINT PEEK(23)*256+PEEK(24)
That gives me a location about 30 bytes before FRETOP (start of string storage). Here is the program I am using:
0 ' BASPTRS.BAS

10 ' BOTTOM OF STACK
20 SP=PEEK(23)*256+PEEK(24)

30 ' START OF BASIC PROGRAM
40 BS=PEEK(25)*256+PEEK(26)

50 ' START OF VARIABLES
60 VS=PEEK(27)*256+PEEK(28)

70 ' START OF ARRAYS
80 SA=PEEK(29)*256+PEEK(30)

90 ' END OF ARRAYS (+1)
100 EA=PEEK(31)*256+PEEK(32)

110 ' START OF STRING STORAGE
120 SS=PEEK(33)*256+PEEK(34)

130 ' START OF STRING VARIABLES
140 SV=PEEK(35)*256+PEEK(36)

150 ' TOP OF STRING SPACE/MEMSIZ
160 ST=PEEK(39)*256+PEEK(40)

180 PRINT "START OF PROG",BS;(VS-BS)
190 PRINT "START OF VARS",VS;(SA-VS)

200 PRINT "START OF ARRAYS",SA;(EA-SA)
210 PRINT "END OF ARRAYS+1",EA

215 PRINT "BOTTOM OF STACK",SP

229 PRINT "START/STR STORE",SS;(ST-SS)
230 PRINT "START/STR VARS",SV;(ST-SV)
240 PRINT "TOP OF STRINGS",ST

250 PRINT "FREE MEMORY",(SP-EA)

999 END

William clarified a bit of this in a follow-up post.
Actually, currently available memory would be approximately the difference between BOTSTK and ARYEND less the STKBUF amount. MEM neglects to add the STKBUF adjustment in when it calculates the difference. Total usable memory under current PMODE/FILES/CLEAR settings would be the difference between BOTSTK and TXTTAB.
– William Astle, 7/8/2022
Note that the stack (and consequently the BOTSTK value) will grow downward from FOR loops, GOSUB, and expression evaluation. Expression evaluation can use a surprising amount of stack space depending on how many times it has to save state to evaluate a higher precedence operation, how many function calls are present, etc.
ARYEND is the top of all the memory used by the program itself, PMODE graphics pages, disk buffers and file descriptors, scalar variables, and arrays.
When calculating OM errors, it takes ARYEND, adds the amount of memory requested, adds the STKBUF amount, and then compares that with the current stack pointer. It does the comparison by storing S since you can’t directly compare two registers.
STKBUF is 58 for whatever reason. That’s sufficient to allow for a full interrupt frame (12 bytes) plus a buffer so routines can use the stack for saving registers, routine calls, etc., within reason, without having to continually do OM checks. It does this to prevent corrupting variables when memory is tight. Even so, there may be a few routines in Disk Basic that may still cause the stack to overflow into variable space when memory is very tight.
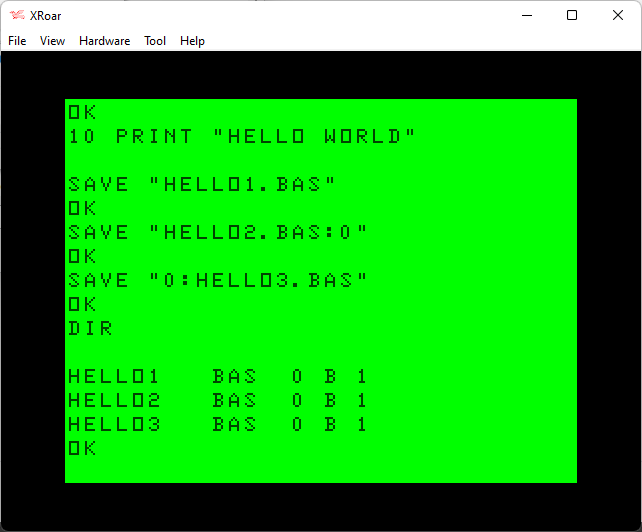
So how can we test? Using the XRoar emulator, I started with a standard 64K CoCo with Disk BASIC. PRINT MEM returns 22832 bytes free.

For testing, I’ll create one line of BASIC that is just a REM statement:
10 REM
Now PRINT MEM shows 22817 bytes free. That is 6 bytes less, which is two bytes for where the next line will be (38 7), two bytes for the line number (00 10), the token for REM (130), and a NULL byte (0). Each new line number takes up 5 bytes plus whatever the content of the line is.
Now I want to reserve most of that memory for strings. I’ll do CLEAR 22800. After this, PRINT MEM shows 207… That can’t be right. Shouldn’t it really be 17?
In this case, the original PRINT MEM was already counting 200 bytes reserved for strings. When I did CLEAR 22800, it was release that 200 bytes, then redoing it as 22800 (so, 228600+200).
Let’s start over…
Okay, so let’s redo this. I restarted the CoCo back to where PRINT MEM shows 22823.
The next thing I did was type CLEAR 0 to reserve NO string space, then check PRINT MEM. It shows 23023 — the largest BASIC program I can have on this disk-based machine, unless I deallocate some graphics memory (6K is reserved for that, by default).
Now I enter in the “10 REM” line, and PRINT MEM again. It shows 23017 — 6 bytes less, as expected.
I try to type CLEAR 23017, which gives ?OM ERROR.
I back that off a bit to CLEAR 22960. PRINT MEM shows ?OM ERROR. And now I have hosed BASIC. Even CLEAR 0 now returns ?OM ERROR.
Is this a bug? I can still EDIT my line 10, and LIST it, but while CLEAR by itself works, it changes nothing. I’ve managed to consume so much memory, I can’t run the command I need to give it back.
Let’s start over again…
CoCo reset. CLEAR 0 entered. PRINT MEM shows 22823. 10 REM typed. PRINT MEM shows 23017.
This time I’ll try CLEAR 22950 to give BASIC a bit more room. PRINT MEM shows 67.
If this is accurate, I should be able to add 67 characters to the end of that REM statement.
I type “EDIT 10”, then “X” to extend to the end. I enter ten characters, then ENTER.
10 REM1234567890
PRINT MEM gives me an ?OM ERROR.
Now, the program still LISTS and would run (if it did anything), but clearly other things are broken.
I EDIT 10 and try to add another ten characters.
10 REM12345678901234567890
?OM ERROR.
And now, LINE 10 is completely gone! EDIT must try to “add” a line when it’s done, and if there’s no memory, the line is … erased?
PRINT MEM still shows 67, even though the “10 REM” seems to be gone. Where did that memory go? I try adding a total of 15 characters after the REM:
10 REM123456789012345
That works. PRINT MEM shows ?OM ERROR.
Let’s start over again again.
I reboot the CoCo, then CLEAR 22950. PRINT MEM shows 73 (there is no line number yet).
This “should” mean I could enter a line (5 bytes) that has 73-5=68 characters. But, if I tried to type anything longer than 16, I get ?OM ERROR (REM token is one byte, then 15 characters).
This tells me that when PRINT MEM shows me 67, I really only had 5+16=21 bytes available. 67-21=46 bytes difference.
Looking back at my BASIC POINTERS program output:
…I see the calculated free memory was 22042, versus PRINT MEM showing 22038. That is only four bytes different.
Questions keep stacking up
It is clear you cannot use PRINT MEM to know how much room you will have for a BASIC program. It is more of a guideline, within 50 or so bytes.
The wildcard is probably this mysterious (to me) “stack” that BASIC needs for operation. Depending on what is going on, the stack in-use may be larger or smaller, but the max limit is 58 bytes. And, STKBOT notes that is is “bottom of stack at last check” so it may not be reflecting the actual stack at the particular moment when the code looked at it.
I really don’t have any conclusions from this. When I started writing, I expected I’d find a set of PEEKs I could subtract to get a more accurate PRINT MEM value.
But I failed.
Anyone have any suggestions?
Until then…