Author Archives: Allen Huffman

About Allen Huffman

Co-founder of Sub-Etha Software.

C strcat, strcpy and armageddon, part 3

See also: part 1, part 2, part 3, part 4, part 5 and part 6.

Previously, I discussed a way to make string copies safer by using strncpy(). I mentioned there would be a bit of extra overhead and I’d like to discuss that. This made me wonder: how much overhead? I decided to try and find out.

First, I created a very simple test program that copied a string using strcpy(), or strncpy() (with the extra null added).

#include <stdio.h>
#include <stdlib.h>
#include <string.h>

#define BUFSIZE 20

//#define SMALL

int main()
{
    char buffer[BUFSIZE];

#ifdef SMALL
    // Smaller and faster, but less safe.
    strcpy(buffer, "Hello");
#else
    // Larger and slower, but more safe.
    strncpy(buffer, "Hello", BUFSIZE-1);
    buffer[BUFSIZE-1] = '\0';
#endif

    // If you don't use 'buffer', it may be optimized out.
    puts(buffer);

    return EXIT_SUCCESS;
}

Since I am lazy, I didn’t want to make two separate test programs. Instead, I used a #define to conditionally compile which version of the string copy code I would use.

When I built this using GCC for Windows (using the excellent Code::Blocks editor/IDE), I found that each version produced a .exe that was 17920 bytes. I expect the code size difference might start showing up after using a bunch of these calls, so this test program was not good on a Windows compiler.

Instead, I turned to the Arduino IDE (currently version 1.6.7). It still uses GCC, but since it targets a smaller 16-bit AVR processor, it creates much smaller code and lets me see size differences easier. I modified the code to run inside the setup() function of an Arduino sketch:

#define BUFSIZE 10
#define SMALL

void setup() {
    // volatile to prevent optimizer from removing it.
    volatile char buffer[BUFSIZE];

#ifdef SMALL
    // Smaller and faster, but less safe.
    strcpy((char)buffer, "Hello");
#else
    // Larger and slower, but more safe.
    strncpy((char)buffer, "Hello", BUFSIZE-1);
    buffer[BUFSIZE-1] = '\0';
#endif
}

void loop() {
    // put your main code here, to run repeatedly:
}

Then I selected Sketch Verify/Compile (Ctrl-R, or the checkmark button). Here are the results:

  • SMALL (strcpy) – 540 bytes
  • LARGE (strncpy) – 562 bytes

It seems moving from strcpy() to strncpy() would add only 22 extra bytes to my sketch. (Without the “buffer[BUFSIZE-1] = ”;” line, it was 560 bytes.)

Now, this does not mean that every use of strncpy() is going to add 20 bytes to your program. When the compiler links in that library code, only one copy of the strncpy() function will exist, so this is more of a “one time” penalty. To better demonstrate this, I created a program that would always link in both strcpy() and strncpy() so I could then test the overhead of the actual call:

#define BUFSIZE 10
#define SMALL

void setup() {
    // volatile to prevent optimizer from removing it.
    volatile char buffer[BUFSIZE];

    // For inclusion of both strcpy() and strncpy()
    strcpy((char)buffer, "Test");
    strncpy((char)buffer, "Test", BUFSIZE);

#ifdef SMALL
    // Smaller and faster, but less safe.
    strcpy((char)buffer, "Hello");
#else
    // Larger and slower, but more safe.
    strncpy((char)buffer, "Hello", BUFSIZE-1);
    //buffer[BUFSIZE-1] = '\0';
#endif
}

void loop() {
    // put your main code here, to run repeatedly:
}

Now, with both calls used (and trying to make sure the optimizer didn’t remove them), the sketch compiles to 604 bytes for SMALL, or 610 bytes for the larger strncpy() version. (Again, without the “buffer[BUFSIZE-1] = ”;” line it would be 608 bytes.)

Conclusions:

  1. The strncpy() library function is larger than strcpy(). On this Arduino, it appeared to add 20 bytes to the program size. This is a one-time cost just to include that library function.
  2. Making a call to strncpy() is larger than a call to strcpy() because it has to deal with an extra parameter. On this Arduino, each use would be 4 bytes larger.
  3. Adding the null obviously adds extra code. On this Arduino, that seems to be 2 bytes. (The optimizer is probably doing something. Surely it takes more than two bytes to store a 0 in a buffer at an offset.)

Since the overhead of each use is only a few bytes, there’s not much of an impact to switch to doing string copies this safer way. (Assuming you can spare the extra 20 bytes to include the library function.)

Now we have a general idea about code space overhead, but what about CPU overhead? strncpy() should be slower since it is doing more work during the copy (checking for the max number of characters to copy, and possibly padding with null bytes).

To test this, I once again used the Arduino and it’s timing function, millis(). I created a sample program that would do 100,000 string copies and then print how long it took.

#define BUFSIZE 10
//#define SMALL

void setup() {
    // volatile to prevent optimizer from removing it.
    volatile char buffer[BUFSIZE];
    unsigned long startTime, endTime;

    Serial.begin(115200); // So we can print stuff.

    // For inclusion of both strcpy() and strncpy()
    strcpy((char)buffer, "Test");
    strncpy((char)buffer, "Test", BUFSIZE);

    // Let's do this a bunch of times to test.
    startTime = millis();

    Serial.print("Start time: ");
    Serial.println(startTime);

    for (unsigned long i = 0; i < 100000; i++)
    {
#ifdef SMALL
        // Smaller and faster, but less safe.
        strcpy((char)buffer, "Hello");
#else
        // Larger and slower, but more safe.
        strncpy((char)buffer, "Hello", BUFSIZE - 1);
        buffer[BUFSIZE - 1] = '\0';
#endif
    }
    endTime = millis();

    Serial.print("End time  : ");
    Serial.println(endTime);

    Serial.print("Time taken: ");
    Serial.println(endTime - startTime);
}

void loop() {
    // put your main code here, to run repeatedly:
}

When I ran this using SMALL strcpy(), it reports taking 396 milliseconds. When I run it using strncpy() with the null added, it reports 678 milliseconds. strcpy() appears to take about 60% of the time strncpy() does, at least for this test. (Maybe. Math is hard.)

Now, this is a short string that requires strncpy() to pad out the rest of the buffer. If I change it to use a 9 character string (leaving one byte for the null terminator):

#ifdef SMALL
// Smaller and faster, but less safe.
strcpy(buffer, "123456789");
#else
// Larger and slower, but more safe.
strncpy(buffer, "123456789", BUFSIZE - 1);
buffer[BUFSIZE-1] = '';
#endif

…no padding will be done. Without padding, the SMALL version takes 572 and the strncpy()/null version takes… 478!?!

Huh? How can this be? How did the “small” version suddenly get SLOWER? Well, before, strcpy() only had to copy the five characters of “Hello” plus a null then it was done, while strncpy() had to copy “Hello” then pad out five nulls to fill the buffer. Once both had to do the same amount of work (copying nine bytes and a null), it appears that strncpy() is actually faster! (Your mileage may vary. Different compilers targeting different processors may generate code in vastly different ways.)

Perhaps there is just some optimization going on when the destination buffer size is know. (Note to self: Look in to the GCC strncpy source code and see what it does versus strcpy.)

Conclusion:

  • strncpy() isn’t necessarily going to be slower (at least on this Arduino)!
  • strncpy() might be significantly slower if you copy a very short string (“Hi”) in to a very long buffer (char buffer[80];).

Buyer Programmer beware!

I am sure glad we (didn’t) clear that up. In the next part, I’ll get back to talking about appending strings using strcat() and how to make that safer.

To be continued…

C strcat, strcpy and armageddon, part 2

See also: part 1, part 2, part 3, part 4, part 5 and part 6.

In part 1, I gave a quick overview of the C library call, strcpy(), and showed how it is used to copy a string in to a buffer.  I specifically wanted to show a problem that can happen if you copy more data than the buffer can hold (a buffer overrun), and show a simple way to fix it using strncpy().

The final example would limit how much data was copied to the number of bytes the buffer could hold:

char buffer[10];
strncpy( buffer, "I forgot how much room I have", 10);

Not only does strncpy() limit how many characters will be copied, it also does something else. If the source string is shorter than the maximum number you specify to copy, it pads the rest of the destination buffer with null characters (zeros). If you give it a null terminated string shorter than the max…

strncpy( buffer, "HI", 10);

…that would result in:

+---+---+---+---+---+---+---+---+---+---+
| H | I | 0 | 0 | 0 | 0 | 0 | 0 | 0 | 0 |
+---+---+---+---+---+---+---+---+---+---+

Even though it’s clearly stated in the C library manual, I guess I never read that part. I had no idea it did that.

If I were to write my own crude implementation of strncpy(), it might look something like this:


// My own crude implementation of strncpy()
char * myStrncpy( char *destination, const char *source, size_t num )
{
size_t i;
// Now we will begin copying characters until we copy a null (0) or
// we have copied num characters.
for (i=0; i<num ; i++)
{
// If we have found a null character...
if (source[i]=='\0') break; // Exit the for loop.
// Copy a character over.
destination[i] = source[i];
} // Here we have copied 'i' characters. // If less than num, fill the rest with nulls. while(i < num) { destination[i] = '\0'; i++; } return destination; // Why? Because it just does. }

While strncpy() will prevent us from a buffer overrun, passing in a string that is too large will create a different problem: It will not leave us with a usable C string. Per the cplusplus.com page on strncpy:

No null-character is implicitly appended at the end of destination if source is longer than num. Thus, in this case, destination shall not be considered a null terminated C string (reading it as such would overflow).

strncpy() will copy characters until it has copied a null (0) or has copied a max number of bytes you specify with the third parameter. If you copy that full amount, and no null was copied, the destination buffer will not have a null terminator. It won't be a C string, and using it as one will do strange things.

char buffer[10];
strncpy( buffer, "I forgot how much room I have", 10);
+---+---+---+---+---+---+---+---+---+---+
| I |   | f | o | r | g | o | t |   | h |
+---+---+---+---+---+---+---+---+---+---+

In the above example, you end up with buffer full of 10 bytes of data without a null character at the end. You won't be able to use it with any of the C string functions like printf(), strlen(), strcat(), etc. Well, you can, but you might not get what you expect.

If you try to use it, these functions will continue through memory until they find the next null character after the buffer. If the next byte in memory after the buffer just happens to be a zero, everything will work and you won't see the problem. If the next 1K of memory is garbage that has NO zeros in it, the functions would begin at buffer and keep going as it if found a really long 1K string that starts out with what you expected, followed by garbage.

On operating systems that have memory protection, the program might even get terminated if it seeks through memory and ends up trying to read (still looking for that null byte) RAM that doesn't belong that that process.

Don't do that. Instead, when using strncpy(), always make sure you manually null terminate the buffer in case this situation occurs:

// Copy up to 10 characters.
strncpy( buffer, "I forgot how much room I have", 10);
// null terminate destination at 10th byte (bytes 0-9)
buffer[9] = '';

The end result of that will be up to 9 characters followed by a null. (See #3 below for an optimization tip.)

+---+---+---+---+---+---+---+---+---+---+
| I |   | f | o | r | g | o | t |   | 0 |
+---+---+---+---+---+---+---+---+---+---+

Because of needing a null at the end, if you truly did want a 10 character string, you would have to make the buffer 11 bytes large, so it can hold the 10 characters you want plus the null character at the end.

Therefore, my suggestion for doing string copies is to do the following:

  1. For clarity, use a #define for how large the buffer is, so you have that define available to use in strncpy(). This will mean only one place in code to change the buffer size if you need to (rather than having to edit every function instance of strncpy() that used it).
  2. Always manually null terminate the last byte of the destination buffer after the copy, just in case a string as large or larger than the buffer is copied to it. (Yes, this will add to your code and take more CPU time, but we are going for safety here.)
  3. Optimization tip: Since you are going to manually terminate the final byte anyway, you can copy one less byte in strncpy(). (There is no need to have strncpy() write out to the final byte only to have you write to that final byte again.)
#define BUFSIZE 10
char buffer[BUFSIZE];
strncpy(buffer, "Here is my stuff", BUFSIZE-1);
buffer[BUFSIZE-1] = '';

Above, we will allow up to 9 bytes to be copied in to the buffer (BUFSIZE-1), then we will null terminate the 10th byte (remember bytes are numbered starting at zero, so 0-9, therefore BUFSIZE-1 is 9, the 10th byte of the buffer).

If you truly did want to be able to hold a 10 character string, just add one to the BUFSIZE define. None of the other code will have to be touched.

Get in to that simple habit and your strncpy() will now not create a buffer overflow, and will never create a non-terminated C string.

And before you say it . . .

Now, obviously, if YOU are copying a literal "string" inside your own code, you can know exactly how large it is so using strcpy() is perfectly safe (and more efficient if you don't need the rest of the destination buffer padded with zeros). BUT, if you code using strncpy() all the time, you will reduce the chances of you changing something later on that might cause you grief:

strcpy( buffer, "Game Over" );
...later changed to...
strcpy( buffer, "Game over, dude! You suck!" );

Above, a simple change to a message might end up crashing your program because you forgot how large buffer was.

In the next installment, we will take a look at strcat() and appending strings.

C strcat, strcpy and armageddon, part 1

See also: part 1, part 2, part 3, part 4, part 5 and part 6.

I am pretty sure writing crash-proof code used to be a thing. Back when computers were simpler, and an entire project was done by one developer, it was much rarer to find a glaring bug in a piece of released software.

Today I’d like to share some things you may never have known, or thought about, when it comes to standard C library string manipulation calls.

Upon the conclusion of this series, you will know some very simple things to do to make your program a bit more crash proof just by using “safer” versions of C string calls. Let’s begin with the “less safe” calls.

From the very-useful cplusplus.com website:

  • strcat( char *destination, const char *source ) – Concatenate strings. Appends a copy of the source string to the destination string. The terminating null character in destination is overwritten by the first character of source, and a null-character is included at the end of the new string formed by the concatenation of both in destination.
  • strcpy( char *destination, const char *source ) – Copy string. Copies the C string pointed by source into the array pointed by destination, including the terminating null character (and stopping at that point).

    To avoid overflows, the size of the array pointed by destination shall be long enough to contain the same C string as source (including the terminating null character), and should not overlap in memory with source.

These simple functions allow us to copy, append and compare null terminated strings. A null is a zero that indicates the end of a string. Consider the string “HELLO WORLD”:

char *message = "HELLO WORLD";

In memory would be the characters “HELLO WORLD” followed by a 0 to indicate the end of the string:

+---+---+---+---+---+---+---+---+---+---+---+---+---+
| H | E | L | L | O |   | W | O | R | L | D | ! | 0 |
+---+---+---+---+---+---+---+---+---+---+---+---+---+

When we control everything, and know exactly what we are doing, strings are safe. But in the real world, there are some very serious problems that can happen with strings that can cause crashes from memory corruption. At best, this may just be annoying if your Arduino sketch won’t run, but at worst, it could mean Armageddon if the corruption is on a system that controls nuclear missiles.

Let’s discuss some very simple habits to get in to when using strings in C that will reduce the chances of an atomic meltdown. Or your blinking LEDs from stopping blinking…

First, here is an example of the problem. Suppose you have a 10-byte string buffer:

char buffer[10];

Somewhere in memory will be 10 bytes reserved for that buffer:

+---+---+---+---+---+---+---+---+---+---+
|   |   |   |   |   |   |   |   |   |   | <- buffer
+---+---+---+---+---+---+---+---+---+---+

You can load a string in to that buffer using strcpy() like this:

strcpy( buffer, "HELLO" );

Then buffer will contain your string, including the null character at the end:

+---+---+---+---+---+---+---+---+---+---+
| H | E | L | L | O | 0 |   |   |   |   | <- buffer
+---+---+---+---+---+---+---+---+---+---+

Anything else in the buffer may be random junk from what might have been in that memory before the buffer was allocated. If this was a concern, we could have initialized that buffer memory ahead of time by doing something like this:

char buffer[10] = { 0 };

…or in your code, you could use memset() to clear the contents of the buffer:

memset( buffer, 0, 10 ); // Initialize buffer with zeros

But I digress. (Not to self: I should share some pros and cons of initializing data like that sometime.)

When you control the world, you can do things like this safely. But what if you forget how large buffer is, and try to load something larger in to it?

strcpy( buffer, "I forgot how much room I have" );

strcpy() will gladly start copying everything you give it up until it finds a null at the end of the string. In C, when you created a “quoted string” it automatically has a null added to the end of it.

Thus, it begins copying “I forgot how…” in to the 10 bytes of buffer, and keeps on going well past the end of buffer, overwriting whatever happens to be in memory past that area. This is a very common mistake.
Suppose you had created two buffers, and the compiler created them in memory next to each other:

char buffer[10];
char launchCode[10];

As the above strcpy() began writing to buffer, it would fill up buffer then continue to write over part of launchCode, corrupting whatever was there. This is bad, and you might not even notice if if you hadn’t checked launchCode to see if it was still intact.

+---+---+---+---+---+---+---+---+---+---+
| I |   | f | o | r | g | o | t |   | h | <- buffer
+---+---+---+---+---+---+---+---+---+---+
| o | w |   | m | u | c | h |   | r | o | <- launchCode
+---+---+---+---+---+---+---+---+---+---+
| o | m |   | I |   | h | a | v | e | 0 | ...other memory...
+---+---+---+---+---+---+---+---+---+---+

Worse, you might have had other types of variables there for counters, high scores or mom’s birthday, and overwriting the buffer might end up corrupting some numeric variable and cause your program to behave in unexpected ways. This can be madness to figure out :)

The solution is to use a special version of string copy that lets you specify the maximum number of characters it will copy before it stops.

  • strncpy( char *destination, const char *source, size_t num ) – Copy characters from string. Copies the first num characters of source to destination. If the end of the source C string (which is signaled by a null-character) is found before num characters have been copied, destination is padded with zeros until a total of numcharacters have been written to it.
    No null-character is implicitly appended at the end of destination if source is longer than num. Thus, in this case,destination shall not be considered a null terminated C string (reading it as such would overflow).

    destination and source shall not overlap (see memmove for a safer alternative when overlapping).

By using this, and specifying the max size of the destination buffer, we can prevent the overrun and life will be perfect and happy:

strncpy( buffer, "I forgot how much room I have", 10 );

…or will it?

+---+---+---+---+---+---+---+---+---+---+
| I |   | f | o | r | g | o | t |   | h | <- buffer
+---+---+---+---+---+---+---+---+---+---+
|   |   |   |   |   |   |   |   |   |   | <- launchCode
+---+---+---+---+---+---+---+---+---+---+

That looks fine, doesn’t it?

In the next part, I’ll demonstrate why the above example is bad, and show you an easy way to make it more bullet-proof. Maybe you see it already… (Hint: The description of strncpy specifically mentions the problem.)

I’ll also discuss appending strings with strcat() and the similar problems that happen there, plus a few unexpected things I did not realize about these functions until I was digging in to them this week for a work project.

To be continued…

Bitcoin is less anonymous than cash

This article is written to address a peeve of mine/ I keep reading/hearing “bitcoin is anonymous” and warnings about how terrorists and drug dealers can use it for bad purposes. While this is true, they are far safer doing illegal activities with cash. If you are somehow unaware of Bitcoin, check out the wikipedia page for a good overview.

Bitcoin Summary

Basically, bitcoin is like PayPal except it uses its own currency (bitcoin) instead of U.S. dollars. You have to have internet access to transfer funds (just like you do with PayPal or a credit card). Without an internet connection, you cannot send or receive bitcoin. (Just like PayPal, and just like credit cards, though with credit cards a business could use a paper imprint of the card and run that through later, trusting the buyer. I am not sure if there is any way to do this offline with PayPal or bitcoin.)

Unlike PayPal, bitcoin is decentralized. If PayPal goes down, you can’t use PayPal. Bitcoin works like peer-to-peer file sharing services do. There is no master bitcoin server. Instead, thousands of bitcoin servers are running around the world, creating a vastly redundant network with no central point of failure.

Obtaining Bitcoin

You earn bitcoin just like you earn U.S. dollars — you can do work for someone who pays you in bitcoin, or, you can exchange/sell stuff for it, like how you might give someone a table for cash. In my case, a few years ago I gave some U.S. dollars to a company and they gave me some bitcoin for it.

But how does someone get bitcoin in the first place?

Creating Bitcoin

If you trace the U.S. dollar back far enough, you find it originated as paper notes representing some supply of precious metal (see the wikipedia entry on the U.S. silver certificates).  At some point, we unlinked our dollar from silver, and now paper is just a virtual currency, not really tied to anything. We accept the value because we can trade/exchange it for goods and services. Our banks don’t even have enough dollars to match what we have in our checking or savings accounts. See the wikipedia entry on fractional reserve banking.

Just like U.S. dollars originated from mining precious metals, bitcoin originated by virtual mining. Bitcoin is a mathematical creation, with a finite amount that can be created through some complex mathematical formula. In the early days, bitcoin miners ran software to decode/discover the bitcoin. They might then use it to buy a pizza (which may have been the very first bitcoin transaction for goods in 2010). And thus it begins.

Over the years, mining has become less and less popular. The fewer bitcoins there are to find, the harder and longer it takes to find them. Just like the gold rush, early miners found plenty, and those who showed up years later had to do much more digging.

At some point, the electricity cost to run the bitcoin mining computers is more than what the bitcoin is worth. But, just like gold, if the value of bitcoin goes up high enough, it might be worth mining it again. (It’s much like the oil industry. If gas goes to $4/gallon, suddenly it’s worth it to do more work on those old U.S. oil fields. When it’s $1/gallon, it’s cheaper to just import it.)

Bitcoin is NOT Anonymous

And now … the point of this article. Bitcoin is not an anonymous currency. Every bitcoin ever created is recorded in a ledger. This ledger (see the wikipedia entry on block chain database) is replicated on the thousands of systems running bitcoin software. Every transaction (sending or receiving bitcoin) is recorded in this ledger, thus every virtual penny of bitcoin is traceable.

Just like every U.S. dollar has a serial number on it, every bitcoin has a serial number. Just like with cash, you can spend a portion of a bitcoin — like giving a store $10 for an $8 item, and receiving $2 back in change. As bitcoins split up, new entries in the ledger are created. It is possible to track the movement of every piece of a bitcoin ever spent back to its original full bitcoin that was created through the mining process.

It would be as if every business wrote down the serial number of every cash bill they ever received and then shared this information with every other person who uses cash around the world. In the real world, this would be impossible, but in the digital world, the Internet and distributed computing makes it easy.

What this means is if you have ever been identified as owning a bitcoin (or portion of one), it would be possible to see where you spent it. Since the entire ledger is public, if the receiver of the bitcoin has ever been known, you could now trace the transactions and know that Bob just sent Dan $5 worth of bitcoin.

In order to stay anonymous, users can create disposable wallets for each transaction, and split up bitcoins in to many small pieces and exchange them through anonymizing services making it much harder to track down. Think of it as exchanging serial numbered U.S. dollars to un-serial numbered coins, then turning those coins back in to dollar bills later. (Except, in the case of bitcoin, every fractional penny of bitcoin is still tracked.)

Cash is More Anonymous than Bitcoin

Because of this, cash is far more anonymous than bitcoin. There is no master ledger for cash. There may be a record of where brand new bills are delivered, but once they leave the bank or ATM machine, they are out in the wild. Tracking bills can be done, of course:

http://www.wheresgeorge.com/

…but it’s far from a complete record of every place those bills have been. I expect anyone using bills for illegal purposes probably didn’t take the time to log their bill’s serial numbers in a public database.

“Bitcoin is the new MP3”

MP3 files and peer-to-peer systems were initially associated with illegal music piracy. Today, many see bitcoin along the same lines. Yet, it’s no different than any other piece of technology. Cash can be used to buy a carton of milk, or a bag of illegal narcotics.

The convenience of being able to near-instantly transfer bitcoin anywhere in the world without government oversight is both a benefit and concern. It is a far superior way to move value around the world without anyone being able to stop you. Since cash is completely anonymous, you could buy bitcoin with cash and then move that bitcoin around in ways cash never could — something you could never do though a bank transfer. (You would have to physically smuggle out suitcases of cash to do the same thing with paper currency, and hope it doesn’t get stopped at the border during an inspection.)

Just be aware that somewhere in the ledger is a record of you transferring bitcoin for that carton of milk you just bought.

See Also

Bitcoin is being accepted by places like Dell, Overstock.com and ProXPN. Maybe you’ve heard of them. To them, it’s just another form of value — much like a company dealing with different world currencies.

It will be interesting to see how bitcoin evolves. Maybe it will be huge in the future, or disappear completely like so many other amazing technologies have.

Until then, I’m willing to do work for bitcoin so let me know if you ever need any custom Arduino programming or audio/video work done.

Drobo (2nd gen) to Drobo (3rd gen), part 5

See also: Part 1, Part 2, Part 3 and Part 4.

When we last left off, our hero (that’s me) was waiting to see if hs data survived after moving four hard drives from an old Drobo in to a new one. Spoiler: It did.

With that out of the way, let’s look at some of the differences between old versus new Drobos:

  1. The removable front plate has a logo that is now embossed/raises from the black plastic.
  2. The LEDs are much brighter.
  3. There is a power switch on the back.
  4. Drobo Dashboard gives you several new options!

Paradise By the Dashboard Light

Drobo Dashboard has a few notable improvements when browsing a 3rd generation Drobo:

Screenshot 2015-11-12 22.49.12

Drobo 3rd Gen: New System Information status display, featuring Drobo health.

Drobo 3rd Gen: New HEALTH status for each installed drive, too!

Drobo 3rd Gen: New Drive Information status display, featuring health of each installed drive, too!

Drobo 3rd Gen: New Performance status, though mine always shows 0.

Drobo 3rd Gen: New Performance status, though mine always shows 0.

And for comparison, the more limited Status display from the 2nd generation Drobo:

Drobo 2nd Gen: Much less status...

Drobo 2nd Gen: Much less status…

Under Volumes, there is now an option to create a special Time Machine volume. My understanding is that this volume will be treated as a size-limited volume, rather than the “grow until it breaks” virtual volumes.

Drobo 3rd Gen: New Time Machine volume support.

Drobo 3rd Gen: New Time Machine volume support.

The Tools display seems to be the same, except wording is different. “Turn Blink Lights On” versus “Blink Lights”, and “Shutdown” versus “Standby”.

Drobo 3rd Gen: Tools display.

Drobo 3rd Gen: Tools display.

The 3rd gen model adds a new Drobo Settings display. From here, you can set the name of the Drobo (that was possible with the 2nd gen, but was done somewhere else), Disk Drive Spindown, and Dim Lights timeout. There is also a greyed out “Dual Disk Redundancy” selection. According to a feature chart at the Drobo site, this model does support dual disk redundancy where  you can have two drives fail and still preserve data. I am unable to test that with my current unit since it was already formatted to use all the disks for storage in the previous 2nd gen model I had.

Drobo 3rd Gen: Drobo Settings display.

Drobo 3rd Gen: Drobo Settings display.

Dual Disk Redundancy is a feature I would really like to try out. You have less space available for data, but if you migrate from 2TB drives to 3TB drives, you can do this and end up with about the same amount of storage as before. This will be a topic for another time.

Next time, we’ll compare some data transfer benchmarks. How does a “faster” Drobo 3rd gen via a USB 2.0 port compare to a slower Drobo 2nd gen hooked up via FireWire? I could tell you now, but then you wouldn’t need to wait for the next part.

Until then…

Drobo (2nd gen) to Drobo (3rd gen), part 4

See also: Part 1, Part 2 and Part 3.

When we last left off, we were waiting 440 HOURS (18 days!!!) for my second generation Drobo to rebuild after replacing a 2TB drive with a 3TB one. 440 HOURS! Fortunately, it didn’t actually take that long. I did the drive swap on a Friday evening, and it was actually complete the following Wednesday evening – a mere 120 hours later.

During those five days, if a second drive had failed, my data would have been toast. When a drive is down and being rebuilt, there is no data protection. I would be writing a completely different article is that had happened.

Faster than a Speeding Rebuild…

Spoiler: Drobo 3rd gen rebuilt in 12 hours what 2nd gen took 120 hours to do. (* Not 100% fair since I was moving a second 3TB drive in, but it's good enough for a reference point.)

Spoiler: Drobo 3rd gen rebuilt in 12 hours what 2nd gen took 120 hours to do. (* Not 100% fair since I was moving a second 3TB drive in, but it’s good enough for a reference point.)

One of the promises of the new 3rd generation Drobo was that it has dramatically faster rebuild times. (Skipping ahead, it looks like the newer model could have done the same rebuild in 12 hours.) On the downside, the new model does not have Firewire, so disk access would be much slower on my old Mac which only has USB 2.0. Newer Macs have USB 3.0, which is supposed to be very fast with the 3rd gen Drobo.

Since I didn’t want to spend months waiting for Drobo to rebuild as I upgraded drives one at a time, and since I feared trusting my data to a six year old end-of-life Drobo and dying hard drives, I decided it was time to upgrade. I do need to point out that I did not go out and buy a new $300 Drobo. I am far too broke for that. But, I do have one to review. If you want to get your own, you can use a special discount code and get $100 off. Go to:

www.drobo.com/macosken

You can learn more about Drobo there, and find a special “KEN100” discount code that lets you pick up a 3rd generation Drobo for $199 (plus about $20 in FedEx shipping). That would be a good price for a dumb 4-bay hard drive enclosure. (This code is supposed to be good until 12/31/2015.)

I’ll wait right here while you go do that . . .

Old Versus New

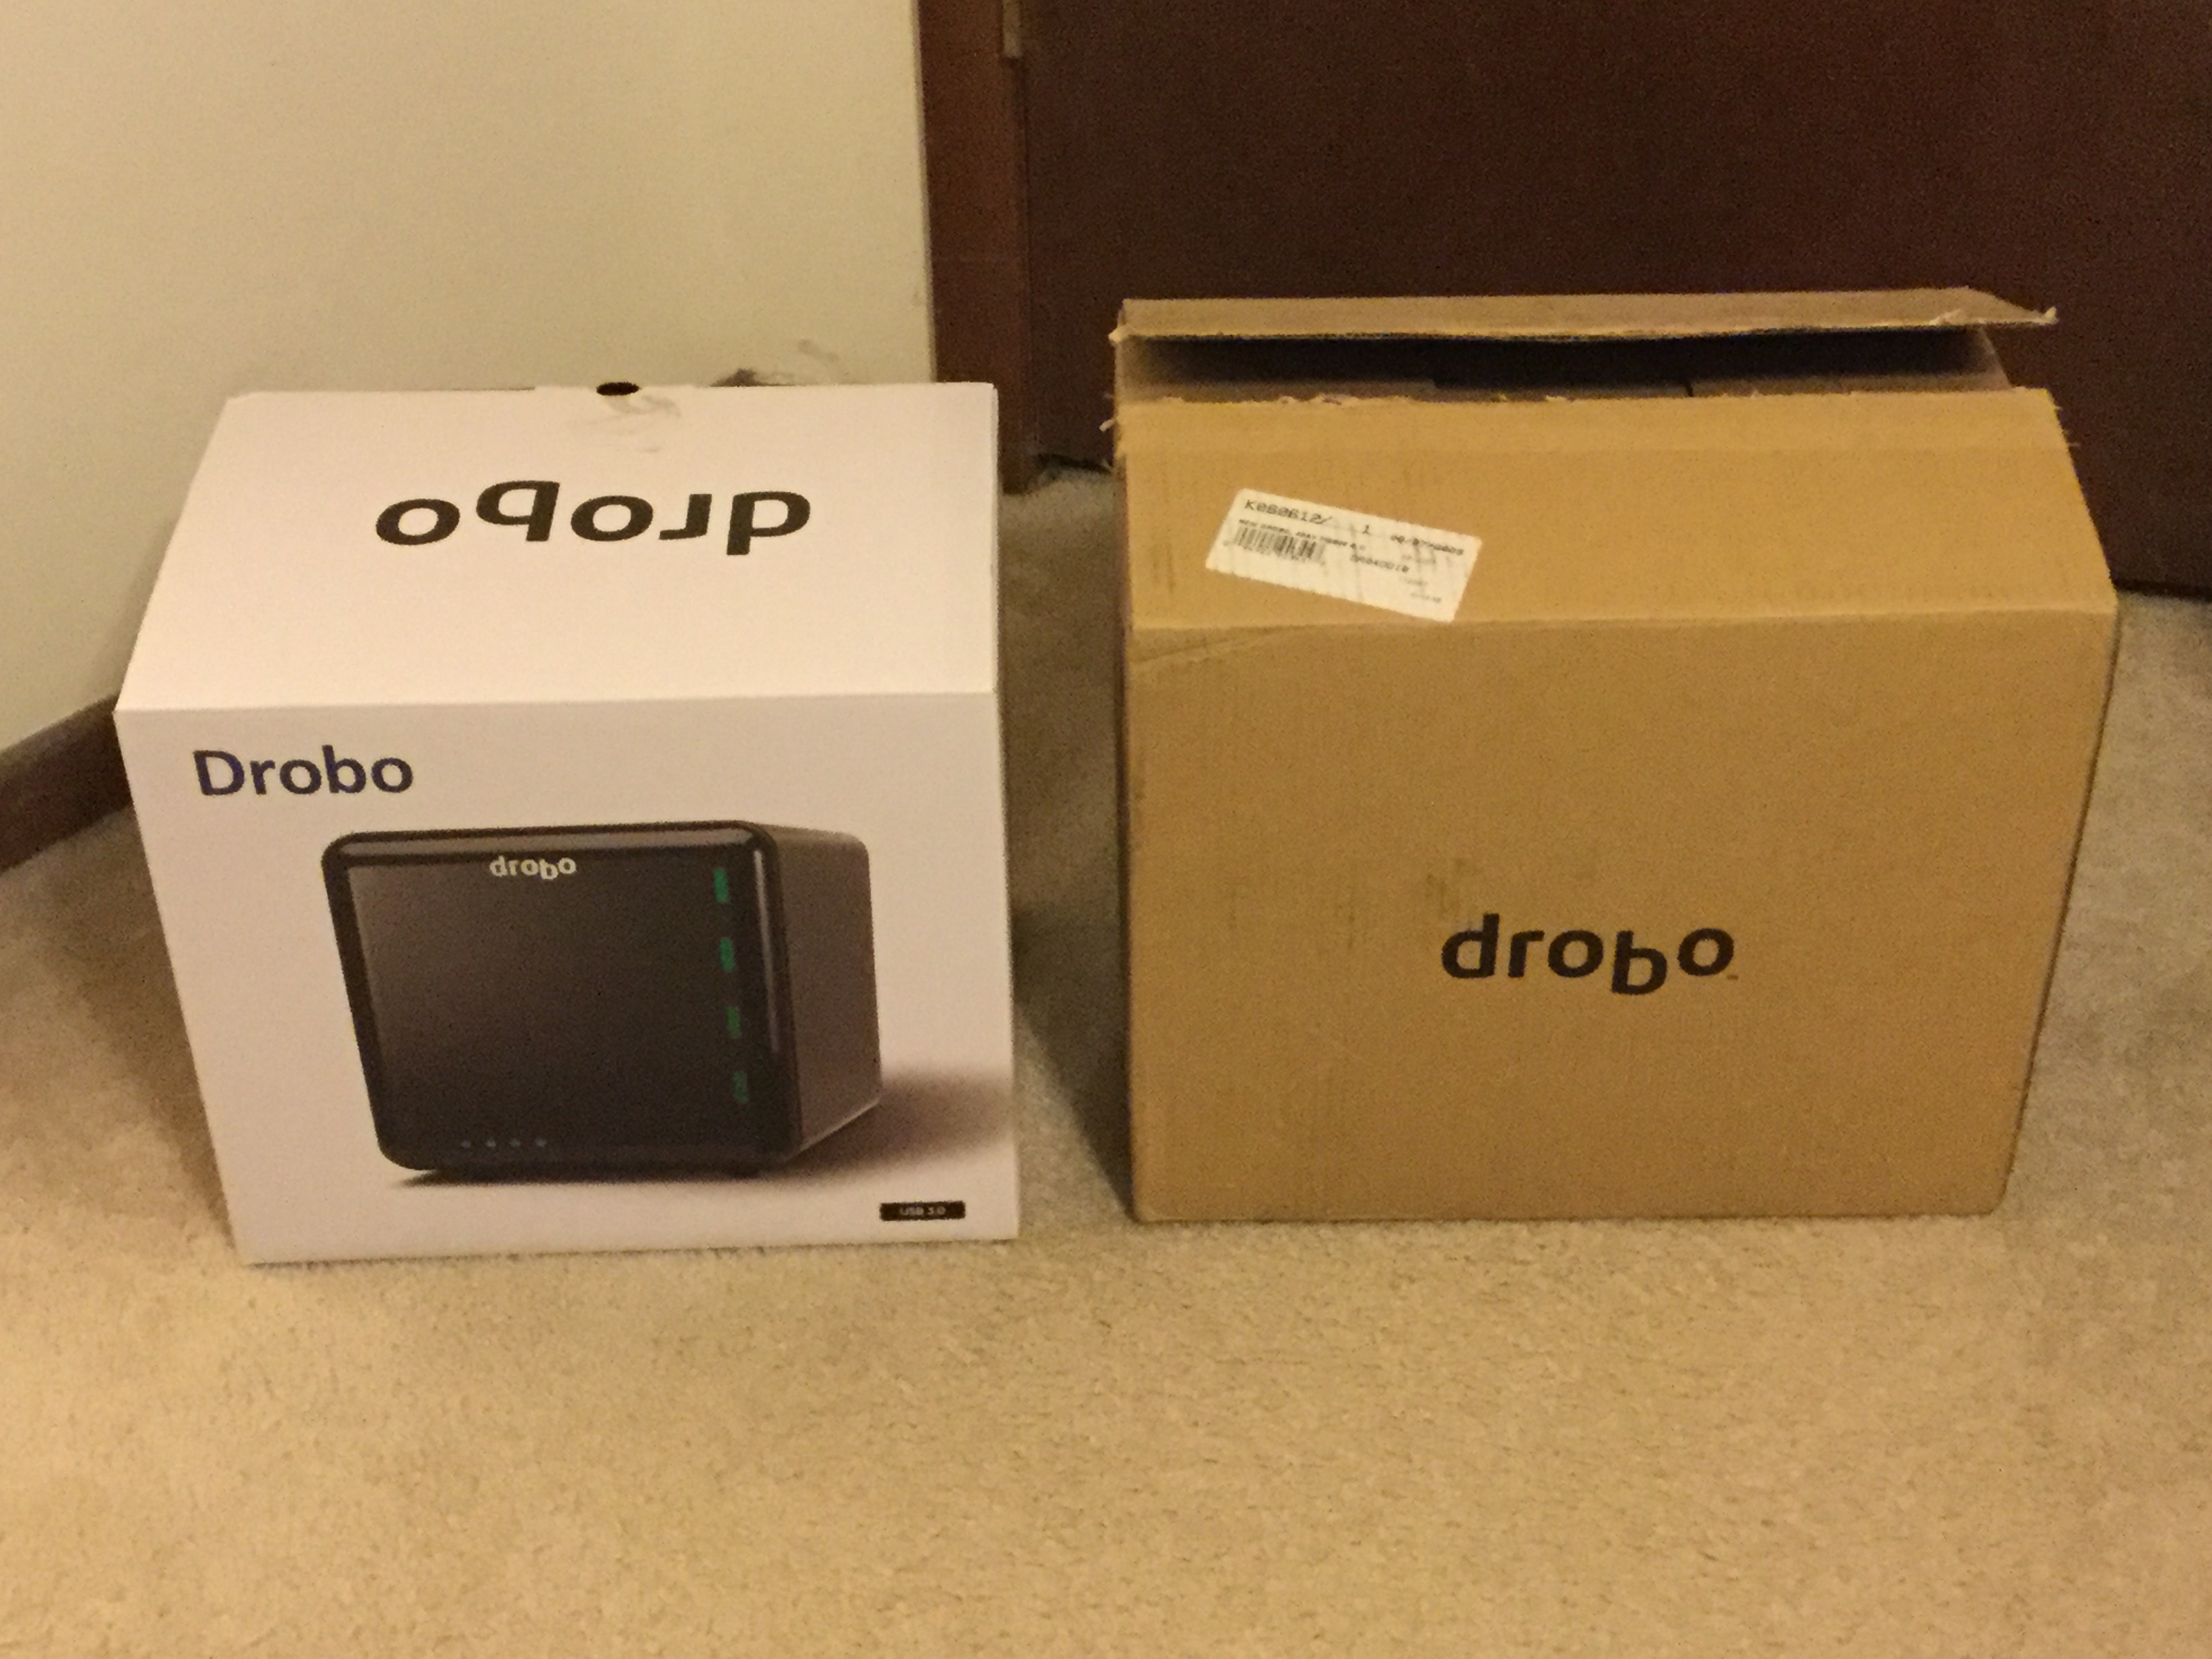
Drobo 3rd gen (left) vs 2nd gen (right).

Drobo 3rd gen (left) vs 2nd gen (right).

One week later… You should now have your new Drobo. The first thing you will notice is their package has gotten much nicer. I blame this on Apple, as they have made boring brown boxes seem downright primitive.

My old Drobo came wrapped in a black cloth bag. The new one comes in a black cloth bag that has handles on it — it’s a Drobo-logo’d version of those reusable grocery store bags! There was also a Drobo window sticker inside just like when you get that Apple sticker with a new Apple product (did I mention blaming things on Apple?). The packaging has much improved.

Everything else should be pretty similar. There is an included USB cable, and the power supply now uses a more standard power cable. The new Drobo looks the same except the logo is now embossed/raised on the front instead of just being painted on. (That’s the easiest way to tell them apart by looking at them when the lights aren’t on. More on the lights in a moment.) There is also a power switch on that back now. (Wow! I can FINALLY turn the thing off without having to yank the power cable.)

There is a warning note attached to the Drobo (and repeated in the included Quick Start guide printed on the inside cover of the accessory box). It says any drives you insert will have their data erased. What!?! I thought I read you could migrate your old “disk pack” from an old Drobo to the new one. Just to be safe, I did some searching on Drobos website and found an article that verified this was possible.

I also contacted Drobo support and they clarified: As long as the units are powered off, the erase will not happen, but if you insert the drives while the Drobo is booted, it will being the process of formatting them for new storage.

PRO-TIP: READ THE INSTRUCTIONS AND WARNINGS! Had I made the mistake of having my new Drobo powered up when I inserted the first drive, I would have lost data!

Once my previous drives (three 2TB and one 3TB) were moved over to the new Drobo, I powered it up to see if my data would survive…

Next time, we’ll find out if my data survived…


Drobo (2nd gen) to Drobo (3rd gen), part 3

See also: Part 1 and Part 2.

My 2nd generation Drobo (currently for sale on e-Bay).

My 2nd generation Drobo (currently for sale on e-Bay).

The story so far . . . In August 2009, I purchased two 2nd generation Drobos. Back then, Drobo was still a relatively new thing. I had been aware of it since the first model was introduced in 2007, but it was USB-only and thus too slow for my needs. The 2nd generation model added Firewire and I hoped I could use it for some video editing.

I populated my new Drobos with the bare hard drives I had been using separately. It took quite a bit of juggling to get all the data off various drives so I could then wipe them out and put them in the new Drobo. (I always do a zero-byte full reformat of drives before I use them. This exercises every sector of the drive and helps the drive map out bad blocks, or identify larger problems.)

At the time, Drobo documentation said if you make the device look like one huge drive, it might take several minutes to boot up. I chose to have the Drobo split itself up in to 1TB volumes. (This startup delay went away with a firmware update, apparently.) As I added drives, more volumes would appear. Over the years, I upgraded from four 500GB drives to four 2TB drives, and eventually had six 1TB virtual drives on each device. (I say “virtual” because unlike a true RAID system, the Drobo file system is flexible. It has a set amount of storage, split between the various drive volumes. You can’t actually fill each to 100%, and the Drobo suffers from severe slowdown if you fill it within 10% of max capacity. There are alot of gotchas with the magical Drobo.)

Eggs in One Basket

"Just buy another drive," they tell me.

“Just buy another drive,” they tell me.

While having to manage six volumes might seem like more work than one huge volume, it ended up saving me a number of times. I have had several instances of file system corruption on a Drobo volume where a volume would be unreadable (or not even mount). If this had happened to a huge 6TB single volume, I would have lost everything. By having it isolated to 1TB, it greatly reduced the amount of data I lost.

I tried Apple Disk Utility and a few other programs trying to recover the first disk crash, but only AlSoft’s DiskWarrior could do it. I strongly recommend every Mac user have a copy of this wonderful program. In all but a few cases, it was able to recover my corrupted Drobo volume. The one that it couldn’t is still a bit of a mystery. A support guy from AlSoft spent some time examining sectors on my Drobo and determined that the directory had been erased. Drobo support claimed they didn’t do it, and blamed Disk Warrior. Disk Warrior claimed they didn’t even modify the drive until the final stage after the data was declared recoverable.

Thus, two of my major Drobo issues: Support and reliability. Though overall they have been helpful, there have been a number of times when Drobo support was useless. Early on, when a firmware update looked like it had lost ALL my data, they provided me a special firmware version that would let me READ all my data off. That’s great if I had a few spare terabytes sitting around to copy it to. Fortunately, they figured out the problem and I was able to recover my data and continue using the device.

Let’s just say I have had quite a bit of close calls over the years with Drobo (and have lost several terabytes of data). There have been issues where the Drobo would suddenly shut off (unmounting, and not waking up), or times when it would cause my Mac to hang on startup (if plugged in to the computer) and endless other annoying issues. Web searched revealed hundreds of similar reports from other Drobo users.

Much like an abusive relationship, the magic of Drobo seemed to keep many of us involved even when we knew we probably should move on.

I stuck with my two Drobos for over six years. I put up with repeated problems that always seemed to manifest themselves when I needed to get some work done. If my livelyhood depended on them, I am sure I would have had to move on to something else, but since I was just earning some side-income as a hobby-business, I couldn’t justify the expense of a professional high-end RAID system. It seems Drobo is a consumer toy, not a professional tool.

Danger, Will Robinson

Drobo blues...

Houston, we have a problem.

Recently, a few things happened that caused me to consider an upgrade. First, one of my Drobos was regularly sending me alerts that it was in the process of rebuilding.

After about a week or so of this happening, I contacted Drobo support. The 2nd generation models had been end-of-lifed so they were no longer supported, but I was able to get the support tech to look at a diagnostic log file from my device. They wrote back:

Response By Email (xxxx) (11/03/2015 02:26 PM)

Hello Allen,

Thank you for contacting Drobo Technical Support,
I would recommend replacing the drive with the serial number WMAZA1948667 in the top bay.

We are showing that drive has 31 bad blocks and has had a full timeout.

If you have any other questions feel free to ask.

Thank you and have a great day.

Kind Regards,
xxxx.
Technical Support Agent

At the very least, I was going to have to replace that drive. All of my 2TB Western Digital Green drives were now out of warranty, so if one was starting to fail, it seemed likely others would too.

During my research of RAID systems, the low-cost ones I looked in to would not have worked with my Western Digital Green drives. Had I switched to RAID, I would have had to replace all my drives — an expense I couldn’t handle.

But, thanks to Swagbucks, I could at least get me a replacement drive. I decided to go with a 3TB Western Digital Red drive. These were rated for NAS devices, so they would be good for a RAID down the line if I ever ditched the Drobo.

When the drive arrived, I put my Drobo in standby and swapped out the bad drive. After a restart, Drobo then went to work rebuilding the drive and informed me how long it thought it might take . . .

440 hours!?!?!

440 hours!?!?!

Axl Rose, We Have a Problem…

To be continued . . .


Drobo (2nd gen) to Drobo (3rd gen), part 2

In part 1, I rambled on a bit about my experience with external hard drives and I stated that next I would explain “why I chose Drobo” and that we’d “look at the 2nd generation model versus the 3rd generation model.”

I guess I should do that.

Never Enough Storage

“Just buy a larger hard drive,” people tell me. It must be nice to have so little content you want to store that you can just buy an extra drive and be done with it. As an early adopter of digital photography (I got my first digital camera in 1996), I have taken several hundred thousand digital photos over the years. With no negatives, keeping those digital originals safe is very important. I learned this the hard way when I had a hard drive failure and lost a year’s worth of photos. The only copies I had were the scaled-down and watermarked versions on my website. At least I had those!

All my earlier photos had been archived to stacks of CD-Rs, so I was able to recover most of them, but it was clear I would have to make backups more regularly just in case it ever happened again. (“Just buy more DVD-Rs”.)

And it happened again. Several times, actually. I’ve had a number of hard drives fail on me unexpectedly. Most were still “new” drives, well under warranty. While Seagate or Western Digital will promptly replace the drive, that does little for you data. ALWAYS MAKE BACKUPS! (And always check reviews. The “more reliable” hard drive brand to buy has changed a number of times of the years. I am currently using Western Digital drives, but many years ago I wouldn’t have touched a WD for anything important.)

CD-Rs Aren’t Backups

For me, my main backup strategy was making sure all my digital photos and digital video files were archived to CD-R (then, later, DVD-R). I have stacks of these discs, but, sadly, some of my earliest CD-R backups no longer read. That’s right, Virginia. CD-Rs are not “forever” media. Exposure to UV rays in light can cause bit rot. Just because you copy something to a plastic disc doesn’t mean it’s safe long term.

When I learned CD-Rs were not enough, I decided I needed to do a combination of things:

  1. Every bit of important data should be archived to CD/DVD. Even if it’s not necessarily a long term solution, it’s still important to have a backup that can’t be taken out by a power surge or by dropping a computer.
  2. Every bit of important data should exist on at least two hard drives.

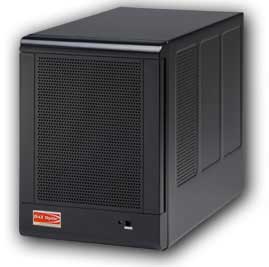
qBox 4-drive enclosure (photo from their website).

qBox 4-drive enclosure (photo from their website).

I started using some qBox-F quad-drive enclosures on my Mac. I had two of them – one for primary storage and the other for backup. Each one was “JBOD” (just a bunch of disks) so they appeared are four separate drives to my Mac. Soon, though, four drives was not enough and I needed more storage. Every time I did, I had to get out the screwdriver and swap out drives and spend hours copying data back and forth. There had to be a better way.

A Better Way: Trayless Hard Drive Enclosures

iStarUSA v7AGE220-SAU enclosure

iStarUSA v7AGE220-SAU enclosure (photo from their website)

The next thing I found were trayless hard drive enclosures. They let you slide bare drives in and out without using tools. I bought a few inexpensive iStarUSA brand 2-drive enclosures. (I always like to have two matching enclosures in case one of them dies so I can swap drives out and get to my data in an emergency.) I was using the now-discontinued Firewire version for primary store (faster than USB 2.0) and had a cheaper USB-only version for emergency backup.

I also found a company that sold plastic hard drive cases that looked like old VHS rental tape cases. I ended up with a bookshelf full of hard drives. When I would copy data to one of them, I would also copy it to the second backup hard drive.

This worked quite well, but every time my collection grew I had to buy two more hard drives (primary and backup). I was hoping for a way to save some money while still getting protection. That’s what let me to research RAID-type hard drive systems.

Saving Money by Going RAID

With RAID, multiple drives are used and data is spread across all the drives. Every block of data is duplicated on another drive. If one drive fails, any data on that drive still exists somewhere else in the RAID array. This sounded like a good solution, but RAID has some limitations.

RAID systems want all drives to be of matching size (and preferably, type). If you put in a 500GB drive and a 750GB drive, the RAID would only use the largest amount that is common to all drives (in this case, 500GB – thus wasting the rest of the 750GB drive). You were also locked to that size. If a drive failed and you replaced it with a larger drive, the data would rebuild on the new drive, but it would only use the size of the former drive. Thus, you couldn’t upgrade capacity without starting over with an all new set of larger drives and copying everything over.

My 2nd generation Drobo (currently for sale on e-Bay).

My 2nd generation Drobo (currently for sale on e-Bay).

I ended up going with a Drobo because their non-standard “magic” was that you didn’t have to have matching hard drives. You could start with two drives of any size, and then add more (up to four) to expand. When you started running out of space, you could replace a drive with a larger one and continue to do this as needed. Drobo looked like a great solution to my ever-growing need for backup data.

Up next: Drobo pros and Drobo cons.

Drobo (2nd gen) to Drobo (3rd gen), part 1

This multi-part series will be an extensive review of the 3rd generation Drobo external hard drive enclosure and my experiences with it after migrating from a 2nd generation Drobo on a Mac. Thank you to Data Robotics for making this possible. My many years with Drobo have sometimes felt like an abusive relationship – I have had numerous instances of data loss and many other problems, but the “magic” of Drobo keeps pulling me back in. Hopefully, after another generation of product advancement, maybe this time things will be better. Drobo loves me. I know it does.

Most article writers seldom give you any indication of why they are qualified to speak on a subject. My experience with external hard drives began a long, long time ago . . . (Well, to you young folks. To me, it seems like only yesterday…) This will have nothing to do with the actual content, so please free to skip to Part 2 (once it is posted).

My Path to External Drives

In 1998, I purchased my first Apple product – an original bondi blue Apple iMac. It had no RS232 serial port, no parallel printer port, and no floppy drive. Instead, it used some weird port called a Universal Serial Bus (USB) to hook up to such devices. There was pretty much nothing available that used USB back then. Early USB devices included mice, keyboards, printers, RS232 serial ports, external floppy drives and hard drives.

In the next MacWorld keynote after the iMac was released, Steve Jobs gave a presentation where he unveiled “Firewire” (Apple’s re-branding of the IEEE-1394 standard). He demonstrated it by showing it used to hook up an external hard drive and a digital video camcorder. Back then, the only way I’d ever seen an external hard drive hooked up to a PC was via the parallel printer port (Iomega Zip drives, for example) or via a SCSI interface. The only way I’d ever seen a camera hooked up was by audio/video inputs to a video digitizing device. It was a very different world!

Seeing Firewire allow importing of digital video from a camcorder was revolutionary, and I instantly knew it was something I wanted to be able to do.

Digression:

Around 1981, my father had a video camera that hooked to a huge VHS recorder. I remember making silly home videos with it a kid. In 1982, we made a trip to Walt Disney World with a “portable” VHS recorder and camera. I guess we recorded some of the earliest vacation “home videos” long before everyone there was carrying around a camera. In the years that followed, things got smaller: all-in-one VHS camcorders would be introduced, and then tiny 8mm video tapes (and VHS-C). The home video revolution was in full swing, but the only way I ever edited video back then was with two video recorders hooked together. As video moved to digital (Digital8 on 8mm tapes, or DV tapes), a new world opened up. Seeing digital video being “imported” from tape in to a computer and then edited on screen non-linearly was magic. I bought a Sony Digital8 camcorder in preparation for having this editing capability at home.

Although Firewire was initially only available on the high-end (and expensive) PowerMac G3 desktop, Apple quickly added it to their next consumer computer when the iMac DV (digital video) was released in 1999. It took me weeks to get one at the local CompUSA, but soon I was set up with a digital camcorder and a computer with Firewire. The only problem was that an hour of digital video took about 13GB of hard drive space, and the iMac DV Special Edition I had only came with a 13GB drive.

This is what led to me purchasing my first external hard drive. (I am not counting the “big floppy” Iomega Zip drives or SyQuest EZ135 drives I used on PCs, my Radio Shack Color Computer or OS-9 MM/1 systems. I had been using those for years, but they weren’t hard drives.)

After filling up this first 30 gigabyte external drive (at least, I think it was 30), I moved on to many more drives over the years, each one larger than the last. Today on my desk I have four external drive enclosures (two 2-bay RAID systems, and two 2nd generation Drobos), a 3TB Seagate backup drive, and about four tiny pocket drives… Between all of those and the drives in my computers, I easily have over 20 terabytes of storage which, sadly, seems to be full at all times.

Over the years I have gone through brand after brand, including many that no longer exist. Western Digital makes up most of the drives I am currently using, though there was a time when their drives were considered bad and you’d have better luck with Seagate. There were other brands that, for awhile, were considered the most reliable. I have no brand loyalty. I just want my data to be protected. EVERY drive can and will fail. Always assume that day will be tomorrow and keep redundant copies of all your important data.

So am I an expect about external hard drives? Not at all . . . but I’ve probably used more of them over the years, and use more of them today, than most folks will in a lifetime.

Up next, why I chose Drobo and a look at the 2nd generation model versus the 3rd generation model.