I now believe in the Tariff Fairy

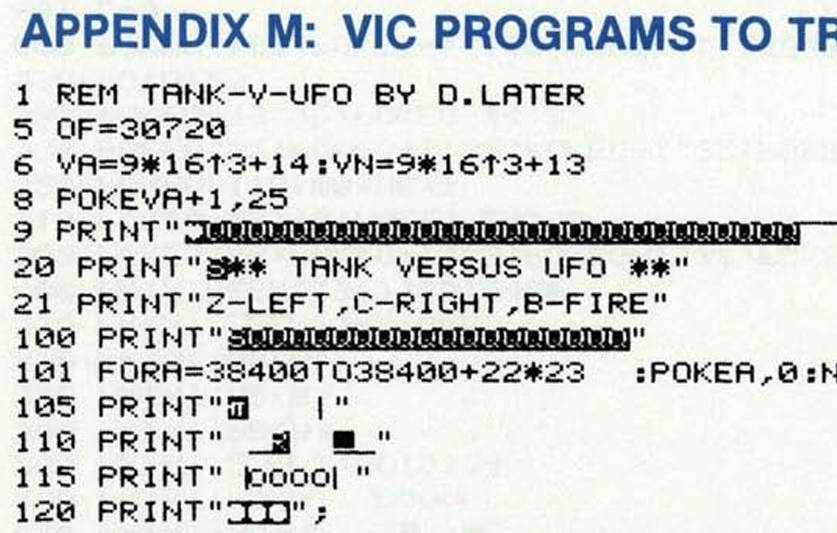
Hello from the U.S.A. Anyone here who has ever imported items from Europe has learned about the V.A.T. (Value-added tax – Wikipedia). A few years ago, I wanted a THEVIC20 – a replica Commodore VIC-20 computer that ran an emulator capable of running Commodore VIC-20 and Commodore 64 software:

THEVIC20

Unfortunately, the manufacturer never released it in the U.S.A. so my only option was to import one. I ended up buying from one of the European Amazon stores (I think it was England). If I recall, there was a fee for currency exchange, as well as a pretty high shipping fee to the U.S.A., and then … V.A.T. This made it much more expensive than if I had been able to pick one up at my local Best Buy.

Replica Commodore VIC-20: TheVIC20.

To make matters worse, my unit was defective, so I had to pay to ship it back to England to return it, then buy it again.

I really wanted a THEVIC20. My first computer was a VIC-20, you see. But mine was a VIC-20 “Color” computer, not a VIC-20 “Colour” computer. Close enough, though.

Whatever value this tax adds, I am sure the Europeans appreciate it.

But I digress.

Earlier this year I learned that I could record 360 video footage and then upload it, along with a GPS log, to Google Street View and get my footage published as a Street View “blue line”. Cool.

While most of my submissions worked fine, others did not.

The wrist-worn GPS Remote I use with my Insta360 X5 camera would sometimes have gaps in the GPS or jumps in the GPS data and this would be rejected by Amazon. I have previously written about how you can (or try to fix) these issues using programs/scripts.

After having a few GPS logs fail to record on the GPS remote, I started using logs recorded on my smartphone as a backup. I have also read that the GPS in the phone would do a better job and be more accurate.

However, even with that, sometimes the data still wouldn’t be good enough for Google.

Remember the Sony GPS-CS1, anyone?

This reminded me of when I first started geotagging my digital photos. We didn’t have smartphones with built-in GPS yet. This was back in the era of Palm Pilots and Blackberries. At the time, I bought a Sony GPS-CS1 standalone GPS logger. It looked like this:

For many years, it hung off my camera bag. I’d power it up at the start of the day, let it record all day, then later download the GPS data via USB and then add it to my photos using a program called HoudahGPS, which I just found is still available:

HoudahGPS — Download and convert GPS track log files

Eventually, I switched to using a program on my iPhone (GeotagPhotos 2) or this purpose. With that, I didn’t have to worry about replacing AA batteries or manually downloading. The gps log would just appear on my computer thanks to my phone syncing with cloud storage.

But I digress. Again.

$150 back then is…

At $150 in 2006, that Sony GPS-CS1 would cost about $240 in 2025 as I write this:

CPI Inflation Calculator

So imagine my surprise when I started looking at a modern device to serve as replacement or backup for my Insta360 logger or my smartphone and found one for about $240!

Columbus P-10 Pro Submeter (0.5m) GPS/GNSS Data Logger and USB Receive – GPSWebShop

The more things change, the more they stay the same. But, this gadget records more data points, has more memory, and extreme battery life. Win!

But I did not really want to spend that kind of money, so I looked around and found a cheaper model that was around $134:

Columbus P-1 Mark II 10Hz Professional GNSS Data Logger – GPSWebShop

That’s the one I would order.

This company was located in the USA, but the product was made in China. And, for some reason, they ship from Canada. Were they trying to bypass some tariffs or something?

I had to pay $25 for “international” shipping, and they warned I would be responsible for tariffs and such, paid to the shipping company (DHL).

This morning, I received a text from DHL with my “import duty payment” notice.

Those fees were… $92.54

So if I take the $134 of the unit plus those fees, I get around $226 – slightly less than what I paid for my original data logger back in 2006 after adjusting for inflation.

While any of us should prefer paying less, I guess I still “paid less” even with the extra fees compared to what it cost 20 years ago ;-)

And now I believe in the tariff fairy.

Mount Synology NAS home folder on Raspberry Pi

Finding out how to do this was a confusing mess. There are dozens (if not hundreds) of messages and blog posts describing how it should work, but none matched my situation enough to actually work for me. Amazingly, the search engine A.I.s were most helpful in figuring it out, but for those who prefer a human (I assume), this blog post has the important details:

https://ponnala.medium.com/mounting-an-smb-path-on-raspberry-pi-or-linux-using-cifs-utilities-372fd9622c3c

I thought I would summarize the steps it takes to have a Synology NAS (like a DS1522+) user home directory on a Raspberry Pi.

Synology NAS Steps

My main system is a Mac and I enable the SMB service on my Synology NAS. This is the file sharing service that will let you access your NAS from a PC (“\\NASName”) or Mac (smb://NASName). On Mac, this is what lets me browse to my NAS through the Finder:

I find that a super-convenient way to do it since I can have my Mac always prompt me for a username and password, or have it remember them in the keychain/passwords app if I don’t want security. . .

1. Enable SMB

Log in to your Synology, then go to Control Panel -> File Services -> SMB Tab

Enable the SMB service. You can also specify a custom Workgroup name, such as “WORKGROUP.”

You may also want to enable the Bonjour service in the Advanced tab. That should make it show up to your Mac without having to know its IP address. For this demo, my NAS is named “DS1522” and Bonjour is what (I believe) makes that show up in my Finder.

2. Create a User on the Synology NAS

You can create a new user account which will have its own isolated home directory.

Control Panel -> User & Groups – Create Tab

You can create a new user account with its own password. I used my e-mail address so I can get any notifications (such as password reset).

After clicking Next, you get a chance to assign this new user to any specific groups. You should have “users / System default group” already checked. If not, make sure to check it.

On the next Next screen, make sure this new user has Read/Write Access to the homes group. You will want to check that one yourself:

The next few screens are for specific permissions. I left them at defaults since all I am using this account for is a shared folder. Eventually, it will Save and you will have the new user.

Now with this user created, you should be able to browse to it and login using that username and password and see the home folder. You can access it in Finder (if Bonjour is active) or type Command+K from a Finder window and enter “smb://” and the IP address of your NAS (“smb://10.0.0.1” or if it has a name, “smb://NASName”) and you should get prompted for a username and password:

Once connected, you should be able to get to that user’s home folder (under homest) and see whatever is is there Your new account will be empty, but I have already copied some files into mine. Those files are stored on my NAS, but I can connect and get to them from my Mac.

Now we will get the Raspberry Pi to connect and see those files, too.

Raspberry Pi Steps

The current Pi operating system has the stuff to do this built-in, but if you have an older OS, you may have to install some things. I can’t cover that, since I did not need to.

At this point, you should be able to mount the new user account on your Pi just by typing in a command like this:

sudo mount -t cifs //ds1522.local/homes/pi400 /home/allenh/DS1522/ -o username=pi400,workgroup=MYGROUP,rw,uid=$(id -u allenh),gid=$(id -g allenh)
  • The “//ds1522.local” should be the name of your NAS or the IP address (if not using Bonjour). After that is the path to where the home folder for the new account is. Those are in “/homes/accountname”.
  • The “/home/allenh/DS1522” is the destination where the folder will me mounted on the Raspberry Pi. In my case, my Pi account name is “allenh” and I wanted it in a folder called “DS1522” in my home folder there — “/home/allenh/DS15222”.
  • After that, “username=” can be set with the user account to log in to, or just have “username=” if you want to b prompted for the username.
  • Then comes where you could have also specified a password using “password=” and the password. But that shows your password to anyone able to see you typing on the screen.
  • You then give whatever workgroup name you set up in SMB sharing on the Synology NAS.
  • After that, I found I had to include the “rw” read/write flag, else I could only read files, and if I tried to write anything out I got a Permission Error.
  • The next bit with “uid” (user I.D.) and “gid” (group I.D.) may or may not be necessary, but after mine only gave me READ access, I asked some of the A.I.s and they suggested that and it worked. I don’t really know what that is for, but “it worked for me.”

After this, you should get prompted for the password of that Synology account, and then you should see that remote home folder appear on your PI.

Un-mounting

To unmount/release this mapped in folder, use “sudo umount -l /home/allenh/DS1522“.

If you forget what all you have mounted, you can type “df -h” to see a list of all things mounted to the Pi.

Scripting

To make things easier, I created a simple shell script called “mountnas.sh” that contains the command I use. I also made an “unmount.sh” script with the unmount command.

Now, if my Pi is on the same network as my NAS, I can just run one of those scripts or type the command and get that folder mounted so I can read/write files to it from my Pi.

Hope this helps…

Hacking the Color BASIC PRINT command – part 2

See Also: part 1, part 2, part 3, part 4, part 5, part 6 and part 7 (and maybe more to come…)

Here is what I have learned so far…

When BASIC wants to output a character, it jumps to a ROM routine called CHROUT. This is one of a few documented ROM calls in Color BASIC. Here is how it is documented in the EDTASM+ manual:

I have used this ROM call in previous blog posts, showing how to output “HELLO WORLD” or whatever using assembly:

That small program makes the X register point to the first byte of the MSG data. It then loads that byte into register A and increments X. If A is 0 (the end of string marker), it branches to DONE. If not, it jumps to the subroutine pointed to at $A002 which outputs whatever is in A. It then goes back to do it again.

I wrote a two-part post about Color BASIC RAM hooks awhile ago. There I explored these extra spots where later BASIC ROMs (like Extended, DISK, and the CoCo 3 ROM) can patch in and make the original Color BASIC call new code first. That new code did things like add support for DISK devices or the (gone in CoCo 3) DLOAD command. I assume it is also used to patch in the CoCo 3’s high resolution 40/80 column text screens, as well.

The idea is before Color BASIC does its thing with the CHROUT routine, it will jump to “new code” and let it run first, and that code may then return back to let the normal code process. When disk devices were added as device #1 to device #15, this jump goes to code in Disk Extended BASIC which checks the incoming device number. If it is 1-15, new code is called that takes care of writing data to a disk file. If not, it returns back and Color BASIC handles the devices it knows about (device 0 for console, device -1 is the cassette, and device -2 if the serial/printer port).

For the task Erico was inquiring about, I thought I could patch in a new routine that would check for device 0 (writing to the screen) and then if it was, look for a special character that now means “transparent”. Instead of putting the character on the screen then moving the cursor position over by one, it would just move the cursor position and leave the screen alone.

Here is what I came up with in a quick and dirty hack:

* lwasm consmove.asm -fbasic -oconsmove.bas --map

* Convert any lowercase characters written to the
* screen (device #0) to uppercase.

DEVNUM equ $6f      device number being used for I/O
CURPOS equ $88      location of cursor position in RAM
RVEC3 equ $167      console out RAM hook

    org $3f00

init
    lda RVEC3       get op code
    sta savedrvec   save it
    ldx RVEC3+1     get address
    stx savedrvec+1 save it

    lda #$7e        op code for JMP
    sta RVEC3       store it in RAM hook
    ldx #newcode    address of new code
    stx RVEC3+1     store it in RAM hook

    rts             done

newcode
    * Do this only if DEVNUM is 0 (console)
    tst DEVNUM      is DEVNUM 0?          
    bne continue    not device #0 (console)

    * If here, device #0 (console)
    cmpa #'r        compare A to lowercase 'r'
    bne continue    if not, continue

    leas 2,s        remove PC from stack since we won't be returning there.

    * Now this is the start of what Color BASIC ROM does for PUTCHR:
LA30A
    pshs x,b,a
    ldx CURPOS      X points to current cursor position
    leax 1,x        increment X, skipping that location.
    jmp $a344       jump back into Color BASIC ROM code.

continue
savedrvec rmb 3     call regular RAM hook
    rts             just in case...

    end

The “init” code saves out whatever is in the console out RAM hook (three bytes, either “rts” if not being used, or “jmp abcd” to jump to new code). It then patches in a “jmp” to the new code in this program, then returns back. This installs the new code into the RAM hook.

Now when anything tries to print through CHROUT, BASIC first calls whatever the RAM hook points to. That will be the “newcode” here.

This new code first checks if the device is 0, indicating we are printing to the screen. If it is not, it branches to the “continue” spot where the original RAM hook jump was copied, allowing it to jump there and proceed as normal.

Next it checks to see if the character to print is a lowercase ‘r’ (I chose ‘r’ for “right”). If not, it returns.

Now things get weird. This is not a normal RAM hook because I can’t just “do stuff” then return to the original ROM code. That original code would still want to output whatever is in register A to the screen. To make mine work, I need to take over some of the functions of the ROM and then jump back into the normal ROM code so it can continue after I have done my thing.

In a normal RAM hook, BASIC would use a JSR (jump subroutine) to get there, then have that code return back. But for this hack to work, my new code has to jump directly back into Color BASIC. Because of this, there is a return address (where RTS will return to) on the stack that we won’t be using. Doing “leas 2,s” moves the stack pointer so it skips that. This allows me to jump directly out of this new code back into the ROM.

Now we have to do whatever code the ROM would have done before processing the character. I looked at the disassembly and see it pushes three registers to save them, then at the end it will pull them back off the stack to restore them.

So I do that in my code.

Next, all I need to do is increment the cursor position then jump back into the Color BASIC ROM just past where it would normally put the character on the screen. From there on, everything will be normal.

I may not have explained this very well, but I am sure someone can help me in the comments.

Patching BASIC with BASIC

Thanks to LWTools, here is a simple BASIC loader for this test code:

10 READ A,B
20 IF A=-1 THEN 70
30 FOR C = A TO B
40 READ D:POKE C,D
50 NEXT C
60 GOTO 10
70 END
80 DATA 16128,16170,182,1,103,183,63,43,190,1,104,191,63,44,134,126,183,1,103,142,63,24,191,1,104,57,13,111,38,15,129,114,38,11,50,98,52,22,158,136,48,1,126,163,68,16174,16174,57,-1,-1

If you load this into a CoCo or emulator, then RUN it, the code will be loaded at address &H3F00. Type “EXEC &H3F00” to install the new RAM hook and now any print of lowercase ‘r’ skips to the right without erasing anything.

10 CLS0
20 PRINT@0,"THISrrrrWILLrrrrWORK"
30 GOTO 30

That simple program will clear to a black screen, then you will see “THIS” then four blocks to the right “WILL” then four blocks past that “WORK”. Normally it would erase those blocks with spaces, but the lowercase ‘r’ now means “just skip to the right”.

It’s not perfect, but it does prove the concept.

More to come…

Hacking the Color BASIC PRINT command – part 1

Over in the CoCo Facebook group, Erico Patricio Monteiro asked an interesting question:

“Would it be possible to PRINT a transparent character?”

– Erico Patricio Monteiro

His idea was for putting stuff on the CoCo’s text screen without wiping out the background. He used an example of PRINT”OOOOX” where “O” represented the transparent character. The way I see it, if you had the first line printed like this:

PRINT @0,"ABCDEFG";

…and you had such a transparent character and did this:

PRINT @0,"OOOXOOO";

…your top line would then look like this:

ABCXEFG

This reminded me of how my Commodore VIC-20 had cursor movement characters you could embed in a PRINT statement. Once you typed the quote, you could now embed typeable escape codes to change colors, clear the screen, home the cursor, insert or delete characters, or just move the cursor up, down, left or right. This made VIC-20 program listings require a graphical printer to represent those characters. Here is something from the VIC-20 manual:

This is many pages into the manual, after it had explained how you can embed things like color changes or reverse video. The program listings in the VIC-20 manual had graphical characters in them, and you had to learn what to type to recreate them:

Program listings for the VIC looked weird ;-)

At some point, Commodore BASIC listings were represented with text strings instead of the graphical characters, making a modern listing look like this:

25 print"{home}{down}{right}{black}abc{down}{left*3}def{down}{left*3}ghi{down}{left*3}jkl"

Then you just had to know what key was “black” or “left” (three times, as the “left*3” indicates).

But I digress…

Since there was no PRINT@ or LOCATE on the VIC-20, any time you wanted to print something in a particular spot on the screen you had to print the HOME (move cursor to top left of the screen) character then use a bunch of cursor controls to move to where you wanted to print.

This was … not optimal. And thus, most BASIC VIC-20 programs would print their information (lives left, etc.) on the top of the screen since it was shorter code just to home and print there:

VIC-20 Sky-Ape-Er, screen 3.

My Sky-Ape-Er VIC-20 game had a timer, and I got it in that top corner like this:

105 print"{home}{blue}{reverse on}{right}time:";t:t=t+1

You will notice the above snipped says “reverse on” and has “time” in lowercase, but on my screenshot it is uppercase without being reversed. That is due to the character sets of the VIC-20 where some modes were upper and lower, some were upper with reverse, and other combinations. For the mode I was in, reverse was getting the uppercase characters (and uppercase characters typed with SHIFT would be the graphical characters for those keys).

“But that’s really not important to this story…”

If you look at the Color BASIC Unraveled book you can find the Console Out routine (PUTCHR) on page 84. I did not want to type it all in here, but I did find this GitHub repository by tomctomc that has this already in a text file:

coco_roms/bas.asm at master · tomctomc/coco_roms

From the “bas.asm”, here is the code in question:

; CONSOLE OUT
PUTCHR          JSR         >RVEC3          ; HOOK INTO RAM
                PSHS        B               ; SAVE ACCB
                LDB         DEVNUM          ; GET DEVICE NUMBER
                INCB                        ;  SET FLAGS
                PULS        B               ; RESTORE ACCB
                BMI         LA2BF           ; SEND TO LINE PRINTER
                BNE         LA30A           ; SEND TO SCREEN

                ...snip...

; PUT A CHARACTER ON THE SCREEN
LA30A           PSHS        X,B,A           ; SAVE REGISTERS
                LDX         CURPOS          ; POINT X TO CURRENT CHARACTER POSITION
LA30E           CMPA        #BS             ; IS IT BACKSPACE?
                BNE         LA31D           ; NO
                CMPX        #VIDRAM         ; AT TOP OF SCREEN?
                BEQ         LA35D           ; YES - DO NOT ALLOW BACKSPACE
                LDA         #$60            ; BLANK
                STA         ,-X             ; PUT IN PREVIOUS POSITION
                BRA         LA344           ; SAVE NEW CURPOS
LA31D           CMPA        #CR             ; ENTER KEY?
                BNE         LA32F           ; BRANCH IF NOT
                LDX         CURPOS          ; GET CURRENT CHAR POSITION
LA323           LDA         #$60            ; BLANK
                STA         ,X+             ; PUT IT ON SCREEN
                TFR         X,D
                BITB        #$1F            ; TEST FOR BEGINNING OF NEW LINE
                BNE         LA323           ; PUT OUT BLANKS TILL NEW LINE
                BRA         LA344           ; CHECK FOR SCROLLING
LA32F           CMPA        #SPACE
                BCS         LA35D           ; BRANCH IF CONTROL CHARACTER
                TSTA                        ;  SET FLAGS
                BMI         LA342           ; IT IS GRAPHIC CHARACTER
                CMPA        #$40
                BCS         LA340           ; BRANCH IF NUMBER OR SPECIAL CHARACTER
                CMPA        #$60            ; UPPER/LOWER CASE?
                BCS         LA342           ; BRANCH IF UPPER CASE ALPHA
                ANDA        #$DF            ; CLEAR BIT 5, FORCE ASCII LOWER CASE TO BE UPPER CASE
LA340           EORA        #$40            ; INVERT BIT 6, CHANGE UPPER CASE TO LOWER & VICE VERSA
LA342           STA         ,X+             ; STORE CHARACTER TO SCREEN
LA344           STX         CURPOS          ; SAVE CURRENT CHAR POSITION
                CMPX        #VIDRAM+511     ; END OF SCREEN BUFFER?
                BLS         LA35D           ; RETURN IF NO NEED TO SCROLL

You can see at LA30A the code begins checking for things like backspace and enter. Eventually at LA342 it puts the character on the screen an increments X which is the current screen location. It then has code (not shown) that detects being at the bottom of the screen and scrolling up a line if needed.

To patch this CHROUT routine to support a “transparent” character, I think we’d just have to intercept the code at LA342 and decide if it should put a character on the screen (STA ,X+) or just increment X (LEAX 1,X or something) without putting anything there.

And that would be a real simply patch. A CoCo 1/2 with 64K could run the program that copies the ROM into RAM then switches over, then this could code easily be patched.

And while we were there, maybe it could be extended to support cursor movements as well, replicating how the VIC-20 output works.

But I am getting ahead of myself…

To be continued…

Modern C and initializing an array

I was today years old when I learned something that modern C can do. Thank you, Bing Copilot, for offering this up and learnin’ me somethin’ new.

At my day job I am porting various WIZnet (and hardware TCP/IP ethernet chip) services over to a new circuit board. We are using the W5500 chip, and making use of the provided I/O library from WIZnet:

Wiznet/ioLibrary_Driver: ioLibrary_Driver can be used for the application design of WIZnet TCP/IP chips as W5500, W5300, W5200, W5100, W5100S, W6100, W6300.

For this project, I have gotten basic Ethernet TCP running, then moved on to port their HTTP server code, followed by their SNMP server. While I may have encountered SNMP during my 1990s employment at Microware when I taught an OS-9 networking course, I have not touched it since then so this was “all new” again to me.

Part of configuring SNMP was an array of structures like this:

dataEntryType snmpData[] =
{
    // System MIB
    // SysDescr Entry
    {
        8, {0x2b, 6, 1, 2, 1, 1, 1, 0},
        SNMPDTYPE_OCTET_STRING, 30, {"Description String"},
        NULL, NULL
        },
    // SysObjectID Entry
    {
        8, {0x2b, 6, 1, 2, 1, 1, 2, 0},
        SNMPDTYPE_OBJ_ID, 8, {"\x2b\x06\x01\x02\x01\x01\x02\x00"},
        NULL, NULL
        },

…and so on. You can find this file here:

ioLibrary_Driver/Internet/SNMP/snmp_custom.c at master · Wiznet/ioLibrary_Driver

When I got to the part where I was adding the ability to send an “SNMP trap” (kind of a push notification to a specific IP address), I saw that it would duplicate the values in this array:

void sendTrap_sysObjectID(void) {
    // Create a dataEntryType for sysObjectID
    dataEntryType sysObjectEntry = {
        8, {0x2b, 6, 1, 2, 1, 1, 2, 0},
        SNMPDTYPE_OBJ_ID, 8, {"\x2b\x06\x01\x02\x01\x01\x02\x00"},
        NULL, NULL
    };
    // Send the trap
    snmp_sendTrap( ...params...);
}

Above, the “sysObjectEntry” array is a duplicate of the entry in my definition table.

This would mean keeping two parts of the code in sync, which is a terrible idea since it creates extra places for error, and also doubles the work. The A.I. suggested using the entry in the array, like this:

snmp_sendTrap(
  managerIP,
  agentIP,
  (int8_t*)"public",
  snmpData[1], // SysObjectID or your custom OID
  6,           // enterpriseSpecific
  1,           // specific trap ID
  1,           // one variable binding
  snmpData[10].oid, SNMPDTYPE_INTEGER, (uint8_t[]){1}, 1 // HighTempState = 1
);

Using “snmpData[1]” is more better, since now I can just change the definition table instead of multiple places hard-coding that information.

BUT, how do I know which entry is [1] versus [7]? I’d have to ensure the table entries stayed in order, then I could use a #define as an index, like this example:

typedef struct
{
	int x,y,w,h;
} BoxStruct;
// Declare an array of boxes, the old fashioned way.
BoxStruct box[] = // Initialize four boxes
{
	{ 0, 0, 100, 10},
	{ 10, 10, 90, 10 },
	{ 20, 20, 80, 10 },
	{ 30, 30, 70, 10 }
};
// Declare an array of boxes, the new fangled way.
#define BOX1    0
#define BOX2    1
#define BOX3    2
#define BOX4    3

That would let me get the data for box[BOX1] or box[BOX4]. Easy.

But if this was a long list of entries, like my SNMP was, and later I added something in between, I’d have to update the array as well as make sure this #define table is updated. Again, more place for error and more work.

The first thought was to declare the array as fixed size and initialize it like this:

// Declare an array of boxes, the new fangled way.
#define BOX1    0
#define BOX2    1
#define BOX3    2
#define BOX4    3
#define BOX_MAX 4
BoxStruct box[BOX_MAX];
box[BOX1] = { 1,1,1,1 };
box[BOX2] = { 2,2,2,2 };
box[BOX3] = { 3,3,3,3 };
box[BOX4] = { 4,4,4,4 };

That makes it easy and obvious, BUT you cannot have those initializes with global variables. You can only initialize that way from a function. This is fine if you want to declare your global array, then initialize like…

void initBoxes (void)
{
    box[BOX1] = { 1,1,1,1 };
    box[BOX2] = { 2,2,2,2 };
    box[BOX3] = { 3,3,3,3 };
    box[BOX4] = { 4,4,4,4 };
}

And that is the approach I would probably take on my “C-like” embedded compilers that do not support all of modern C.

However, the A.I. showed me something I had not seen before. Initializing the array like this:

// Initialize by element number, in order.
BoxStruct box[BOX_MAX] =
{
	[BOX1] = { 0, 0, 100, 10},
	[BOX2] = { 10, 10, 90, 10 },
	[BOX3] = { 20, 20, 80, 10 },
	[BOX4] = { 30, 30, 70, 10 }
};

Huh? I did a quick check on the Online GDB compiler, and that was valid. It even lets you initialize out of order:

// Initialize by element number, out of order.
BoxStruct box[BOX_MAX] =
{
	[BOX3] = { 20, 20, 80, 10 },
	[BOX1] = { 0, 0, 100, 10},
	[BOX4] = { 30, 30, 70, 10 },
	[BOX2] = { 10, 10, 90, 10 }
};

By doing it that way, I could “see” the label match the data, regardless of whatever the number the label was set to. And, if I messed up the #defines later (duplicate value or whatever), a “good compiler” with warnings enabled should alert me of that (at least, GCC does).

For my specific use, this is a great solution, and it works in whatever compiler the Microchip MPLAB X IDE is using for PIC24 processors.

Here is my test code:

/******************************************************************************
Welcome to GDB Online.
GDB online is an online compiler and debugger tool for C, C++, Python, Java, PHP, Ruby, Perl,
C#, OCaml, VB, Swift, Pascal, Fortran, Haskell, Objective-C, Assembly, HTML, CSS, JS, SQLite, Prolog.
Code, Compile, Run and Debug online from anywhere in world.
*******************************************************************************/
#include <stdio.h>
/*---------------------------------------------------------------------------*/
// Typedef
/*---------------------------------------------------------------------------*/
typedef struct
{
	int x,y,w,h;
} BoxStruct;
/*---------------------------------------------------------------------------*/
// Globals
/*---------------------------------------------------------------------------*/
// Declare an array of boxes, the old fashioned way.
BoxStruct foo[] = // Initialize four boxes
{
	{ 0, 0, 100, 10},
	{ 10, 10, 90, 10 },
	{ 20, 20, 80, 10 },
	{ 30, 30, 70, 10 }
};
// Declare an array of boxes, the new fangled way.
#define BOX1    0
#define BOX2    1
#define BOX3    2
#define BOX4    3
#define BOX_MAX 4
// Initialize by element number, in order.
BoxStruct foo2[BOX_MAX] =
{
	[BOX1] = { 0, 0, 100, 10},
	[BOX2] = { 10, 10, 90, 10 },
	[BOX3] = { 20, 20, 80, 10 },
	[BOX4] = { 30, 30, 70, 10 }
};
// Initialize by element number, out of order.
BoxStruct foo3[BOX_MAX] =
{
	[BOX3] = { 20, 20, 80, 10 },
	[BOX1] = { 0, 0, 100, 10},
	[BOX4] = { 30, 30, 70, 10 },
	[BOX2] = { 10, 10, 90, 10 }
};
/*---------------------------------------------------------------------------*/
// Prototypes
/*---------------------------------------------------------------------------*/
void ShowBox (BoxStruct box);
/*---------------------------------------------------------------------------*/
// Functions
/*---------------------------------------------------------------------------*/
void ShowBox (BoxStruct box)
{
	printf ("x:%d y:%d w:%d h%d\r\n", box.x, box.y, box.w, box.h);
}
int main()
{
	printf ("---foo---\r\n");
	for (int idx=0; idx<4; idx++)
	{
		ShowBox (foo[idx]);
	}
	printf ("---foo2---\r\n");
	for (int idx=0; idx<4; idx++)
	{
		ShowBox (foo2[idx]);
	}
	printf ("---foo3---\r\n");
	for (int idx=0; idx<4; idx++)
	{
		ShowBox (foo3[idx]);
	}
	return 0;
}
/*---------------------------------------------------------------------------*/
// End of main.c

You can mess with it online here:

https://onlinegdb.com/G73hxWSQuN

I wonder what other stuff has been added to C over the years that I do not know about…

Until next time…

We probably can’t trust X5 bloggers about the DJI Osmo 360 or Go Pro Max 2, can we?

I first took “one shot” 360 photos in 2005 using a weird “half-mirror on a stick” thing called SurroundPhoto. It created images like this one, which were processed into 360 panorama QuickTime VR files:

360 Disneyland in 2005.

I later backed a kickstarter for a 3-lens device that was specifically designed for taking 360 photos (the failed 360cam). I’ve also owned a Kodak SP360, as well as several RICOH Theta cameras. The Thetas became my go-to camera due to their ease-of-use and form factor. My first Insta360 was the ONE X2, and that device is what switched me from RICOH to Insta360 cameras.

All this to say … I’ve been following and playing with this stuff for twenty years (and even longer if you consider the way we used to make 360 panoramas by taking a bunch of photos and stitching them together later with software). Here’s a 2002 example of photos I took specifically to make a 360 panorama out of using special software.

But I digress… since my 360 world has been Insta360 for several years (I’ve had the ONE X2, X3, X4 and now X5), YouTube has learned to show me lots of Insta360 YouTubers. Meanwhile, other camera manufacturers such as GoPro and DJI have their own set of YouTubers that I am completely unfamiliar with. I assume they are also “sponsored” and generally say good things about the gear they “review” just like the Insta360 reviewers do. My current pet peeve is the YouTubers who have hardware sponsors that provide them gear, then they lie to use and say they are unsponsored (this is illegal in the U.S.A. thanks to Federal Trade Commission rules that require disclosures).

But I digress…

Familiarity

Since I do not know the DJI YouTubers, I have no idea if I can trust what they tell me about the new DJI Osmo 360. Instead, many of us have been waiting to see what our Insta360 YouTubers say about it. After all, we are familiar with them and “trust” them because of it.

But can we?

If you are getting special perks from a company, such as free hardware, gift packages, and even being paid to make special tutorials from time to time, would you risk all of all that to tell us that a competing product is better? I cannot see why Insta360 would keep supporting content creators that promote another company’s product as being better.

With that said, I have found the Insta360 YouTubers take on the DJI Osmo 360 to be very interesting. I have also been watching the (unknown to me) DJI YouTubers discuss it, though since this is a new category for DJI, those videos have to explain the basics of what makes 360 video so cool to their audience that is likely unfamiliar. This makes the DJI videos a bit less useful for those of us that have been doing this stuff for years.

My ask of you…

Please leave a comment and share links to the “best’ DJI Osmo 360 review videos you have found. This can be dedicated videos, or comparison videos. I will share them here in a future post (or update this one).

BONUS: With the upcoming release of the GoPro Max 2 360 camera, I’d like to know similar GoPro channels that I should check out.

Thankes!

Segway Max G3 firmware update.

I have not ridden my scooter in the past two week or so, and when I checked today I saw new firmware was available (here in the U.S.A. at least):

We are entering Fall (which lasts a few weeks before Winter takes over, often) so I may be able to get a few more weekend rides on the scooter. If I notice anything new or different, I will make a post.

Google Street View: GPS data contains gaps greater than 5 seconds in between GPS points.

Explain it to me like I am five…

Every time I think I have figured out what Google Street View expects, I encounter a new problem. This time, I have a file that Google says has gaps in the GPS data:

But the problem is, I have already tried to fix this multiple times using tools like gpsbabel. This command line utility will create in-between points at the rate you specify. You can use a value of 1 second and get a point every second in the entire GPX file.

Using GPX Editor on the Mac lets me inspect the tracking points. If I sort by duration value, the longest value in the entire file is 4 seconds:

Yet, Google claims there is a 7 second gap after 9 seconds. Looking at the points in time order shows this is not the case: (But do note, this GPS starts sooner than the video; so the points I show here may be from time before the video begins. This does not change the issue, since there is nothing reported longer than 4 seconds in the entire file, anywhere.)

Anyone care to explain why this happens and how I can fix it? I have gotten every other file I have uploaded to work just fine, except for these two I have been working on since last week.

Even when I run gpsbabel with a 1 second “gap” between each point, I still get this type of error.

What else is Google looking for? Web searches and even chatting with Google’s Gemini A.I. have not produced anything helpful.

Comments appreciated…