On a tape-based Color Computer (Color BASIC or Extended Color BASIC), you could write data out to a tape file by opening device #-1 for Output (“O”) like this:
0 'TAPEWRIT.BAS
10 OPEN "O",#-1,"MYFILE"
20 PRINT #-1,"THIS IS IN THE FILE"
30 PRINT #-1,"SO IS THIS"
40 PRINT #-1,"AND THIS IS AS WELL"
50 CLOSE #-1
By having a tape inserted in the recorder, and PLAY+RECORD pressed, when that program runs the cassette relay in the computer would click on, starting the tape motor, and the three lines of text would be written to the file. The file would look like this:
THIS IS IN THE FILE(enter)
SO IS THIS(enter)
AND THIS IS AS WELL(enter)
After rewinding the tape and pressing PLAY, running this program would open the same file for Input (“I”) and read and display that data:
0 'TAPEREAD.BAS
10 OPEN "I",#-1,"MYFILE"
20 IF EOF(-1)=-1 THEN 60
30 INPUT #-1, A$
40 PRINT A$
50 GOTO 20
60 CLOSE #-1
NOTE: In line 30, if you have Extended Color BASIC, if reading strings use LINE INPUT instead of INPUT. That will allow lines that have commas, quotes, and other special characters in it, which INPUT will not.
In line 20, the EOF function is used to check if there is more data in the file. If you knew exactly how much data was in the file (like a configuration file that always has the same information), you could just do that many INPUTs. If the amount of data is not known, EOF must be used to avoid an end-of-file error when you try to read past the end of data.
Now you have a simple program that would read and print as many lines as are in the file.
Disks Do More
When a floppy disk controller is added, Disk BASIC comes along for the ride. While cassettes use device #-1, disks can use devices #1 to #15. This allows multiple files to be open at the same time, and on different drives. (Disk BASIC supported four floppy drives simultaneously.)
We can change the above sequential file programs to work on a disk system just by changing device #-1 to be device #1:
0 'DISKWRIT.BAS
10 OPEN "O",#1,"MYFILE.TXT"
20 PRINT #1,"THIS IS IN THE FILE"
30 PRINT #1,"SO IS THIS"
40 PRINT #1,"AND THIS IS AS WELL"
50 CLOSE #1
…and…
0 'DISKREAD.BAS
10 OPEN "I",#1,"MYFILE.TXT"
20 IF EOF(1)=-1 THEN 60
30 LINE INPUT #1, A$
40 PRINT A$
50 GOTO 20
60 CLOSE #1
The only change I made other than the device number was adding an extension to the filename. Since a disk file can have a three-character extension, I used “.TXT”. If you leave off the extension, it will be created as “.DAT” for a data file.
With a sequential file, each entry is expected to have a carriage return at the end. You can write out a single line, like the earlier example:
PRINT #1,"THIS IS AN ENTRY"
…or even write out numeric data, separated by commas:
PRINT #1,A,B,C,D
In the disk file will either be “THIS IS AN ENTRY” with an ENTER at the end, or the three numbers with an ENTER at the end.
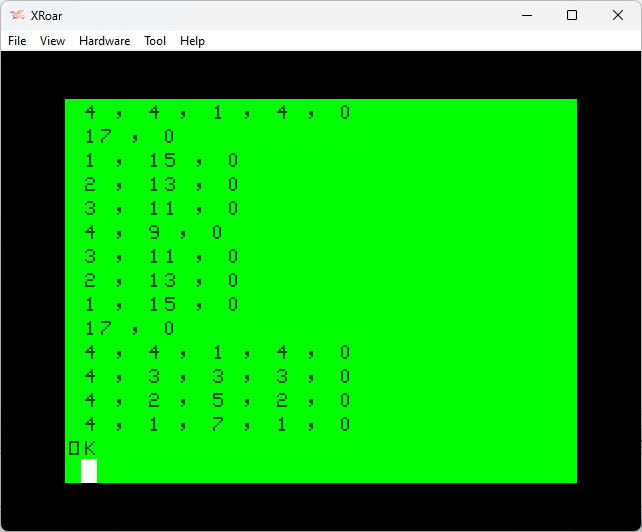
5 A=1:B=2:C=3
10 OPEN "O",#1,"NUMBERS"
20 PRINT #1,A,B,C
30 CLOSE #1
40 '
50 OPEN "I",#1,"NUMBERS"
60 INPUT #1,X,Y,Z
70 PRINT X;Y;Z
80 CLOSE #1
As the name implies, data is sequential — one after the next. If you had a file with 1000 entries in it, and wanted to get to the 1000th entry, you would have to read through the 999 entries first.
Direct Access
A far more powerful form of disk access is Direct. This allows you to create a file that is not made of arbitraty strings that end in a carriage return. Instead, the file can be a set of records (of a size you specify). This is done by using the “D”irect access mode and specifying the record size at the end of the OPEN.
With a direct access file, you can specify a record size, and then write or read to any record you want. (This is usually called “random access” these days.)
Here is an example that creates a file with 32-byte records, and writes three entries to it:
0 'DISKWRIT2.BAS
10 OPEN "D",#1,"MYFILE2.TXT",32
20 PRINT #1,"THIS IS IN THE FILE"
25 PUT #1,1
30 PRINT #1,"SO IS THIS"
35 PUT #1,2
40 PRINT #1,"AND THIS IS AS WELL"
45 PUT #1,3
50 CLOSE #1
For a direct access file, using PRINT (or the WRITE command, which seems to do the same thing), the data goes in to a buffer and won’t be written to the disk until PUT is used to tell it which record of the disk file to write it to. The file would look like this:
          11111111111222222222233
 12345678901234567890123456789012
+--------------------------------+
|THIS IS IN THE FILE             | record 1
+--------------------------------+
|SO IS THIS                      | record 2
+--------------------------------+
|AND THIS IS AS WELL             | record 3
+--------------------------------+
(There would also be an ENTER at the end of each line, normally.)
The program to read back and display the records looks like this:
0 'DISKREAD2.BAS
10 OPEN "D",#1,"MYFILE2.TXT",32
20 FOR R=1 TO LOF(1)
30 GET #1,R
40 LINE INPUT #1,A$
50 PRINT A$
60 NEXT
70 CLOSE #1
Above, you see the addition of “,32” to specify 32 byte records, and the use of LOF which is the length of file (number of records). In our example, this should be 3, matching the three records we wrote in the previous example.
To load a record in to the buffer, GET is used, followed by a LINE INPUT to read it in to a string.
Now if 1000 entries had been written in to a direct access file, we could retrieve any record we wanted just by using GET #1,42:LINE INPUT A$ or whatever.
Breaking Records
A record can be treated like a string of a maximum size. When you PRINT or WRITE that record, it must be smaller than the record size, and have the ENTER at the end. The ENTER is needed for INPUT/LINE INPUT to know where the end of that record is.
But, you can also break a record up in to specific entries. For instance, first name, middle initial, and last name. This is done using the FIELD command. You tell it the buffer (device) number and how many bytes to assign to a variable. For example, if you wanted a 32 byte record to look like this:
          11111            11111111
 12345678901234|1|12345678901234567
+--------------+-+-----------------+
| First Name   |I| Last Name       |
+--------------+-+-----------------+
…with fourteen (14) characters for the First Name, one (1) character for the Initial, and fifteen (17) characters for the Last Name, and you wanted them in variables F$, I$, L$, you would use:
FIELD #1,14 AS F$,1 AS I$,17 AS L$
(I wanted to use FN$ for first name but FN is a reserved keyword used for the DEF FN function and it cannot be used for a variable.)
If you do that, you no longer use INPUT/LINE INPUT. Instead, when you GET the record, it loads the appropriate bytes in to the variables for you! Nifty!
And, to write it, you reverse the process by loading the variables (using LSET or RSET) and then using PUT. Also nifty! Here is a program that adds three First/Initial/Last records:
0 'DISKWRIT3.BAS
10 OPEN "D",#1,"NAMES.DAT",32
15 FIELD #1,14 AS F$,1 AS I$,17 AS L$
20 LSET F$="ALLEN":LSET I$="C":LSET L$="HUFFMAN"
25 PUT #1,1
30 LSET F$="ARTHUR":LSET I$="P":LSET L$="DENT"
35 PUT #1,2
40 LSET F$="TRICIA":LSET I$="M":LSET L$="MCMILLAN"
45 PUT #1,3
50 CLOSE #1
If you try to just assign the variable and then PUT, it doesn’t work (or at least, did not for me). The example in the Disk BASIC manual show this being done with LSET and RSET to assign those variables to the buffer (left or right justified). After the write, the disk file looks something like this:
          11111            11111111
|12345678901234|1|12345678901234567
+--------------+-+-----------------+
|ALLEN         |C|HUFFMAN          | record 1
+--------------+-+-----------------+
|ARTHUR        |P|DENT             | record 2
+--------------+-+-----------------+
|TRICIA        |M|MCMILLAN         | record 3
+--------------+-+-----------------+
Using LSET puts the entry in to the left, and using RSET would right justify it instead. (What is this for, anyone know?) RESET would make the file look like this:
          11111            11111111
 12345678901234|1|12345678901234567
+--------------+-+-----------------+
|         ALLEN|C|          HUFFMAN| record 1
+--------------+-+-----------------+
|        ARTHUR|P|             DENT| record 2
+--------------+-+-----------------+
|        TRICIA|M|         MCMILLAN| record 3
+--------------+-+-----------------+
…and here is the program that reads them back and displays them:
0 'DISKREAD3.BAS
10 OPEN "D",#1,"NAMES.DAT",32
15 FIELD #1,14 AS F$,1 AS I$,17 AS L$
20 FOR R=1 TO LOF(1)
30 GET #1,R
40 PRINT F$;" ";I$;". ";L$
60 NEXT
70 CLOSE #1
With this in mind, we could make a program that dumps out all the bytes in a file by making the record size one (1) byte, like this:
0 'DIRECT.BAS
10 '
11 ' CREATE A FILE
12 '
20 OPEN "O",#1,"FILE.TXT"
30 PRINT #1,"DON'T PANIC!"
40 CLOSE #1
100 '
101 ' OPEN DIRECT ACCESS
102 '
110 OPEN "D",#1,"FILE.TXT",1
115 FIELD #1,1 AS BT$
120 NR=LOF(1)
130 PRINT "RECORDS: ";NR
140 FOR R=1 TO NR
150 GET #1,R
170 PRINT ASC(BT$);
180 NEXT
190 CLOSE #1
The important part are lines 100-190. You could remove the earlier lines that just make a test file, and modify this to “dump” any file you want. Here’s a simple HEX dump program:
0 'HEXDUMP.BAS
10 LINE INPUT "FILENAME:";F$
20 OPEN "D",#1,F$,1
30 FIELD #1,1 AS BT$
40 OF=0:C=0
50 FOR R=1 TO LOF(1)
60 IF C=0 THEN PRINT:PRINT USING"####   ";OF;
70 GET #1,R
80 BT=ASC(BT$)
90 IF BT<&H10 THEN PRINT "0";
100 PRINT HEX$(BT);" ";
110 C=C+1:IF C>7 THEN C=0
120 OF=OF+1
140 NEXT
150 CLOSE #1
There is more you can do with Disk BASIC, so here are a few references to get you started:
- Full Disk BASIC Manual – https://colorcomputerarchive.com/repo/Documents/Manuals/Hardware/Color%20Computer%20Disk%20System%20(Tandy).pdf
- Disk BASIC Programmers Reference (may be better) – https://colorcomputerarchive.com/repo/Documents/Manuals/Hardware/Color%20Computer%20Disk%20System%20Programming%20Manual%20(Tandy).pdf
- Quick Reference Guide – https://colorcomputerarchive.com/repo/Documents/Manuals/Hardware/Color%20Computer%20Disk%20System%20-%20Quick%20Reference%20Guide%20%28Tandy%29.pdf
Until next time…