The later model CoCo 2s used an upgrade MC6847 video display generator chip. This chip provided an updated font with true lowercase, as well as the ability to change the border color and inverse the video.
The original 6847 had a hardware pin that could inverse video, and I recall taking the VDG out of my CoCo 1 to pull up a pin then re-insert it. That gave me the nice inverted display I often use in the XRoar emulator:

In the nearly-forty years since I did that modification I had forgotten that it could only be done in hardware. I thought there was probably a POKE or something, since many programs I had used the inverted video mode.
I couldn’t figure it out, and the bits that made the updated 6847T1 show inverse video did not work on the original 6847.
So I asked on the CoCo mailing list…
I wrote a program to go through the 6847 T1 VDG text modes, which includes lowercase, changing the border, and inverting the screen.
I’ve seen programs on the CoCo (like GRABBER) that invert/reverse the screen in software, but the bits to do that on the T1 don’t seem to do anything on the 6847.
Does anyone know of a reference that would show me how to do this? Thanks, much!
– Me, 2/15/2023
On the regular VDG, there is no reverse video bit. So you have to use the inverted characters in the character set (ie POKE 1024+loc,0-63).
– L. Curtis Boyle, 2/15/2023
It was Tim Lindner that reminded me of the hardware pin:
There is an inverse video pin on the chip. But it is not hooked up. I think.
– tim lindner, 2/15/2023
With that in mind, I decided to do some quick tests. This test PRINTs every possible visible character on the screen:
10 CLS:PRINT
20 FOR C=32 TO 255:PRINT CHR$(C);:NEXT
30 GOTO 30

I skipped the first line and I started printing with CHR$(32) (a space) because the values below that are non-visible characters.
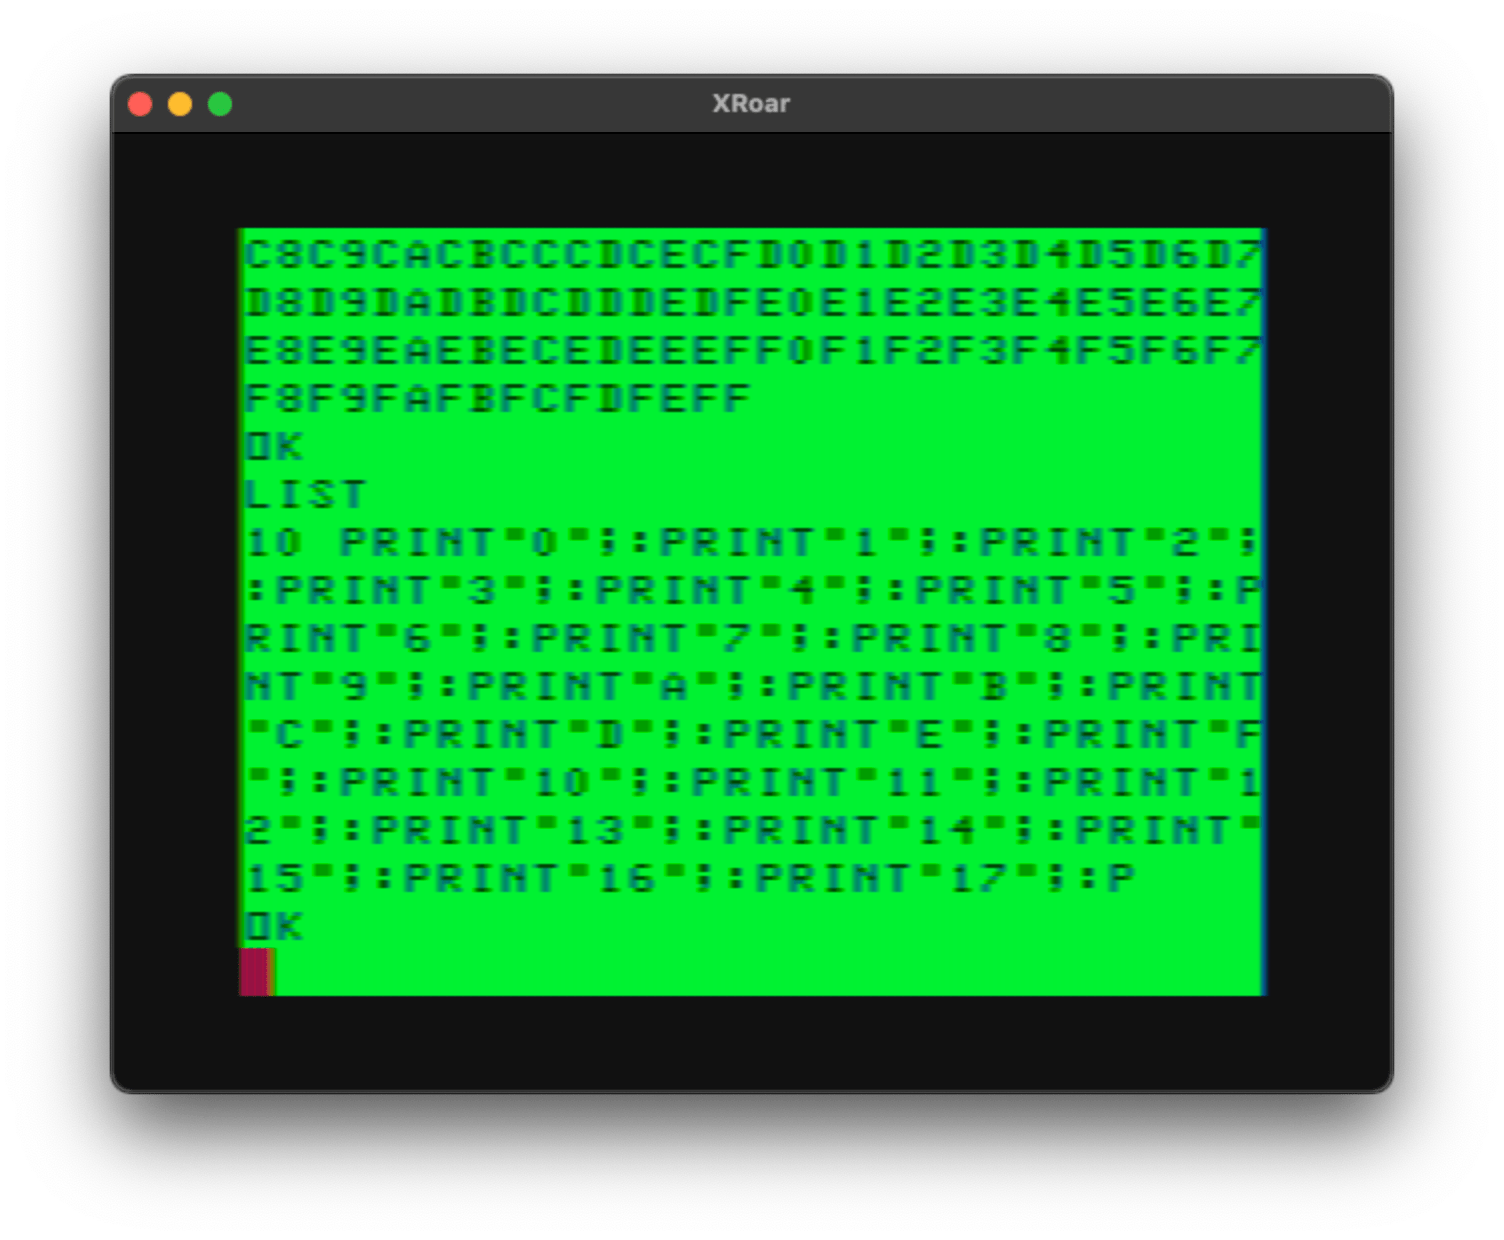
BUT, if you POKE to the screen, you get more characters. Here is an update that will POKE the values 0-255 to the bottom half of the screen:
10 CLS:PRINT
20 FOR C=32 TO 255:PRINT CHR$(C);:NEXT
30 FOR C=0 TO 255:POKE 1280+C,C:NEXT
40 GOTO 40

Comparing the PRINT versus POKE characters, you can see PRINT has 64 ASCII-printable characters starting at 32-96. After that are 32 inverted characters. There are 32 characters that you cannot print in inverse.
When you POKE, values 0-63 represent the inverted full ASCII character set, and 64-127 are the uppercase.
 PRINT   POKE
------- -------
32-96   64-127  Space to Left Arrow
96-127  0-31    Inverse "@" to Inverse Left Arrow
        32-63   Inverse Space to Inverse "Left Arrow"?"
From that table, you can see it’s impossible to PRINT thirty two of the available inverse characters in the 6847, but you can POKE them.
I thought it might be fun to write a routine that would PEEK through the screen memory and invert all the characters. Since there are 32 non-inverted characters from 32-96, and 32 inverted characters from 96-127, it seems all I needed to do is PEEK each location and if it was from 96-127, subtract 64 and POKE it back.
We start with this slow program, complete with some benchmarking timing code:
10 ' FILL SCREEN WITH STUFF
20 CLS:FOR C=32 TO 255:PRINT CHR$(C);:NEXT
30 TIMER=0
40 FOR L=1024 TO 1536
50 V=PEEK(L):IF V>63 AND V<128 THEN POKE L,V-64
60 NEXT
70 PRINT TIMER
This prints 631 for me. One of the first speedups we can do is change the decimal numbers in line 50 to hex.
10 ' FILL SCREEN WITH STUFF
20 CLS:FOR C=32 TO 255:PRINT CHR$(C);:NEXT
30 TIMER=0
40 FOR L=1024 TO 1536
50 V=PEEK(L):IF V>&H3F AND V<&H80 THEN POKE L,V-&H40
60 NEXT
70 PRINT TIMER
That simple change takes the time down to 490. And, since variable lookups (when there aren’t a ton of variables) is faster than parsing a hex number in source code, we can change those values to variables and make it even faster:
10 ' FILL SCREEN WITH STUFF
20 CLS:FOR C=32 TO 255:PRINT CHR$(C);:NEXT
25 X=&H3F:Y=&H80:Z=&H40
30 TIMER=0
40 FOR L=1024 TO 1536
50 V=PEEK(L):IF V>X AND V<Y THEN POKE L,V-Z
60 NEXT
70 PRINT TIMER
This drops to 475.
And, any time you use “IF this AND that”, it can be sped up by doing “IF this THEN IF that”. Let’s try that…
10 ' FILL SCREEN WITH STUFF
20 CLS:FOR C=32 TO 255:PRINT CHR$(C);:NEXT
25 X=&H3F:Y=&H80:Z=&H40
30 TIMER=0
40 FOR L=1024 TO 1536
50 V=PEEK(L):IF V>X THEN IF V<Y THEN POKE L,V-Z
60 NEXT
70 PRINT TIMER
In this case, it really did not change anything — I see 474. Okay, that was a fail. I guess it doesn’t always help.
Since the math we are doing is a subtract 64, we should see if we can do that by using AND to remove the bit that represents 64. We don’t want to do that if it is a graphics character (128-255) so we’ll need to retain on IF:
10 ' FILL SCREEN WITH STUFF
20 CLS:FOR C=32 TO 255:PRINT CHR$(C);:NEXT
25 X=&H3F:Y=&H80:Z=&H40
30 TIMER=0
40 FOR L=1024 TO 1536

50 V=PEEK(L):IF V<Y THEN POKE L,V AND &H3F
60 NEXT
70 PRINT TIMER
That shows 367 for me. Better!
I did test to see if checking for the 8th bit (V AND 128) was faster than just comparing a value (A > 127) and the “>” check was faster, so we’ll stick with that.
At this point, the routine to inverse the screen while leaving graphics characters alone is getting close to twice as fast as the original version.
Can we do better? At least a bit, by removing spaces and combining lines (and even though it only parses the FOR values once, I’ll switch them to hex):
10 ' FILL SCREEN WITH STUFF
20 CLS:FOR C=32 TO 255:PRINT CHR$(C);:NEXT
25 X=&H3F:Y=&H80
30 TIMER=0
40 FORL=&H400 TO&H5FF:V=PEEK(L):IFV<Y THENPOKEL,V AND&H3F
50 NEXT
70 PRINT TIMER
That prints 356. (There were a few spaces that could not be removed due to needing them so the BASIC parser knows where a variable ends and a keyword begins.)
Now we could make a subroutine that would invert the screen, slowly.
1000 ' INVERT SCREEN
1010 X=&H3F:Y=&H80:FORL=&H400 TO&H5FF:V=PEEK(L):IFV<Y THENPOKEL,V AND&H3F
1020 NEXT:RETURN
While it might be a neat “effect” for a title screen to watch it painting the screen, it’s not fast enough to use in a program that you want the output to always be inverted.
Some thoughts…
If no semigraphics characters were being used, the check for them could be removed:
10 ' FILL SCREEN WITH STUFF
20 CLS:FOR C=32 TO 127:PRINT CHR$(C);:NEXT
25 X=&H3F:Y=&H80
30 TIMER=0
40 FORL=&H400 TO&H5FF:V=PEEK(L):POKEL,V AND&H3F
50 NEXT
70 PRINT TIMER
That prints 304 — twice as fast as the original, though it will corrupt semigraphics blocks by changing them.
Another approach might be to only do the portion of the screen that has been PRINTed to by changing the range that the L loop scans. For example, you could call a routine to invert just the last line of the screen every time something is PRINTed there.
Or, perhaps a custom “print reverse” routine might make more sense. We’d also want a special CLS routine that cleared the screen to inverse spaces.
10 CLS
20 GOSUB 1100
30 P=0:A$="This is in REVERSE video!":GOSUB 1000
40 P=32:A$="And this one is, too.":GOSUB 1000
50 P=480:A$="Hello, bottom line!":GOSUB 1000

999 GOTO 999

1000 ' PRINT@ REVERSE
1010 L=&H3FF+P:FOR I=1 TO LEN(A$)
1020 V=ASC(MID$(A$,I,1)):IF V>95 THEN V=V-96 ELSE IF V>64 THEN V=V-64
1030 POKE L+I,V:NEXT:RETURN

1100 ' CLS REVERSE
1110 P=0:FOR L=&H400 TO &H5FF:POKE L,&H20:NEXT:RETURN
To use the function set P to the PRINT@ location, assign the string to A$, then GOSUB 1000. Not much to it.
Handling scrolling the screen would be more work (and slower), but could also be done. Perhaps the routine could track the PRINT@ position internally, so every time you print it increases P by 32 (next line) and if it gets to the end of the screen, it could scroll everything up… slowly…
10 CLS
20 GOSUB 1200
30 A$="This is in REVERSE video!":GOSUB 1000
40 A$="And this one is, too.":GOSUB 1000
50 A$="PRINT;":GOSUB 1100
60 A$="NEXT TEXT":GOSUB 1100
70 P=480:A$="BOTTOM LINE":GOSUB 1000
80 A$="AND THIS":GOSUB 1000

999 GOTO 999

1000 ' PRINT@ REVERSE
1010 GOSUB 1100:P=P+32-I+1:IF P<512 THEN 1050
1020 ' SCROLL
1030 FOR L=&H400 TO &H5E0:POKE L,PEEK(L+&H20):NEXT
1040 FOR L=&H5E0 TO &H5FF:POKE L,&H20:NEXT:P=P-32
1050 RETURN

1100 ' PRINT@; REVERSE
1110 L=&H3FF+P:FOR I=1 TO LEN(A$)
1120 V=ASC(MID$(A$,I,1)):IF V>95 THEN V=V-96 ELSE IF V>64 THEN V=V-64
1130 POKE L+I,V:NEXT:P=P+I-1
1140 RETURN

1200 ' CLS REVERSE
1210 P=0:FOR L=&H400 TO &H5FF:POKE L,&H20:NEXT:RETURN
To clear the screen, GOSUB 1200.
To do a normal PRINT, set the string in A$ and GOSUB 1000.
To do a PRINT with a semicolon at the end, set the string in A$ and GOSUB 1100.
To simulate a PRINT@, set P to the screen position then GOSUB 1000 or 1100.
This program does NOT handle printing past position 512 at the bottom right of the screen.
IT CAN POKE PAST SCREEN MEMORY AND CAUSE A CRASH!
A simple check could be done before line 1130 to see if L+I is going to be past the end of screen memory (1536) and adjust accordingly.
If there is any interest (leave a comment), we can look at how we might do that in a future article.
Is this useful?
If we really wanted to use inverse video in BASIC, I guess it would be useful. Can you make it faster in BASIC? What would you suggest? Leave a comment.
But, doing inverse text would be a simple thing for some assembly language routines that could be called easily from BASIC.
OR, perhaps there would be a simple way to just hook in to the output vector used by Color BASIC and do it there.
To be continue… Maybe.